

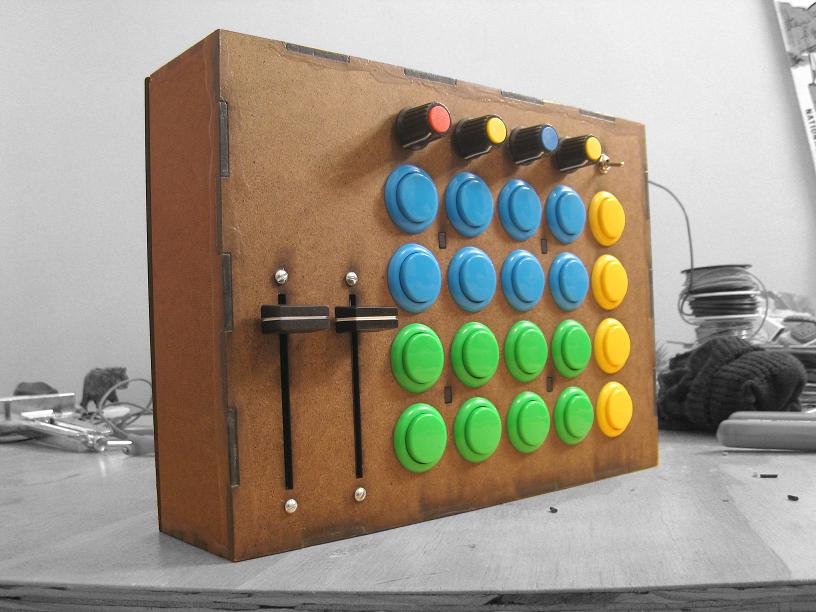
One of the users in our rapidly expanding forum has made this wonderfully fun arcade controller and shared some info on how you can do it yourself. Inspired by the Monome and Ean’s original arcade button mod, King Vitamin set upon a journey to create a unique controller for his live ableton sets. The result is a great example in DIY controllerism that you could easily adopt into your own concepts. Lets dive in and take a closer look at his controller, the mappings and how you might also do the same thing.
The BackStory

King Vitamin started working in his spare time last December, he first started by collecting the parts and pieces and then created the case design inside of a Adobe Illustrator. Once that was finished he sent the AI file off to his brother who just happens to work for a company that has a laser cutting machine. Some friendly advise would be to triple check your measurements before sending something off to the laser machine, once the case had been cut he had to do some fix ups with the duct tape of DIY projects- a dremel. If you plan on doing any kind of DIY modifications, a $45 dremmel is a must have.
Originally the case was supposed to be made out of colored acrylic sheets, However his brother convinced him that using wood should provide a sturdier case that wouldn’t flex under the weight of a heavy button mashing session. Arched supports were used under the top panel to provide extra support for the face plate. The wood was a great move, it gives the controller a street fighter meets boy scout camp look that you cant help but love.

The wood panels are made out of Masonite and glued together using PVA wood glue. King Vitamin doesn’t recommend using masonite if it can be avoided though, as over time the corners might chip away easily. For soldering, connection checking and general maintenance, the bottom plate needs to be easily removable, so miniature brackets were secured to the bottom lip using Sculpting Epoxy.
Whats in the box:

– UMC32 circuit board $75
– Arcade buttons $2.05 each x20
– Faders $13.60 each x2
– 10k Linear taper potentiometers $.55 each x4
– Pot knobs $.35 each x4
– Fader knobs (vestax crossfader caps) $5 each x2
– Switch, wire, solder
<<
Mounting Solution:
Mounting the arcade buttons, faders and knobs is easy work. The arcade buttons slip into holes drilled into the faceplate and the included orange nut holds it in place. The knobs are also attached in a similar fashion. The faders are mounted using a screws that go into pre-drilled holes on the ends of the faders. The UMC32 (the brains of the operation) is mounted on the same brackets that are used to fix the bottom plate of the unit to the rest of the case. You get a good idea of how everything is mounted by looking inside the box:

Ableton Controllerism
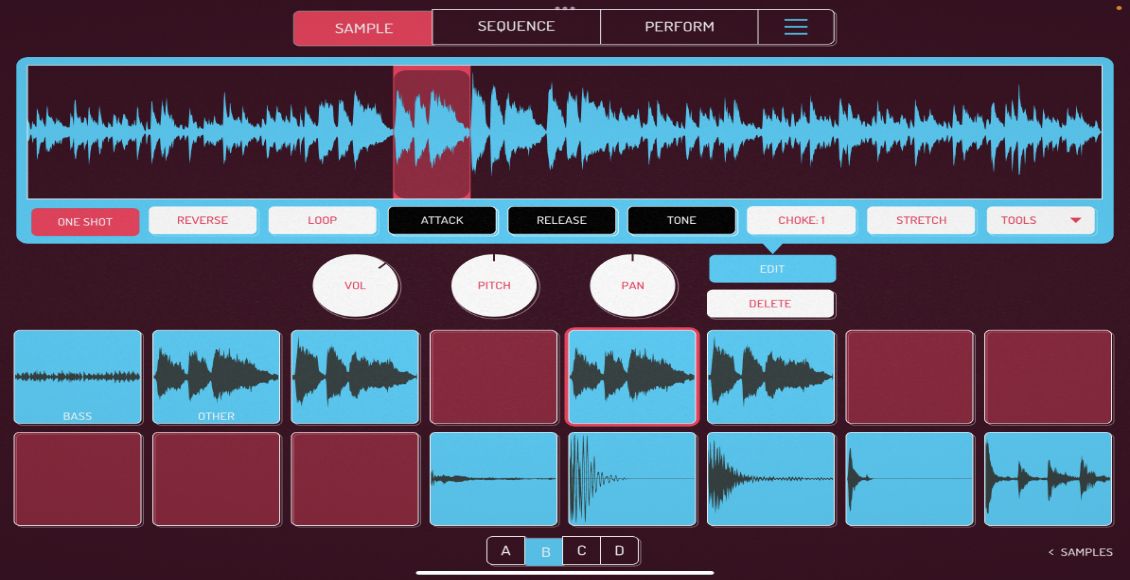
In ableton I set it up really simply. It is just triggering clips in the session view. Usually all the clips are quantized to 1 bar so everything comes in at the beginning of the next bar, but for this I set it to 1/16 so you can still trigger them pretty fast, but you timing doesn’t have to be perfect. I liked the way some of the applications for the Monome worked where a one or two bar loop is mapped across the buttons, so that’s the idea i was going for, except parred down a bit.
So I just take whatever loop i want and put that in the top clip slot and set the play marker at the beginning as usual. Then i duplicate it to the slot below and move the play marker to the next snare hit, or a quarter note later in the song, keeping the beginning and end of the loops the same. I do this for the rest of the clips in that column, moving the play marker along the loop. So, when play around and start pushing buttons, the loop keeps playing no matter what the last button you press is. If anybody knows a better way to do this let me know cause this is kind of a pain in the ass. I tried doing this same thing with drum racks, but that didn’t work because it wasn’t quantized and just didn’t work with the tempo.
With Bome’s Midi Translator I have figured out a way to make it so when you press the yellow buttons, it will cycle through different columns, activating only one at a time. So if you wanted 5 different loops to switch through on the blue buttons, you setup five columns that are all being triggered simultaneously, but only one is active and not muted.
So the big idea is to take an original, break it into different parts, say bass and drums on the blue buttons, then samples and a lead synth on the green, then play the parts together, remixing them live and progressing through different parts by switching loops with the yellow buttons.” – King Vitamin
We will write a more in depth tutorial on how this can be accomplished inside abelton later this month. In the mean time check out the video bellow which has more detail on the abelton session. If you found this article interesting you might want to check out some of the many oher DIY articles we have written on the blog here.


