Midi mappings are the link between Traktor and your controller, so without these files your midi controller has no way of communicating with the software. Working with mappings can be tricky at first, but it doesn’t have to be that way. Today Ryan Dejaegher, our tech support specialist, is going to show you common mistakes many new djs make with midi mappings and how to avoid them. This article is for those new to using mappings at all, to get started creating your own check out “Building a Basic Midi Mapping”
Stop! Save Your Traktor Settings First
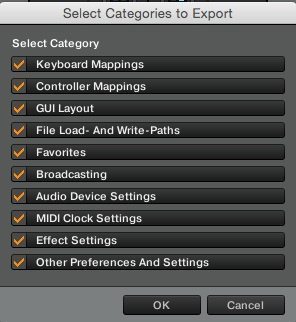
Before you start playing with mappings, it’s important to backup your existing Traktor settings so that you can easily get back to your original settings. You can do this by clicking the big “Export” button in the bottom left corner of the preferences window and making sure all the boxes are checked. Now you have a complete back up of all your settings in Traktor that can be restored through the big import button. Once you’ve done this you’re ready to start messing around with mappings.
Ean Golden, a mapping expert for over 10 years recommends the following:
Save all of your settings this was each month with the following format (March2015SAFE) so you always have a clear history to roll back when things fail or you mess up mappings. This simple habit has saved my butt many, many times!
Importing Your First Mapping

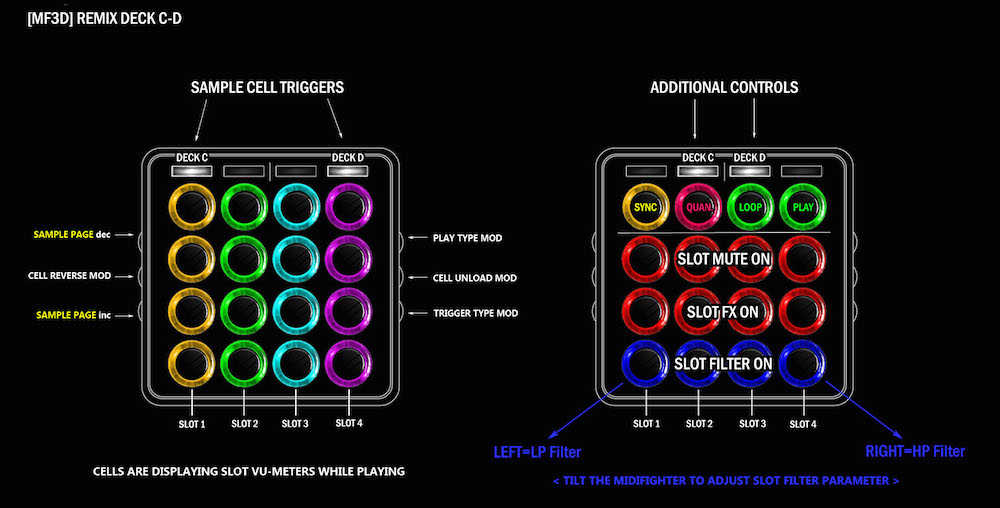
If you’re using a third party controller, not made by Native Instruments – you’ll need a midi mapping for it to work in Traktor. This applies to controllers like the Novation Launchpad, Midi Fighter 3D, and the Pioneer DDJ controllers.
The best source for custom mappings is DJTT Maps which has thousands of settings for all software and hardware
There are 2 ways that mappings can be imported:
1) Use the big “Import” button in the bottom left corner of the preferences window. (Shown above)
This will important all personal settings including mappings so be careful! The IMPORT method will override all of your mappings and is usually only used when restoring all of your settings (for example from a back-up) or if there is special effects settings with a mapping. This button allows you to select which settings should be imported, as many mappings might have additional information.
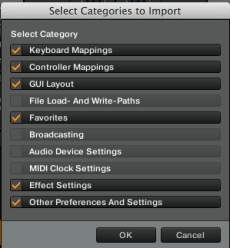
KeyBoard, Controller, GUI, Favorites, Effects, Other – are all usually personal preferences and should not be imported otherwise they will override your settings. The only time this method of mapping import should be used is with files that contain special effects settings like the DJTT Kontrol S4 MK2 mapping or Midi Fighter 3D All-in-1, both which have interesting FX combos.
After IMPORTING a mapping, you can add back older ones using the 2nd method:
1) In the Controller Manager (Add —> Import TSI —> Import Other…) and then select the .TSI file (this is the mapping file format).
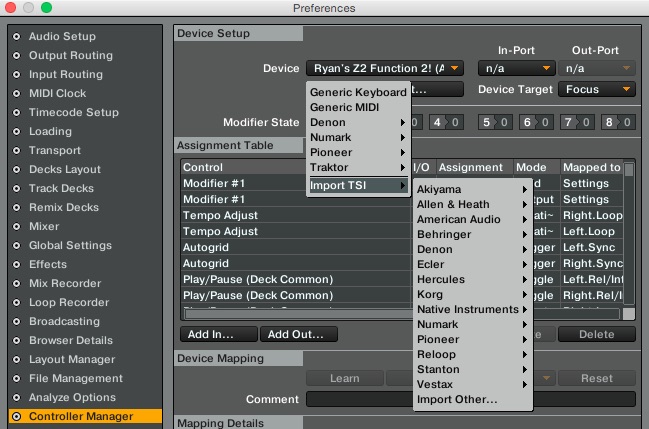
This method will only add the mapping file and is how you can run many different mappings at the same time. If you are adding a single mapping for the first time, this is probably the best method.
Keep in mind that maintaining many large mappings can slow the performance of the controller manager. Switching between mappings or even opening the preferences can take much longer than usual. If you’re no longer using a mapping it’s best to delete it from the Controller Manager (choose the mapping from the device menu, then click “Edit” —> “Delete”)
Don’t Forget to Assign Your Controller – In/Out Ports
The next step after importing your mappings is to make sure that they’re all assigned to the correct controller. A common mistake is forgetting to assign the controller to a mapping or having one controller assigned to multiple mappings. This can cause your controller to be unresponsive or wrong commands to be triggered.
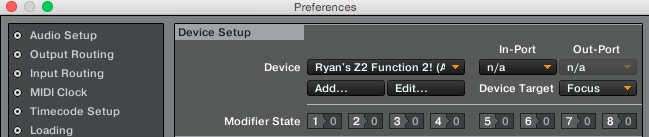
Anytime you import a new mapping, check the in/out ports (beside the Device drop down menu) to make sure the mappings are assigned to the correct controller. Never choose “All Ports” for mappings. That means the mapping is going to listen for midi from any controller that’s connected to your computer, which we don’t want.
Working With Native Instruments Controller Mappings
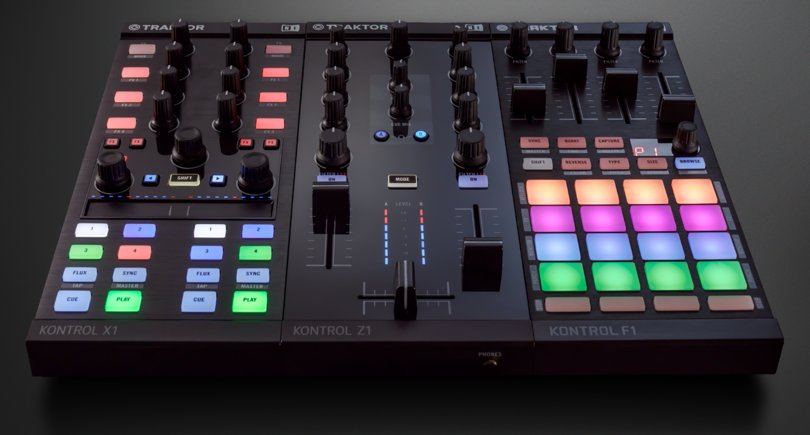
Native Instruments controllers such as the Kontrol S4/S2, Kontrol F1/X1/Z1 are automatically detected by Traktor. These controllers are automatically mapped so there’s nothing to setup or configure. This is the advantage of using a native controller.
You can still use custom mappings for NI controllers (such as the DJTT Kontrol S4 Custom Mapping and Tekken’s Kontrol F1 Isolator mapping). If you import a mapping to replace the default mapping i.e. Kontrol S4, ensure the default mapping for the controller is no longer assigned to the controller. What if you want to revert to the default mapping? Delete the mapping you imported from the controller manager, then under Device click Add –> Traktor –> (Your Controller) –> Default to restore the default mapping.
A final note on NI controllers. For the best compatibility make sure you’re running the latest version of Traktor. Each time a new controller is released it’s usually accompanied with a new version of Traktor that adds support for that controller. For example if you try to use the Kontrol S8 with a version of Traktor before 2.7, it won’t work. So always make sure you’re running the latest version of Traktor.
Testing Your Controller
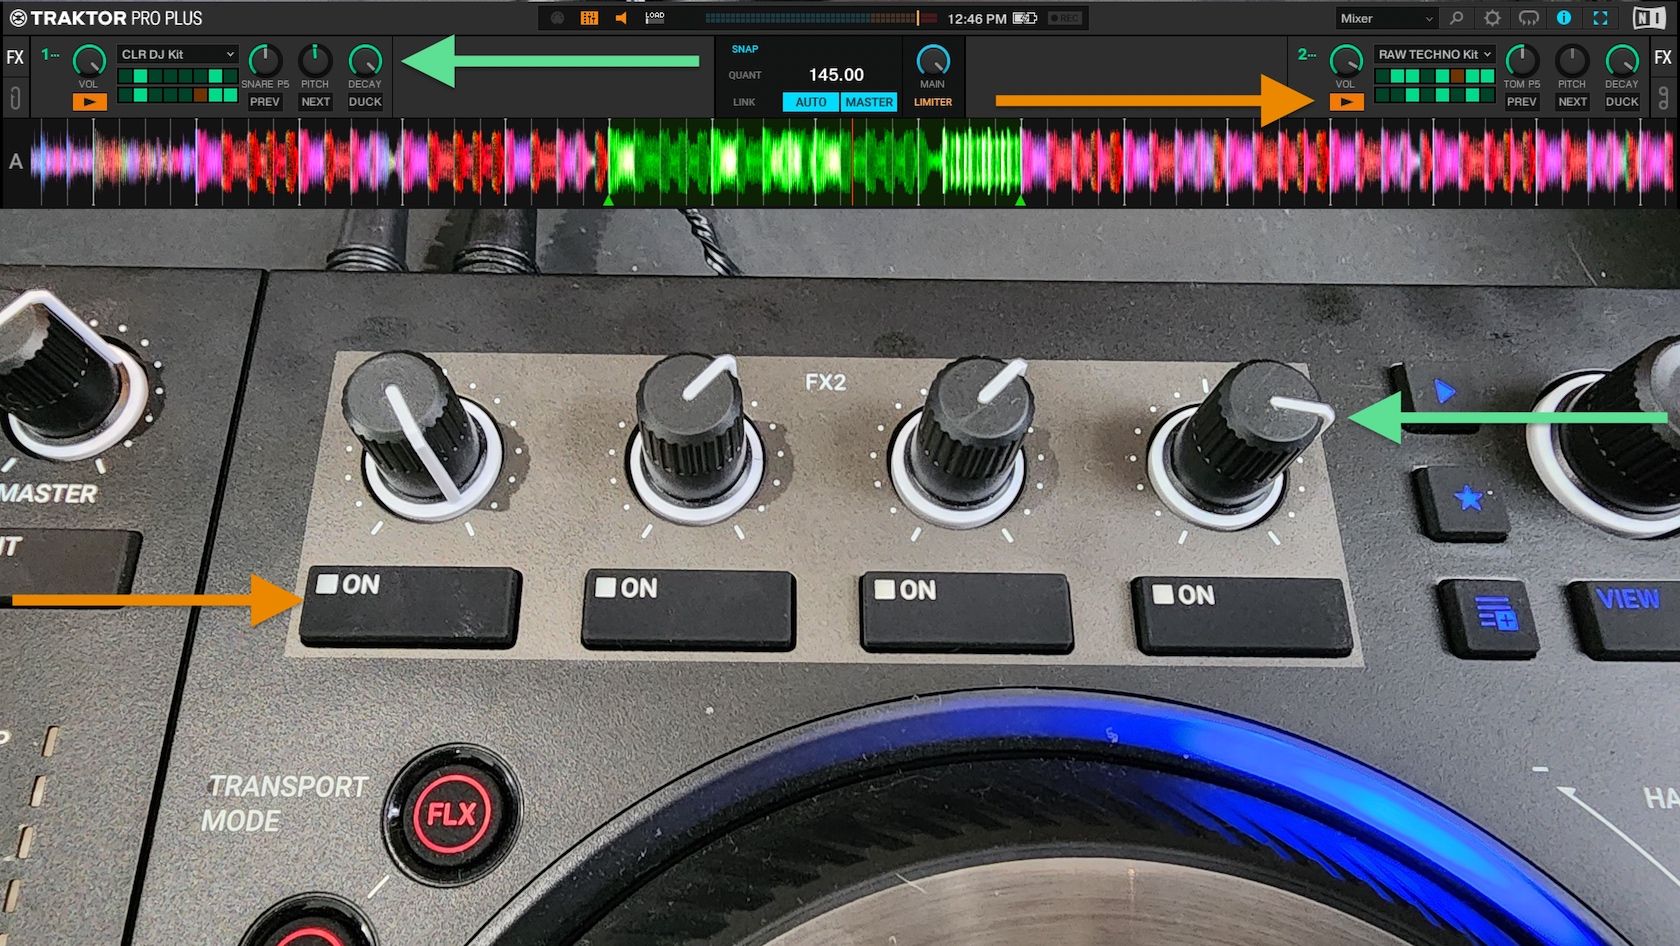
If you import a midi mapping and your controller doesn’t work, don’t panic. It doesn’t mean your controller is broken, so don’t rush off to return it. An easy way to check if your controller is indeed working is by looking at the “CTRL” icon in the at the top of the Traktor window. Press a button on your controller, if that icon lights up then that means Traktor is receiving midi from your controller. If nothing is happening then follow these quick steps:
- Import the mapping again
- Delete any duplicate mappings
- Check that the controller is assigned to the correct mapping via the in/out ports
- Make sure the controller isn’t assigned to multiple mappings
- For Midi Fighters specifically, several mappings include a .mfs file (this is for the Midi Fighter Utility) and it’s used to configure the midi channel, LED colors, and motion settings. Make sure this is imported into the Midi Fighter Utility (File –> Import Settings –> choose the .mfs file –> click “Send Changes To Midi Fighter”)
Several mappings in the DJTT maps section include manuals, instructions, or diagrams showing the parameters that are mapped to a controller. It’s a good idea to test all the controls to see if they match up with the mapping diagram. As a general rule never perform with a new mapping until you’ve tested it thoroughly and you’re familiar with it. If you found a control that doesn’t work as it should then leave a comment on the mapping page so the creator can fix the mapping if necessary.
Ignore the Setup Wizard
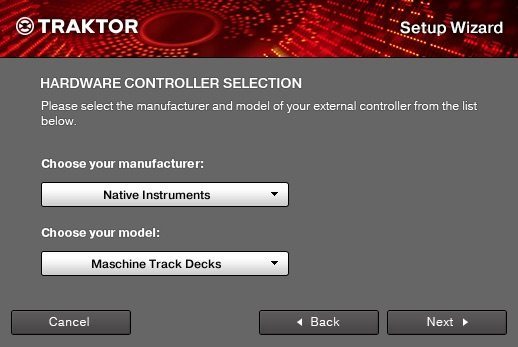
One thing that causes a lot of confusion is the Traktor Setup Wizard. The Setup Wizard appears the first time you setup Traktor and it’s great if you’re using Native Instruments controllers. For most other controllers it can be ignored. Traktor does have some default mappings for third party controllers but it doesn’t have mappings for every single controller ever made. So don’t be paranoid if your controller doesn’t show up in the setup wizard. This just means you need to either import a mapping for your controller or create your own.
Building Your Own Mapping? Save, Save, Save!

Creating your own mapping can be pretty time consuming. The last thing you want is for your computer to freeze or shutdown and lose all your mapping progress. For this reason it’s a good idea to back up regularly as you’re creating your mapping. You can save individual mappings through the Controller Manager. Under the “Device” drop down menu, click Edit –> Export. Name your mapping and save it. I find it’s a good idea to create a dedicated mapping folder and save a new version everytime I export the mapping. Now if your computer shuts down you can import your mapping in progress and pick up where you left off.
Ready to start building your own? Then read “Building a Basic Midi Mapping”