
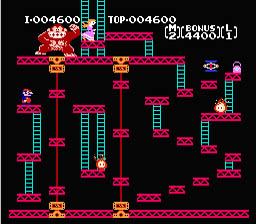
This is mario in his first appearance when he was known as jumpman back from the donkey-kong NES gameFunny to note his nose is nearly the size of his head.
ooo and some trivia, mario has a moustache because they couldn't make a mouth with the limited amount of pixels

Results 11 to 20 of 24
Thread: 8-Bit NES VCI-100 mod
-
08-20-2008, 06:37 AM #11

 Dr. Bento

- Join Date
- Mar 2008
- Location
- Perth, Australia
- Posts
- 6,383

Last edited by BentoSan; 08-20-2008 at 06:42 AM.
-
08-20-2008, 09:17 AM #12
 DJTT Ninja Mod

- Join Date
- Apr 2008
- Location
- Afterhour Ali's lap
- Posts
- 11,358
Here goes: version2.
 RSTRCTD | twitter | facebook (RSTRCTD)
 facebook (LJ) | vimeo | pinterest | my studio | soundcloud (RSTRCTD)| soundcloud (LJ)
-- CHECK our DEBUT (DEEP)HOUSE EP RELEASE ON BEATPORT "RSTRCTD - EXISTENCE" --
-
08-20-2008, 09:32 AM #13
Dr. Bento
- Join Date
- Mar 2008
- Location
- Perth, Australia
- Posts
- 6,383
The Vestax thingy needs a circle around it like the
 logo.
logo.
needs a little ® mark too
Last edited by BentoSan; 08-20-2008 at 09:34 AM.
-
08-20-2008, 12:28 PM #14Tech Wizard

- Join Date
- Jul 2008
- Posts
- 66
wow guys, much appreciated.
i did find this site: http://logo54.com/game/nintendo/
for generating nintendo fonts
and ean, i think of doing a run of these wraps would be awesome + sell well."This is the soundtrack to the nightmares in which I can't wake up. I'm about to be murdered, or I'm being forced to jump off a cliff. Thank you."
http://www.myspace.com/kagnawh
-
08-20-2008, 12:34 PM #15Mr. Golden

- Join Date
- Mar 2008
- Location
- San Francisco
- Posts
- 970
Tekki, or anyone else that is interested, hit me up on the email eangolden at gmail.com and I will send you the illustrator file you need. The wraps cover the entire vci-100 top and sides so there are no plates just one nice smooth surface that will be the same material used on those Nintendo controllers.
They also will not cover the wheels (as that would remove the touch sensitivity)
Nice one Bento, thats exactly what to do. We cant put Nintendo on there otherwise we will get sued for sure but we can make it look just like them.Last edited by EanGolden; 08-20-2008 at 12:37 PM.
-
08-20-2008, 12:34 PM #16Tech Convert
- Join Date
- Jul 2008
- Posts
- 15
actually all of the Original NES and SNES stuff is now copyright free. Due to nintendo giving the build and contr. plans away for a few years to people who want to build them selves a NES SNES combo system.
-
08-20-2008, 12:38 PM #17Tech Wizard
- Join Date
- Jul 2008
- Posts
- 66
really? that's pretty sweet. Originally Posted by frankdelo
 "This is the soundtrack to the nightmares in which I can't wake up. I'm about to be murdered, or I'm being forced to jump off a cliff. Thank you."
http://www.myspace.com/kagnawh
-
08-20-2008, 12:49 PM #18
DJTT Ninja Mod
- Join Date
- Apr 2008
- Location
- Afterhour Ali's lap
- Posts
- 11,358
Jups.. I tried it, but I wasn't able to create a nice one red border around it on short notice. Originally Posted by BentoSan
Will do this in the next release.
Originally Posted by eangolde
Mail's underway. RSTRCTD | twitter | facebook (RSTRCTD) facebook (LJ) | vimeo | pinterest | my studio | soundcloud (RSTRCTD)| soundcloud (LJ)
-- CHECK our DEBUT (DEEP)HOUSE EP RELEASE ON BEATPORT "RSTRCTD - EXISTENCE" --
-
08-24-2008, 12:22 AM #19Tech Wizard
- Join Date
- Jul 2008
- Posts
- 66
alright. i'm going to make the first jump and paint my knobs and the wheels:
i think for the knobs i'm going to use:

has anyone used this before? does it actually work like it's suppose to?
should get the job done in the next couple days. i'm going to do a "painting your vci-100" step by step tutorial...."This is the soundtrack to the nightmares in which I can't wake up. I'm about to be murdered, or I'm being forced to jump off a cliff. Thank you."
http://www.myspace.com/kagnawh
-
08-24-2008, 01:02 AM #20Tech Mentor
- Join Date
- Apr 2008
- Location
- Miami, Florida USA
- Posts
- 442
here u got the best tutorial......edited and review done by BENTOSAN LOL on how to paint ur vci
If you want to make it so your VCI doesnt chip or scratch after sanding the unit down it has to be etch primed. Basicly its an acid that eats tiny microscopic holes into the metal so when the metal primer goes over the top of it, the paint makes its way into these holes and really grips onto the unit, this etch prime coat goes on really thin and diluted. Just because its etch primed doesnt mean it doesn't have to be primed, if you don't put conventional metal primer over the top it will still come off.
What really make a paint job expensive is the prep, Eans original VCI got sanded and some paint thrown on over the top of it and it really shows - no primer was used, let alone a etch primer. Clear coats help, but without a doubt the most important coat is the etchprimer and primer coats, they will determine how much of a beating the top coat will be able to take.
Soo... when i am painting my VCI which will be very shortly i will go though these steps
- Sand unit with 400 grit
- Etch prime unit
- Prime unit
- Sand primer with 600 grit
- Paint unit black with two pack polyurethane - 2 or 3 coats
- Cut and polish unit
- Cover with 2 or 3 coats of Clear.
If you want to put some metal flake into your clear thats also possible, however after doing 2 coats with flake in the clear you need to do another one or two coats without any flakes in the clear. This is to make sure all the metallic flake is covered with clear so it doesnt oxidize, if the flake oxidizes it will lose its reflective capabilities and your flakes will look like crap.Last edited by luigislaperig; 08-24-2008 at 01:05 AM.


 Reply With Quote
 |
|
 Posting Permissions
|
|
© 2023 DJTechTools
Bookmarks