With over 1,000 free devices in the form of instruments, audio effects, MIDI effects and tools to extend the ability of Ableton Live, who could pass up using Max for Live? M4L devices come in all shapes – and if you want, they can be edited and customized to meet specific needs. Today, Lenny Kiser shares how to use 5 essential Max for Live devices to improve your productions and live performances.
LFO DEVICE
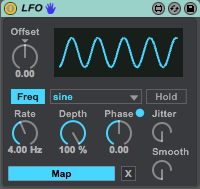
LFO stands for a low frequency oscillator and rather than generating sound or processing sounds directly an LFO is be used to modulate or change parameters on other devices. Here are the steps for using the LFO.
- Drop an LFO on any track next to a device you want to modulate.
- Click Map on the LFO (It will blink)
- Select any parameter on another device.
Now the LFO will control that newly-mapped parameter and you will see the parameter start moving based upon the modulation coming from the LFO. My go to parameters to change on the LFO are the, Depth, Rate and Offset.
The LFO great for modulating:
- Dry/Wet Controls
- Filters and EQ Frequencies
- Volume Levels, Pitch
Bonus Tricks:
- Use an LFO combined with an autofilter to wobble any sound with precise control!
- Use more than one LFO on a single device. For example take several different LFO’s and map them to control several different frequency bands on a single EQ to create interesting frequency movement.
- Use an LFO set to a slow rate to add subtle movement to sounds overtime to keep them interesting and fresh.
PITCH DROP
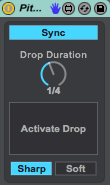
The Pitch Drop device is a really simple and useful device that simulates a turntable tape stop effect. This is great for performance situations as this effect can be used in real time. This is easier than writing pitch transposition automation in the clip itself. Place Pitch Drop on your drums or master track and map a controller button to the activate drop and you’re good to go! Change the drop duration to control how long it takes to slow down.
ENVELOPE FOLLOWER
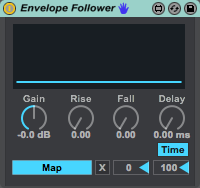
The envelope follower tracks amplitude (volume) envelope information coming through it and uses that amplitude information to then modulate parameters on other devices.
How to use the Envelope Follower:
- Drop an Envelope Follower on any track
- Click Map on the Envelope Follower (it will blink)
- Select any parameter on another device.
The Envelope Follower Device is great for modulating:
- Dry/Wet Controls
- Track Volume Levels
- EQ’s
- Sends
- Device activators
- Anything!
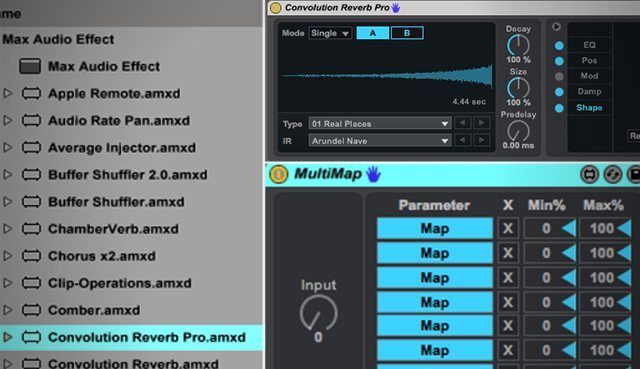
CONVOLUTION REVERB

Convolution Reverb is the process of digitally simulating the natural ambience or reverberation of a real acoustic space. Convolution is a mathematical operation and uses a pre-recorded audio file known as an impulse response that was recorded in the real space. The impulse response is then used in the Convolution Reverb to model the sound of the real space inside your DAW to produce a more natural and realistic sound.
When using this device, place it on a return track. The Convolution Reverb Pro also includes an EQ section, positioning section and a shaping section for better control of the reverb in your mix.
Bonus Tips:
- Use the EQ section to remove un-necessary low end from the reverb to increase clarity in your mix
- Under the shaping tab hit, “reverse” to create a reversed reverb effect
- Use the positioning tab to move the reverb in your mix from front to back and left to right
MULTIMAP DEVICE
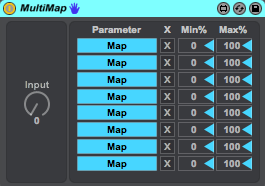
The Multimap device allows you to map multiple parameters across various tracks and devices to one knob. This is huge for controllerists looking to save button and knob real estate.
How to use the Multimap:
- Load Multimap onto any track
- Click Map
- Select any parameter on any another device or track.
- Repeat steps 2-3 as necessary.
- Move the input knob to control them all!
Bonus Tips:
- Turn multiple audio effects on/off on several different tracks at once
- Control the volume of several tracks at once
- Control multiple sends with one knob
- Control feedback level and decay times across all reverbs and delays
- Control Dry/Wet controls on several devices
- Control Chain Selectors on multiple devices
Max for Live is an incredibly powerful addition and extension of Ableton Live’s ability as a DAW. Although Max can be an in-depth visual programming language, you don’t have to be a programmer to use the enormous amount of devices made by the global community of developers and artists. If you found this article helpful check out some of my other tutorials here.
Need more Ableton tips-n-tricks? Lenny offers awesome daily tips n tricks on his Facebook here.


