DJ Techtools’ earliest products (VCI-100 Arcade, Midi Fighter) were based on the idea of taking traditional DJ control surfaces and improving their playability. With today’s article, Kyle Mohr shares a DIY project that does exactly that for DJs who want to incorporate guitar FX pedals into their setup. Instead of high-tension foot switches, mod FX pedals with arcade buttons! Watch the complete tutorial inside.
We’ve reached a point where standard effects from our current DJ software are almost predictable and bland. So you’ve decided to venture along the path of out-of-the box, not in time, adding some sway and some fresh analog to your setup. Welcome to the large world of Guitar FX Pedals!
Why Mod FX Pedals With Arcade Buttons?
While originally intended for guitars and bass, they can be used for a large array of things from vocals, to synth and even your DJ sets. If you haven’t already, go check out the full tutorial from Ean Golden on how to setup such pedals with your DJ gear here (note that DJTT no longer carries guitar FX pedals).
But today, we’re going to show you a few simple ways to quickly update these pedals to be more accommodating for tabletop use. Watch the video below, or keep reading for an in-depth overview of each step:
Replacing the Stomp Switch with an Arcade Button
In this guide and video, there are 3 types of Pedal Mods: Easy, Medium and Hard. For each type, there are essentially 3 steps:
- Removing the switch
- Drilling the larger hole
- Soldering
Shopping List
First, purchase all of your tools and materials. To make things easier I’ve provided many links for Amazon and US retailers below.
Click each dropdown to see what I used:
- Walrus Audio “Janus” Pedal: https://goo.gl/MxFzPu
- Red Panda “Particle” Pedal: http://goo.gl/Oz0ogd
- Dwarfcraft Devices “MiniVan Echo” Pedal: http://goo.gl/SaZwbG
- Dwarfcraft Devices “The Great Destroyer” Pedal: http://goo.gl/sJ1FFs
- Electro Harmonix “Freeze” Pedal: http://amzn.to/299ZSYA
- Boss “Reverb RV5” Pedal: http://amzn.to/29l3jQx
- AMZ FX DPDT Relay PCB: http://goo.gl/CCnoj9
- 24mm Sanwa Arcade Buttons (From FocusAttack.com): https://goo.gl/7gPxWY
- Mini Arcade Buttons: http://goo.gl/544gD0
- Jumper Wires: http://amzn.to/1Gog5km
- Sugru (Moldable Glue/Rubber): http://goo.gl/G7rfy5
- Soldering Iron: http://amzn.to/1Lm9rSl
- Rosincore Solder: http://amzn.to/1HEDU8f *Any Rosin-core solder should do, this is just what I used
- Soldering Flux: http://amzn.to/1P4F4zD
- De-Soldering Pump: http://amzn.to/2a8Hpek
- Step Drill Bit: http://amzn.to/29A1bRf
- WD40: http://amzn.to/2977XMA
- Drill Bit set: http://amzn.to/1fMz2s7
- Drill: http://amzn.to/1HxjMbG
- Small Screw Driver Set: http://goo.gl/SUuqmt
- Liquid Electric Tape: http://amzn.to/1MduiJl
- Wire Cutters: http://amzn.to/1J2zM7w
- Wire Stripper: http://amzn.to/2a8JoAU
- Plier set: http://amzn.to/1h0QdXw
- Hatchbox 3D Filament: http://amzn.to/29U6Sen
- 3D Printer: http://amzn.to/29a0rRZ
- Blue Painters Tape: http://amzn.to/29fPqRF
- Wood Stain: http://amzn.to/29Iupzy
- Sandpaper: http://amzn.to/1NoiDVz
- Rubber Feet: http://amzn.to/2ap2HG0
- DJTT Chroma Caps: https://goo.gl/kJ3thi
- Rubbing Alcohol: http://amzn.to/29yX6Lo
- Set Screws: http://amzn.to/29N8XIy
Preparation: Measure Twice, Drill Once
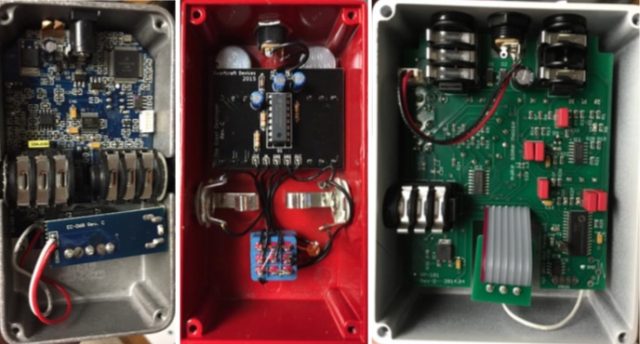
Before starting, open up the pedal (or google the layout if you are looking to buy one for this purpose). Check out how much room you have to work with inside. You’ll need about an inch or more of clearance (depth and width). There are many pedals that will have little to no room left once all the components are inside.
Make sure to leave plenty of space between the components and your drill spot. Otherwise, this could result in broken enclosures, tight areas for soldering, and worst of all, possible damage to the circuit board that creates the effect.
Be sure to take a marker and ruler (I used a 3D-printed Midi Fighter Classic top), measure distance between components, circuit board, and the ideal pilot hole. Then mark up the front or inside of the pedal enclosure with drill/cut spots.
Step 1: Removing the Original Footswitch
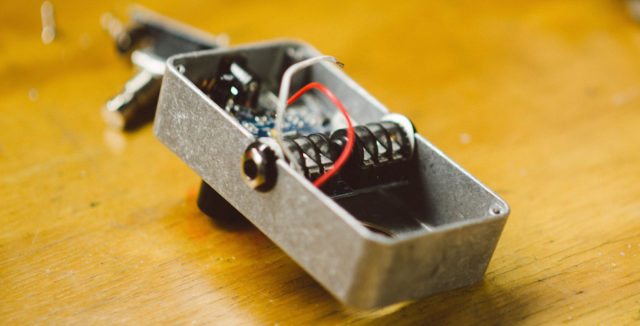
- Use a wrench or heavy set of pliers to loosen the nut which holds the foot switch to the pedal enclosure. Be careful not to scratch the pedal design while doing this. Putting some painters/masking tape down around the switch base can help reduce any damage.
- Once you’ve removed the nut holding the footswitch to the enclosure, open up the back of the pedal with a screwdriver. Don’t use a powered drill as this can result in stripping the screw or hole.
- Take a picture or take some notes to where each connection goes to from the circuit board and footswitch.
- Two options: the hard or easy way. You could de-solder each wire from the switch or simply cut the wire as close to the switch connection as possible, then use wire strippers to pull the casing off the end to expose the wire.
Step 2: Drilling the 24mm hole
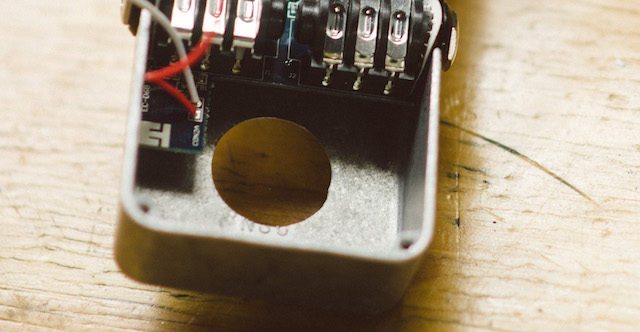
- Now that you’ve removed the original footswitch, again make sure before you start drilling holes that you measure the clearance you have between the original footswitch hole and the circuit board or components. If the original hole puts you too close to anything inside the pedal you will need to move your center point and drill a new pilot hole first. Just be sure your new hole will include the current.
- Make a pilot hole with a drill bit close to the smallest size on the step bit.
- For drilling metal to keep it from cracking or bumping up when drilling, I’d suggest using a Step Drill bit. This will take you step by step to that size in one shot, vs using various standard drill bits. (Note: to reduce heat and friction, drill in short intervals, slowly, and use lots of oil (or in my case WD-40, it is your friend here!).
- Before drilling, to prevent scuffing up the pedal, put masking/painters tape over the area.
- Be sure to mark your step bit with tape on where you should stop. 24mm is just shy or an inch, so if your step bit is like mine, only labeled in inches, be sure to try a few scrap pieces of metal, wood, etc and see how your buttons fit first before going straight to the petal and making a hole that is too big.
- Once you’ve successfully drilled that hole, vacuum up all metal pieces. You don’t want to leave them hanging around, inside or out of your pedal.
- Now you can pop that arcade button in!
Step 3: Soldering The Circuit Board To The Button
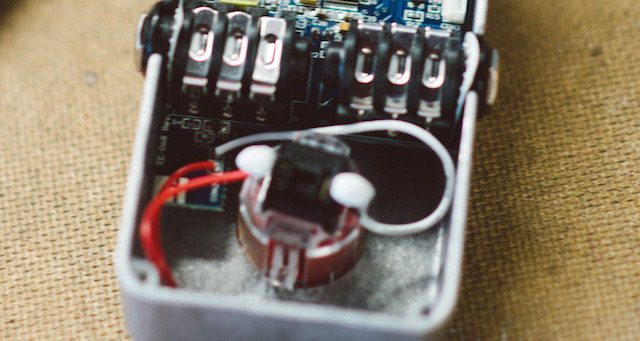
This is where each pedal will differ and when our easy/medium/hard difficulty comes in. You’ll now need to directly solder the existing wires from the circuit board directly to the 2 pins of the arcade button, or you will have to solder them to a Relay PCB which will convert the signal, then from the PCB to the button.
You’ll need your Rosin-core solder (safer than the old lead-based solder) – as mentioned in my last tutorial, I use and recommend .050”-Diameter 63/37 Rosin-Core Solder. You’ll also want jumper wires – I use these instead of typical spools of wire, because they have a single pin at the end instead of braided wire that is more difficult to push through a hole. They are much more efficient – no need to cut, strip, and heat shrink it every time.
If you haven’t soldered before, there’s a wealth of tutorials on YouTube. Here are a few of my favorites. Anyone can do it!
Let’s Start With EASY!
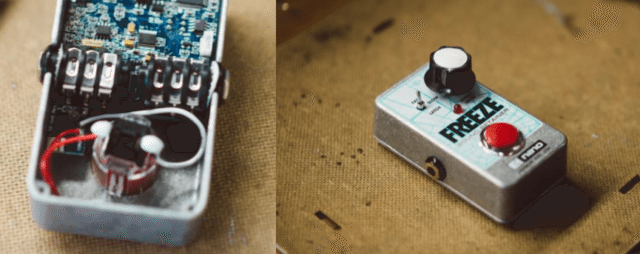
The most simple pedal Mod is a 1 for 1 button swap. This is when the pedal already uses a momentary switch (2 wires, ground and active). You will literally remove the 2 wires from the foot switch (de-solder or cut), drill the 24mm hole, pop in the arcade button, then re-solder the existing wires to the 2 pins on the arcade button. For example, it’s very easily done on the Electro Harmonix “Freeze” Pedal.
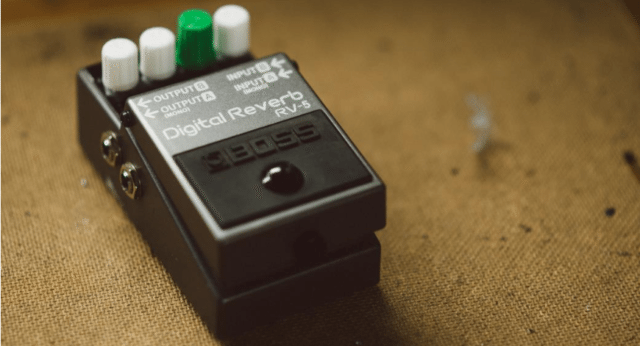
This also is fairly simple to do on the standard Boss pedals. You don’t need to mod a Boss pedal – it’s a push pedal, not a hard foot switch. To reduce the clicking and hard push, you can pad the inside and get a smaller/weaker spring, but that isn’t ideal.
What we’ve done is replace the switch under the foot plate (momentary, with 2 wires), popped it out of the casing using, cut the wires (or de-solder from the mini PCB the button is connected to), and drill a hole for a mini arcade button. The 24mm buttons will not fit – they are deeper than the pedals mold. You’ll also lose the ability to use a 9v battery if you do not space out your button correctly. Then, re-solder the new pushbutton to the 2 wires (if needed, extend the current wires to connect your button). Seal your connections, let it set/dry, then screw the top back on.
Next level: Medium Difficulty
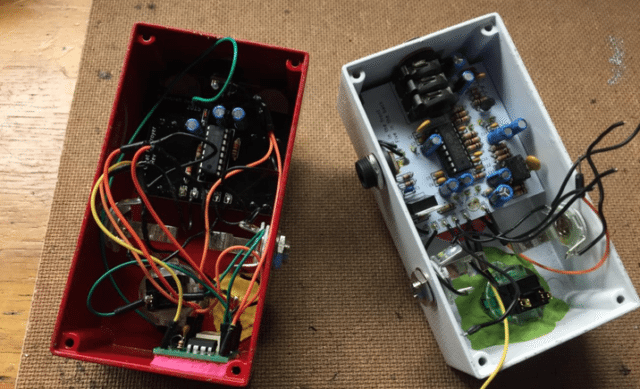
For the next set of pedals, we’re using 2 True Bypass pedals from Dwarfcraft Devices. These are connected to the most common type of footswitch the 3PDT (3 Pole Double Throw) which is 3 rows of connections, which control the input, LED and output all on 1 switch. In order to make this compatible with our arcade button (which are momentary) we will need to use a Relay.
For this mod we’re using a custom Relay PCB Kit designed by guitarist Jack Orman from AMZ-FX. This small 1″ x 1″ board gives an input for the LED, which removed one row of 3 from the 9 connections in the 3PDT and then have 6 spots for the remaining connections. The arcade button then connects to the ground and switch pin. This relay is also built to latch, so while the arcade button is momentary, it will hold the effect, even if you take your finger off the button.
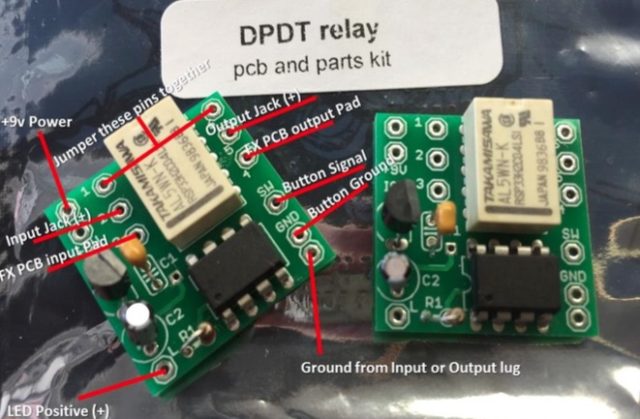
Follow the blueprint above and steps in the video on how to properly assemble your DPDT Relay PCB kit with all components.
- Remove the footswitch from the pedal and disconnect the wire
- Drill out the hole to be 24mms, and insert the arcade button. Solder it to the two switch wires coming from the PCB.
- Reconnect and solder all appropriate wires from the original footswitch to the PCB.
- Mount the board inside the enclosure. This can be done with Sugru, double-sided 3m tape, or hot glue. The Sugru will help provide a rubber barrier from the enclosure, but also keep the board in place.
- Close up the back and move on.
Difficulty Level: Hard
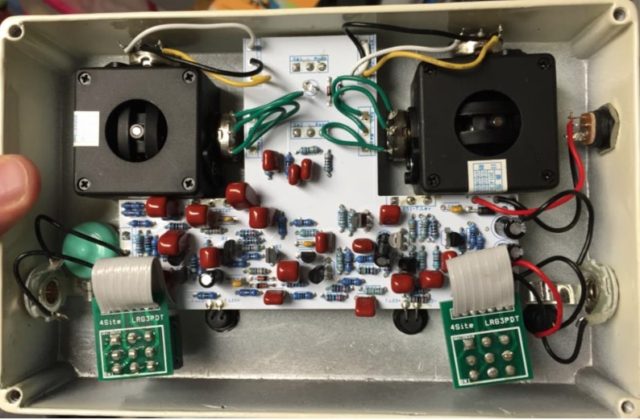
For the final set of pedals, the mod is more difficult – Hard Mode!
We used two pedals with 7 pin ribbon cables to connect their large circuit boards to 3PDT footswitches: “The Janus” from Walrus Audio and “Particle” from Red Panda. These are amazing pedals with great sound. They also feature very large circuit boards, which leave no room for error. Make sure to drill using the original holes as the pilot hole. You can’t move this to the left or right (up or down) at all or you’ll damage the board and components.
The Janus has 2 switches, so you will need to use 2 DPDT Relay PCBs. After removing the old switch, de-solder the ribbon cable from the footswitch board if you can. If not, I’ve found peeling back the ribbon cable from the wires with a box cutter helps. Once enough wire is exposed, cut it and leave enough room to solder your jumper wires to each. Be sure to note the connections before removing.
Note: It is always a good idea to check with the pedal company, if possible to verify which connections are what. Every pedal has a generic connection, but each company can differ.
Wiring The Buttons And Board
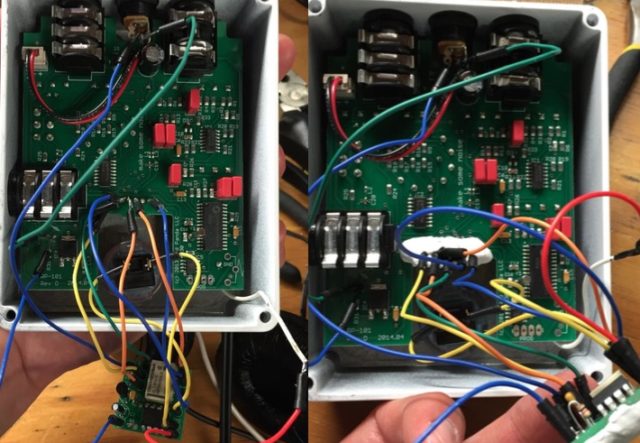
Once you’ve drilled your 24mm holes, solder the jumpers connected to the ribbon cables to the appropriate connections on the Relay PCB, as you’ve done the last few matching up the connections to the 6 relay connections. You will need to solder jumper wires to 5 of the 7 pins on the ribbon cable since the Relay board will be mounted too far away, and 2 pins are unused (pin 5 which is the LED, and 7 which is a dummy pin).
Wiring For The JanusWiring for the Janus is:
Janus pin 1 < – – > Relay Pad 3
Janus pin 2 < – – > Relay Pad 2
Janus pin 3 < – – > Relay Ground
Janus pin 4 < – – > Relay Pad 4
Janus pin 6 < – – > Relay Pad 5
*Relay Pad 1 < – – > Relay Pad 6 (Jumper)
Wiring for the Particle is:
Particle pin 1 < – – > Relay Pad 2
Particle pin 2 < – – > Relay Pad 3 and 6
Particle pin 3 < – – > Relay Pad 1
Particle pin 4 < – – > Relay Pad 4
Particle pin 6 < – – > Relay Pad 5
As done before, run the 2 switch connections from the relay boards to the arcade button pins. Mount the relay boards, seal up any connections with liquid electrical tape or Sugru, let dry, then seal up the back to move to the final step – LEDs.
LEDs
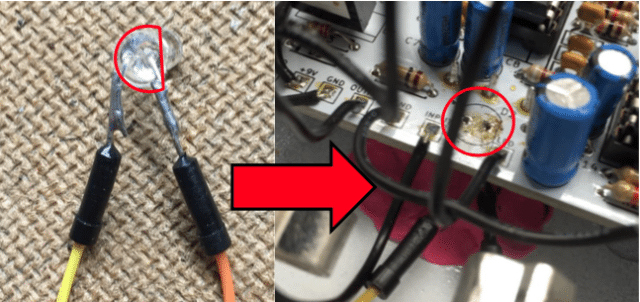
*Note: Always be sure to test the pedal before sealing up the connections. If for any reason your FX works backwards (LED on when FX off, and FX on when LED off) you just move the jumper pins to 3 and 4. Then you use 1 and 6 as the input and outputs. 3 moves to 1 and 4 moves to 6.
The reason we won’t use the LED pin is because we’ll wire the LED directly to the Relay board.
- Cut the LED from the board or current connection.
- solder both pins of the LED to jumper cables, and solder the positive (+) side to the “L” pin on the Relay board.
- The negative side (-) can be daisy chained to ground lug on the input or output jack (or even the ground from the power supply).
- Now that you’ve cut it from the circuit board, you may need to hold it in place so it doesn’t fall through the enclosure. This is where Sugru comes in handy again – or use glue or chunky plastic holders if you’d prefer
- If you can’t get to the LED, find the pins where the LED is connected to the circuit board.
- This step is a bit tricky – you will need to cut the copper connections to the LED pins on the circuit board. this can be done with a box cutter and a little patience (if you go quickly it is very easy to slip and cut vital connections). To be safe I cut both going to the LED. You can just cut the one going to the resistor and leave the ground pin, but better safe than sorry.
- After assuring you’ve completely cut through the copper connection and only see white marks on the board, you can now solder 2 jumper wires to those pins. Note the one going to a resistor is your positive (+).
- Connect the positive to the Relay board and the other to the common ground of the pedal.
Step 4: Protecting The Connections
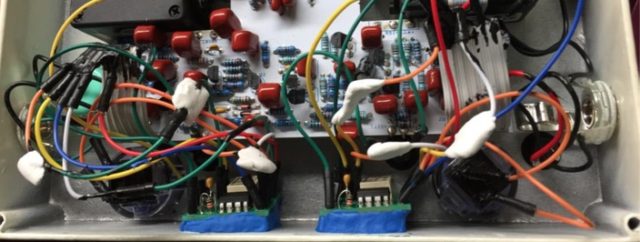
Before testing, clean up the flux residue with a paper towel and/or Q-tip (for hard to reach areas) and rubbing alcohol. This will remove any materials which could overtime corrode your board and connections.
After that dries, cover the connections that could potentially touch another and cause a short. To do this, there are a few options:
- simply tape up any loose connections of bare wire that could touch another or even a metal component part
- cover them with hot glue so nothing moves or touches at all; use heat shrink tubing (which doesn’t always fit perfectly)
- try liquid electrical tape which comes in a rubber cement style bottle and brush on (which makes covering tight areas a little easier). *If using liquid tape please do so in a well ventilated area.
After bare wires are covered, plug in the fully soldered and connected FX Pedal. The LED should light up twice to confirm the Relay board is working. Try out your pedal – if it all works well, locate your 4 screws and put the back panel on the pedal and seal it up.
Final Touches: Swapping Out The Knobs
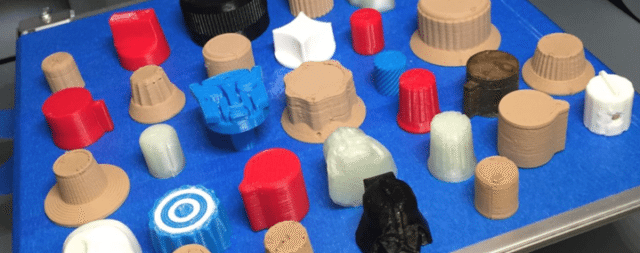
This is a bonus step if you’re really into DIY projects. For a finishing touch, I 3D printed custom knobs to replace the stock ones. I used various colors of Hatchbox 3D printing filament. This stuff looks great and is amazing quality for a low price. If you don’t have access to a 3D printer, you can always use a site like shapeways.com or ponoko.com to print designs, or simply buy some solid DJTT Chroma Caps!
I’ve created a collection here on thingiverse.com where you can see all the custom knobs I’ve printed for use in the video. Or you can download all the STL files here (zip file).
Many pedals also come with rubber feet – but if not, grab a few and stick them on the bottom to keep your pedal from sliding off the table.
That’s it for the tutorial! Enjoy your modded FX pedals and share your own results in the comments if you take it on – or tag @djtechtools on Instagram!
Special thanks to the following groups for providing resources or otherwise helping with this article: AMZ-FX, Red Panda, Walrus Audio, Dwarfcraft Devices, JuriMusic.com
Guide, Design, and Video Editing By: Kyle Mohr
All Video Shot By: Alex Medvick


