We recently published an article on how to use almost any controller with Pioneer DJ’s WeDJ iOS app. In it, we stated that the same method (using 3rd party apps and remapping your controller) would also work for Cross DJ app.
Today we take a different approach to the same objective: use any controller with mobile apps that have a limited list of compatible controllers. But this time the starring apps are Algoriddim’s djay Pro and Mixvibes’ Cross DJ Pro, and the method is far more simple. Let’s get started!
What You’ll Need For This Tutorial
- A MIDI controller which is audio and MIDI class compliant (this means it doesn’t need drivers when used with macOS or iOS). If you’re unsure if your controller is class compliant, refer to the manual or to the brand’s website. We’re going to use the good old Vestax VCI-300MK2, an awesome piece of hardware that resists the passage of time like a rock.
- An official Lightning to USB 3 Camera Adapter from Apple. Despite having the word “camera” in the name, the adapter works with a lot more hardware – like audio interfaces and MIDI controllers. I recommend this adapter instead of the old one because this one has an additional input for a power cable if the iOS device can’t supply enough energy.
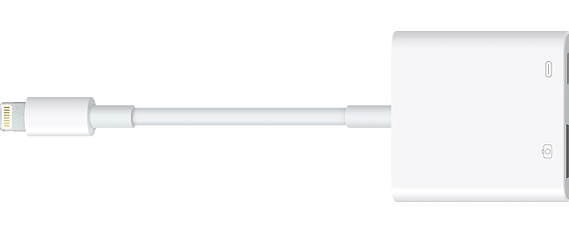
- If you have the old official adapter and you need more power for your controller, you can use a powered USB hub in combination with the adapter.
- djay Pro or Cross DJ Pro iOS apps. Use your favorite one.
- It is not essential, but the macOS versions of djay Pro 2 or Cross 3.4 can help a lot.
Step 1: Check Your Controller Works With Your iOS Device
If your controller is class compliant and needs an external power supply to work, you will probably have no problem using it with iOS. Simply connect your controller to the wall power, connect the USB cable from the controller to the Lightning-USB adapter, and plug the adapter to the iOS device. Turn on the device, and if everything is alright your iOS device will make a charging sound the same way as when you connect it to the power charger. If a wall mount-powered controller does not work doing this, it might not be class compliant, and you can’t do anything to change that. Use another controller.
The big problem can come if you have a non-wall mount-powered controller that is class compliant and the iOS device can’t supply enough energy. In that case, you will see an error message on your iOS device regarding power consumption. There are two options:
- Use the Lightning to USB 3 Camera adapter with an iOS power charger connected
- Connect the controller to a powered USB hub, and the hub to the iOS device using the lightning adapter.
Step 2: Create or Get A Mapping
Here’s the good news: djay Pro and Cross DJ Pro iOS apps can use the same mappings as the desktop versions. But the bad news is that if you want to make your own mapping, you have to create them using those desktop apps as well. If djay Pro 2 – the old djay Pro is no longer in the Mac App Store– and Cross DJ natively support the controller, you just need to export the mapping from the software. Do it this way:
With djay Pro 2:
- Connect the controller (essential, if not the MIDI mapping options won’t appear).
- Run Djay Pro 2
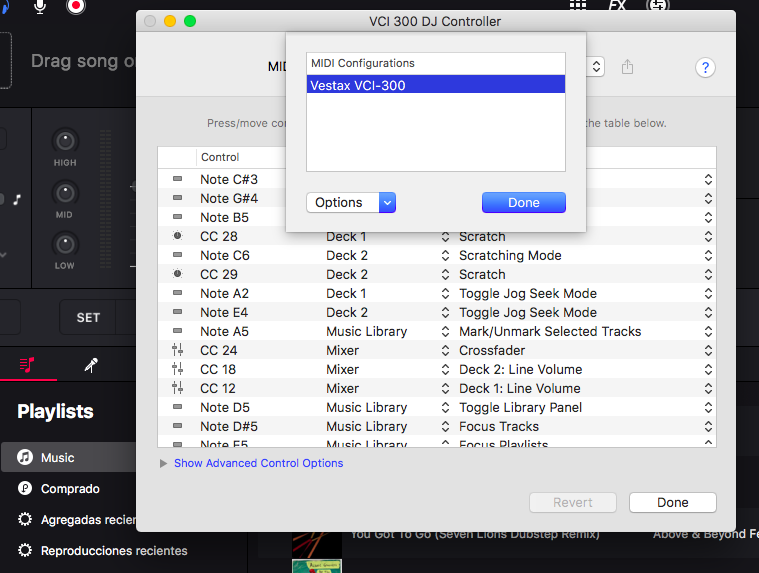
- Go to the MIDI menu, an option will appear named “Configure…” followed by the name of your plugged controller. With our test controller it says “Configure VCI 300 DJ Controller” Select that option.
- In the window that pops up, there is a menu in the top labeled “MIDI Configuration”, open that menu and select Edit Configuration.
- In the new window, select your controller, and in the “Options” menu, select the “Duplicate” option. This is necessary because djay Pro won’t let you export an internal mapping of a natively supported controller, but there is no problem exporting a duplicate. After doing this, a new controller mapping will appear with the same name as the original but with the word “Edit” at the end.
- Now select the newly created mapping, and under “Options” select “Rename”. Delete the “Edit” word from the name. djay Pro won’t have any problem with two mappings with the same name, because the software differentiates the native one – a “Built in” label will appear next to the name of the controller – and the duplicate.
- Go to the previous window, and click on the square with an arrow icon and select “Show in Finder”. A Finder window will pop showing the location of the mapping file. By default, the mappings are always inside the folder Music/djay Pro/MIDI Mappings. Easy.
With Cross 3.4
- Connect the controller and open Cross. Using a natively supported controller it will be detected.
- Go to “Preferences” and click on the “MIDI” tab.
- In the MIDI tab, the page on the left will be the one for the connected controller, click on that page and scroll down till you find your controller. Your controller will be marked in orange.
- In the lower buttons, click on the one on the far right, the “Export Controller Mapping”.
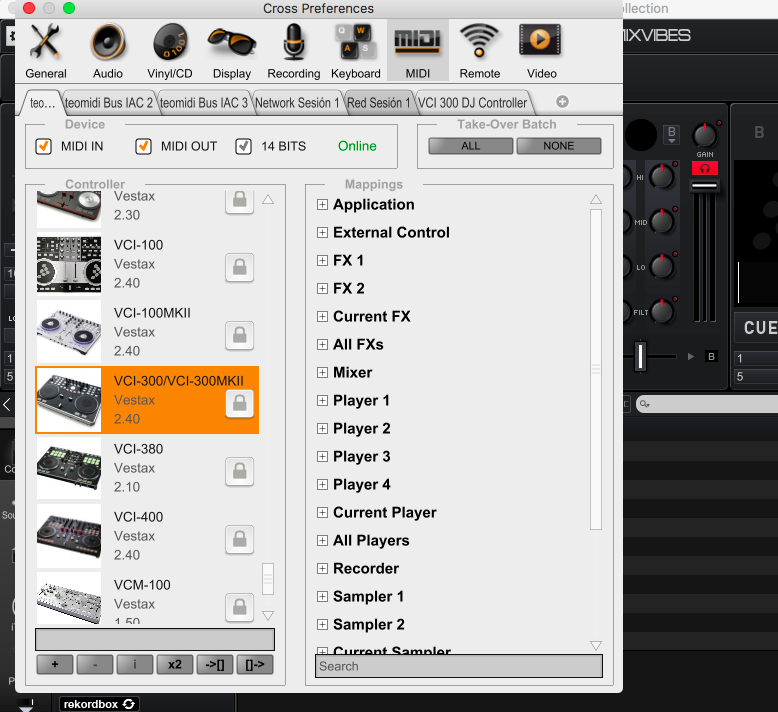
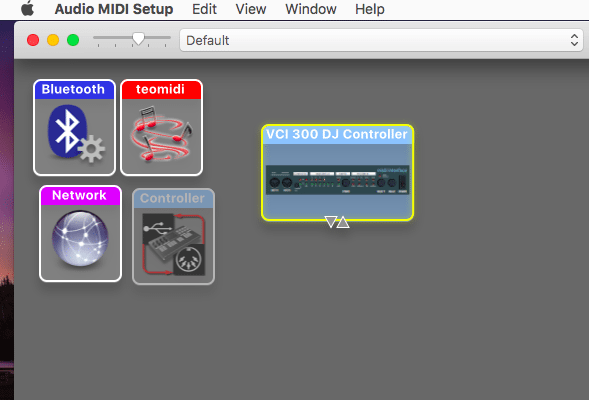
- Select the name and place for the mapping file. You have to name the file exactly as it was detected by your computer. You can check the exact name with the Audio MIDI Setup utility, found in Applications/Utilities and looking in the MIDI Studio window.
Cross DJ is case sensitive with the MIDI controller names. So, if your controller appears in Audio MIDI Setup as “VCI 300 DJ Controller”, write it exactly that way in the name of the mapping you export.
My controller is not natively supported / I don’t have the computer version of the software
If your controller is not natively supported by the computer version of the software you want to use, you have to map it by yourself. When you finish the mapping, export the file using the previous steps. But hey, if you don’t want to expend a lot of time, or if you simply don’t have the computer versions of the software, you can look into our huge MIDI mapping database.
Once you get the file, remember that if you are using Cross you have to rename it to exactly match the name of the controller as it’s detected by the computer. If you don’t do that, nothing will work.
Step 3: Put The Mappings In The iOS Apps
There are two different methods for transferring the mapping to the app, depending on which one you are going to use:
With djay Pro iOS app
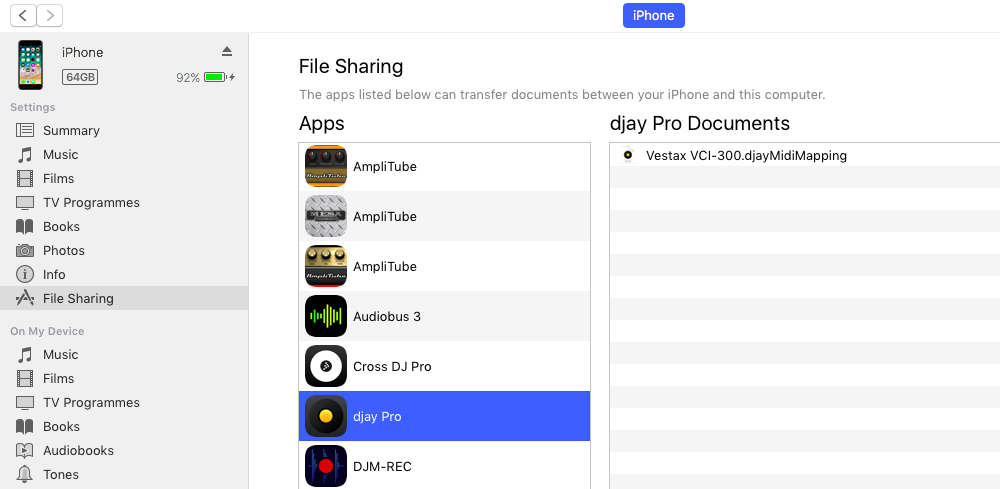
You will need to use iTunes to transfer the file. Connect your iOS device to your computer, open iTunes, click on the device, and then go to the File Sharing tab. Look for djay Pro and click on the app, and on the right area you will read “djay Pro Documents”. Drag your mapping in and it will sync over, easy!
With Cross DJ Pro iOS app
The method with Cross DJ is different because this app has folders inside it’s documents File Sharing area, and iTunes won’t let you drag a file inside a folder. The solution for this is using the “Files” app, and you have different ways of doing this:
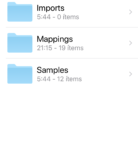
- You can use AirDrop to send the file to the iOS device. Once the file is sent, locate it with the “Files” app and copy it to the Cross DJ Pro documents area inside the “Mappings” folder.
- You can email to yourself the mapping file. Once you open the file on your iOS device, copy it to the “Mappings” folder of Cross DJ Pro.
- You can also copy the file to iCloud, open “Files” in your iOS device, go to iCloud from the device, and copy the mapping file to the “Mappings” folder of Cross DJ Pro.
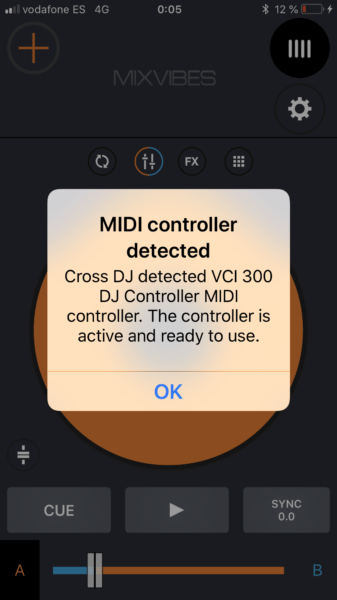
If you have done everything right, plug your controller into your iOS device and run djay Pro or Cross DJ Pro. Your controller should work with the app.
Problems You Might Encounter
- Some controllers, like the VCI-300MK2 I used, and other controllers with optional power adapter, need much more power than what an iOS device can supply. Event the Lightning to USB 3 adapter with an iOS device power charger connected won’t be enough. You will also need to connect the controller’s own power supply and use both sources of power.
- Some controllers and mixers are not completely class compliant. That happens with devices that don’t need drivers for their MIDI controls, but they do need drivers for their audio interface. This happens with some Pioneer DJ controllers and mixers. This means you’d need an additional audio interface, USB hub, and more adapters and cables – so until we find a good way to get those devices to work, I recommend against it. After all, the point of this setup is to have an ultra-portable experience, not something excessively complex.
- Other controllers won’t let let you use some lighting features like VU meters or button illumination. This is a limitation of the app’s features – with no good current workaround.
- If nothing works, check that you are using the latest versions of the iOS app and the computer software. Also check that you are using the latest iOS version available for your iOS device.
Share in the comments your experiences and questions!


