When DJTT contributor DJ Soo shared his recent article about assembling clever portable DJ setups, I noticed one reply Reddit that stood out to me. It was a DJ from the Netherlands who had built his own standalone DJ setup with a DDJ-400 and a Raspberry Pi. Obviously, we had to get the details and share them here.

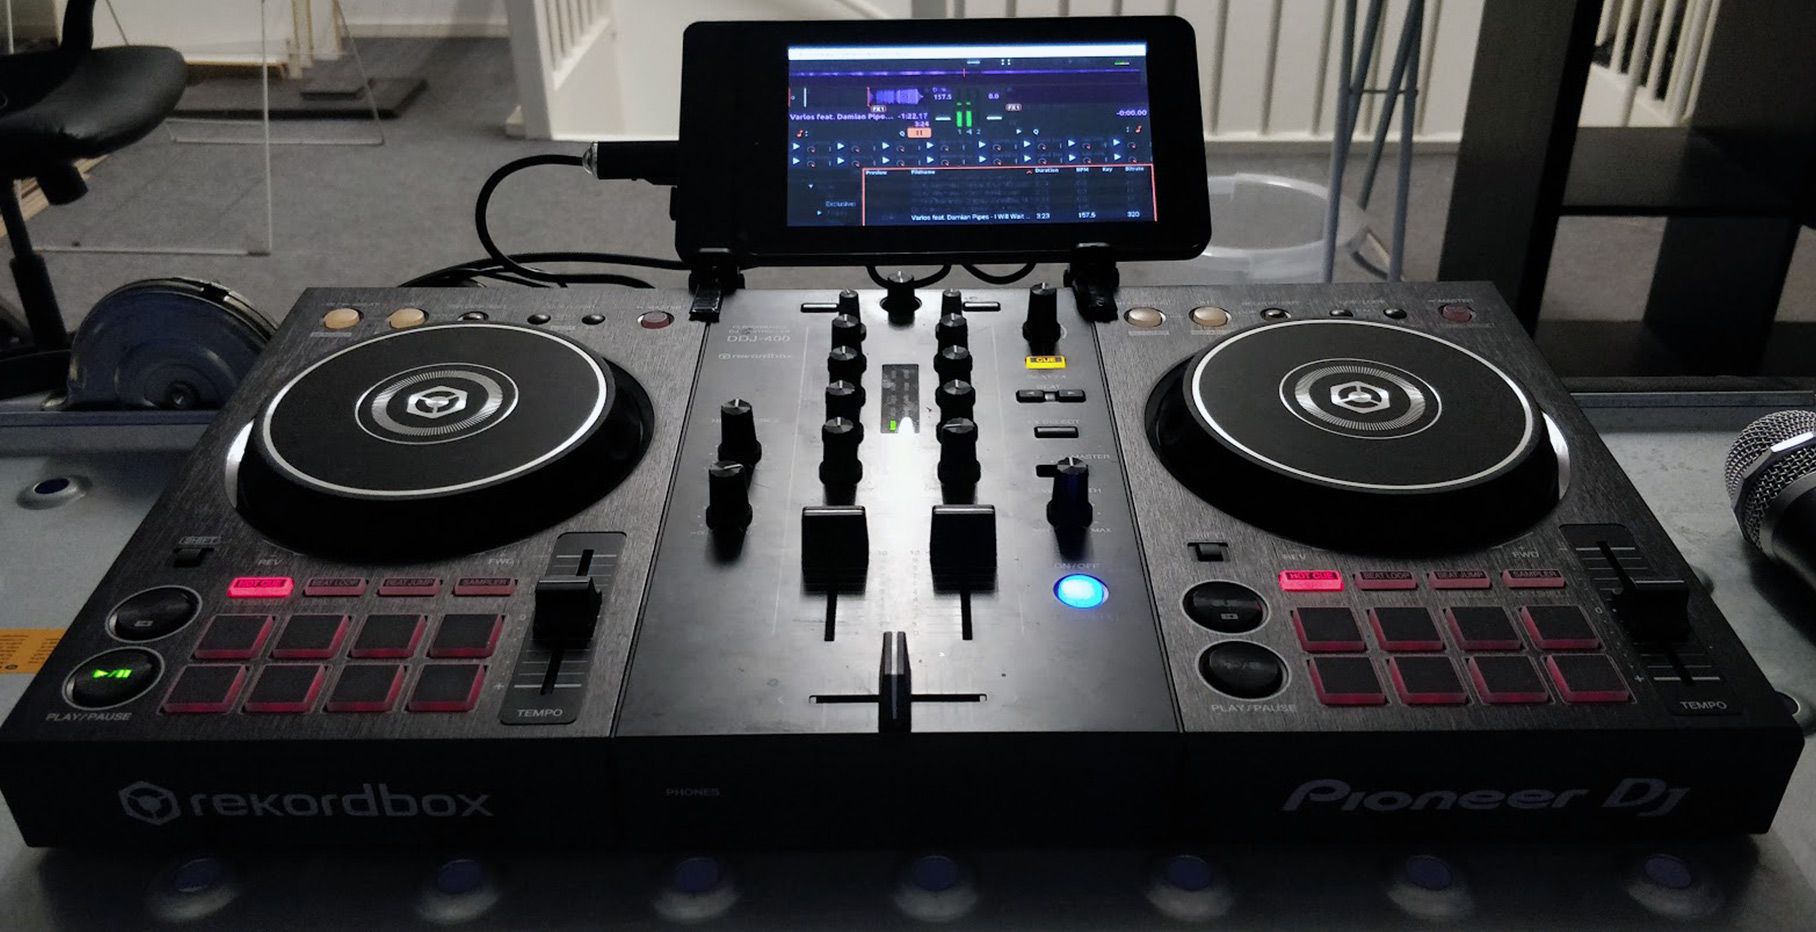
Check it out. TimewasterNL built a standalone DDJ-400 controlling Mixxx on a Raspberry Pi.
Here’s the details from TimewasterNL himself:
Materials used in building the standalone DDJ-400
The system I have built currently consists out of the following:
- Pioneer DDJ-400 Controller (€280,-)
- Raspberry Pi 4B+ (€60,-)
- Raspberry Pi 7″ Touchscreen (€80,-)
- SmartiPi Touch 2 Case (€30,-)
- MicroSD card (€5,-)
- USB-C Charger (€2,-)
- RCA Cable (€2,-)
Optional:
- Metal brackets
- Microphone
- Shorter USB-B cable (0.25m)
- USB Stick
How to build it:
1. I started off installing Raspbian to the MicroSD card, as this seems to be the most stable OS for Raspberry Pi’s today. Some like a realtime kernel for audio, but I find the advantage too small, so I went with the stock kernel.
2. Assemble the Raspberry Pi, the touch screen, and the case following the provided instructions. Connect the RCA cables to your audio interface and connect the USB-C charger to the splitter cable that goes to the Raspberry Pi and Touchscreen. Then, boot up the Raspberry Pi and setup all basic stuff. Preferably use a keyboard or do stuff over SSH 🙂
3. I then proceeded to install Mixxx by compiling it from source (on Github here). Running ‘sudo apt install mixxx’ in a terminal should also do the trick if you don’t want the very latest version.
4. At this point, Mixxx doesn’t have a mapping for the DDJ-400 implemented, but there is a mapping currently in development in the Mixxx Github PR’s (check it out on Github here). It is an XML and Javascript file that can be added to ~/.mixxx/controllers.
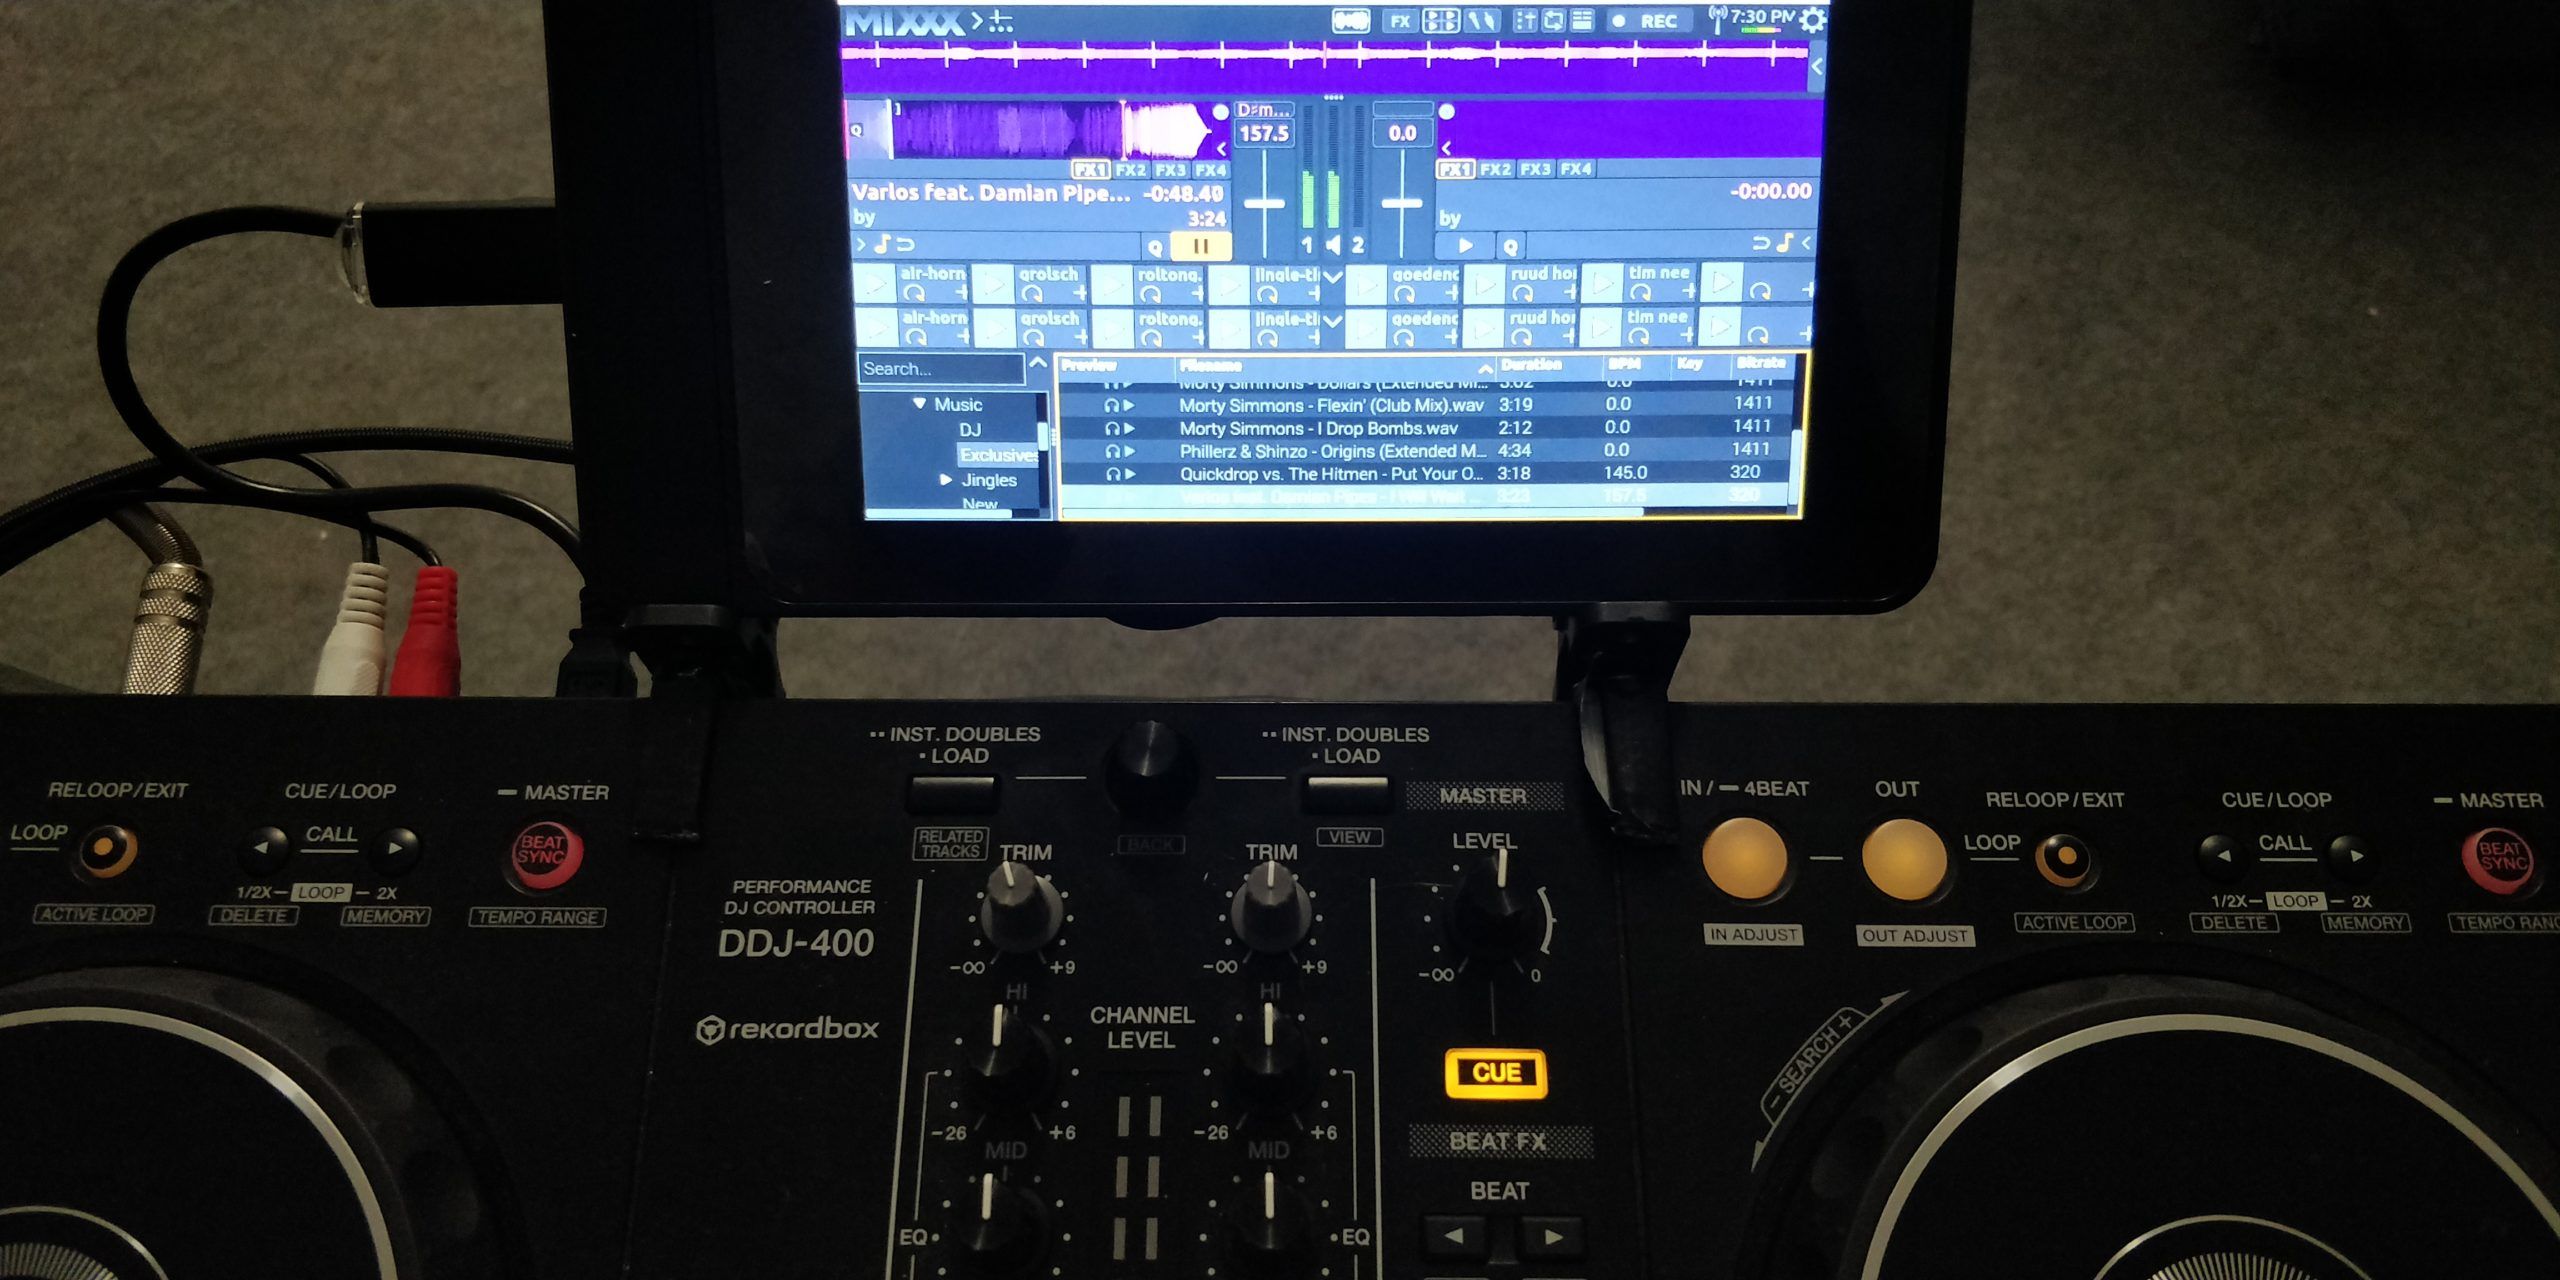
5. Make sure you have connected the DDJ-400 and the Raspberry Pi is able to access the device. Open Mixxx and select the DDJ-400 in the settings, as audio output (Master: Channel 1-2, Headphones: Channel 3-4) and for the mapping that has just been added manually.
6. There’s one more customization I wanted to do: making the skin resizable to smaller resolutions. This is so it would fit the Raspberry Pi Touchscreen, which is 800 x 480 px, properly. This can be done by editing the index file of your current skin used in /usr/share/mixxx/skins/<skin> and setting the dimensions to an appropriate resolution (take the top bar into consideration).
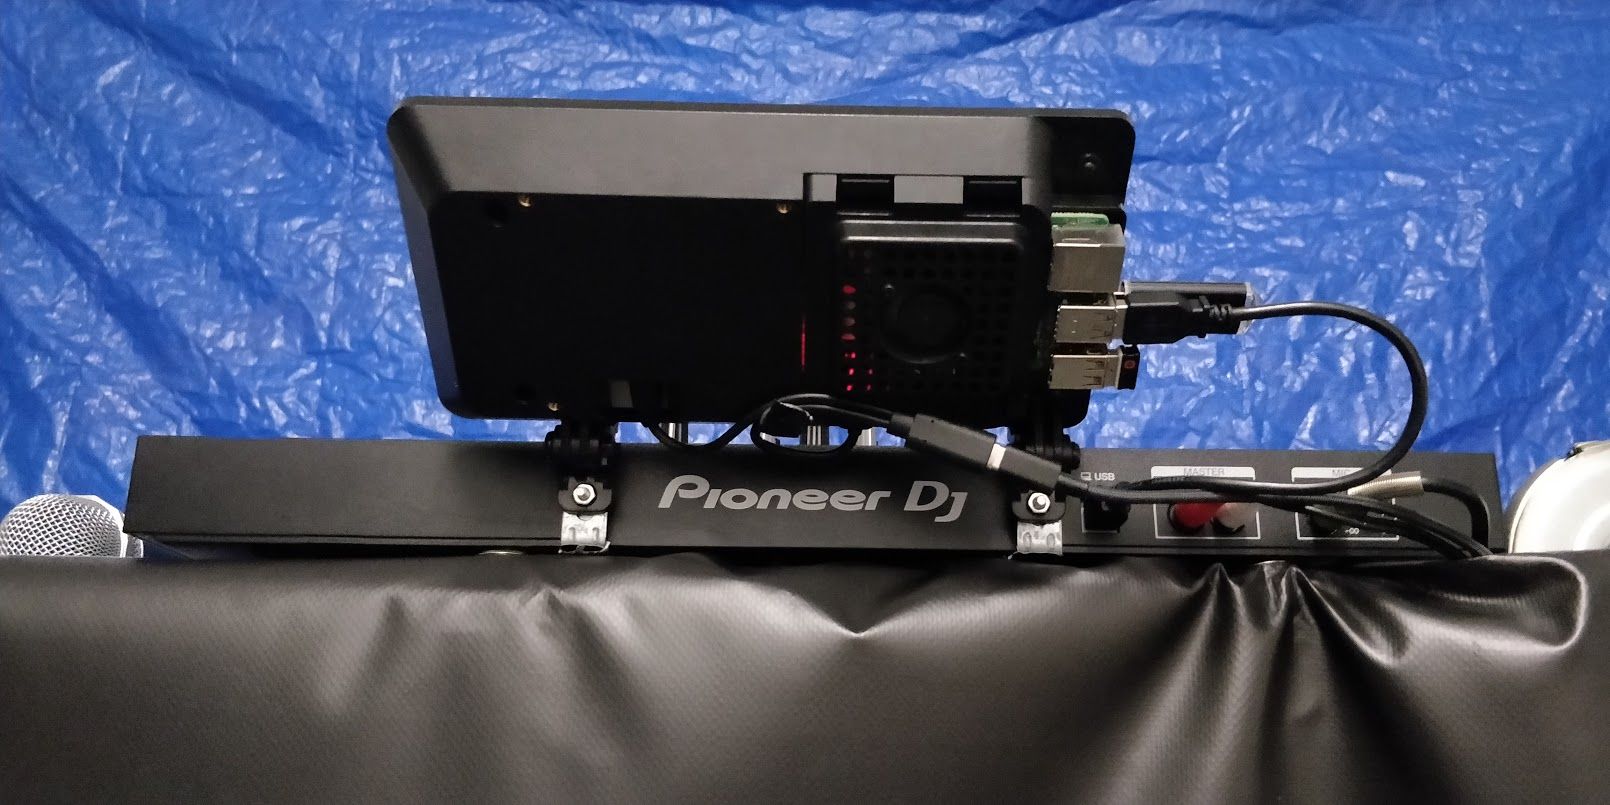
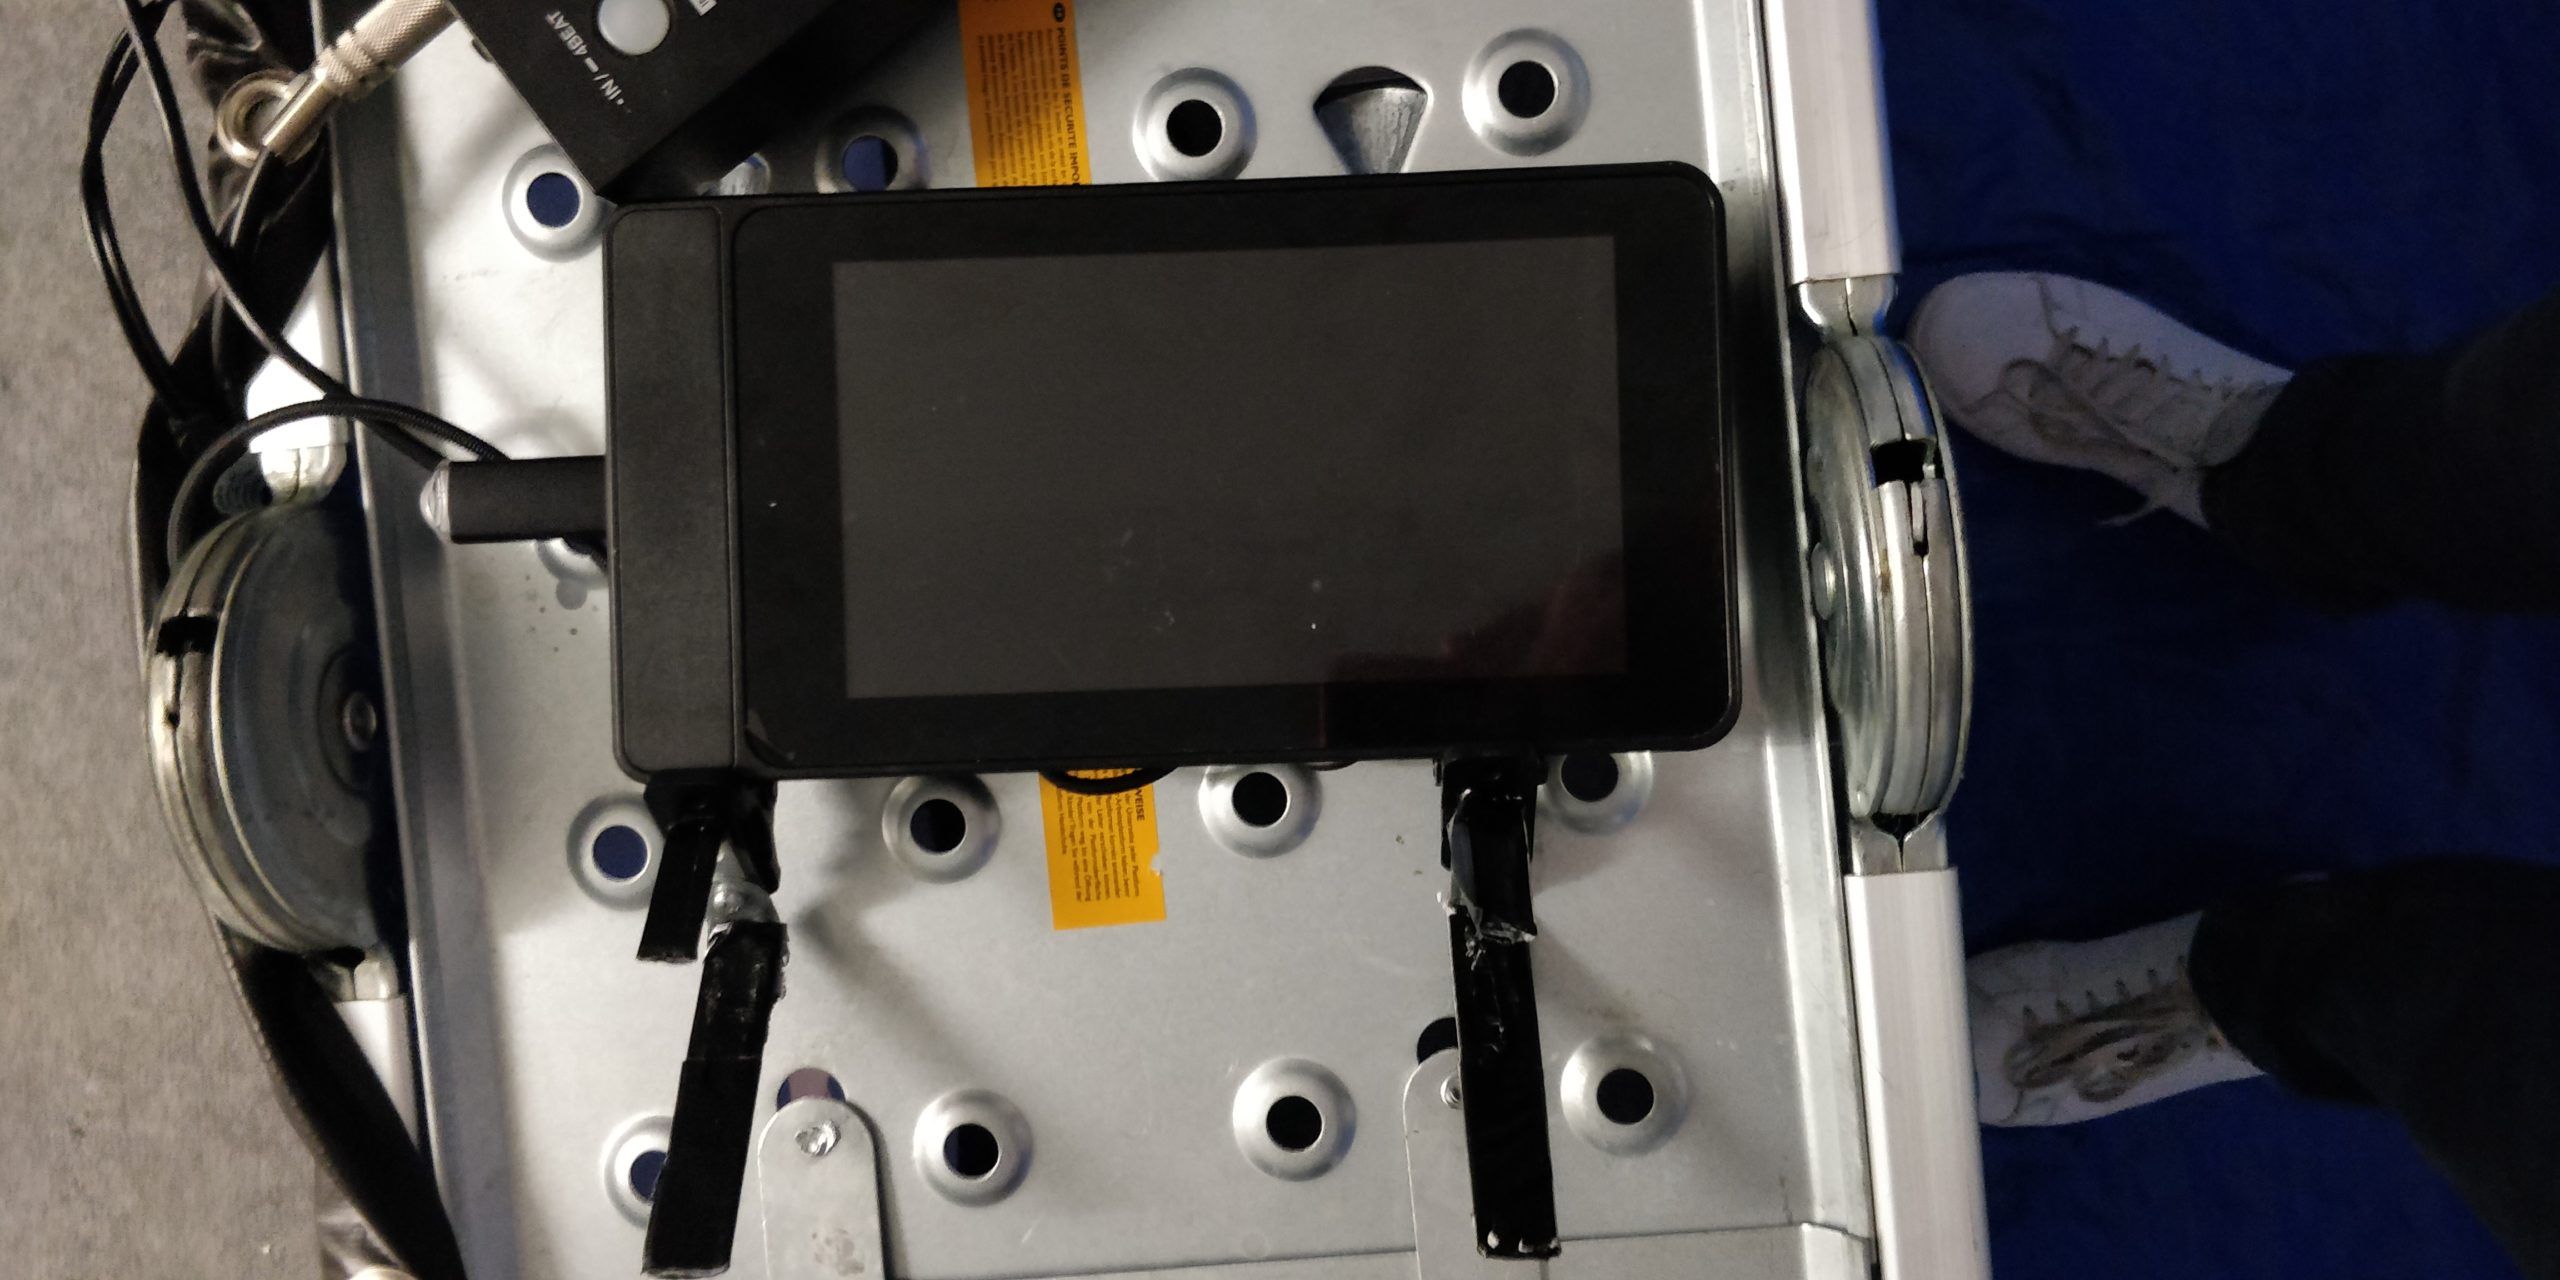
7. (Optional) I have added metal brackets instead of the stand that came with the case, so I can mount it to the controller and move it as one piece (see photo above). Also, I’ve used a shorter USB-B cable than the one provided with the DDJ-400, to avoid tangling with the other cables. Also, connect the microphone at this point if you’d like.
I have wrapped the metal brackets in step 7 in duct tape, so it wouldn’t scratch the controller (as this is the DJ’s job to do).
8. Transfer music to the Raspberry Pi. I have setup a Samba share in my local network with music on it, but I figured this sometimes stutters when playing bigger files, like the ones in WAV format. Optionally, use an USB stick for this.
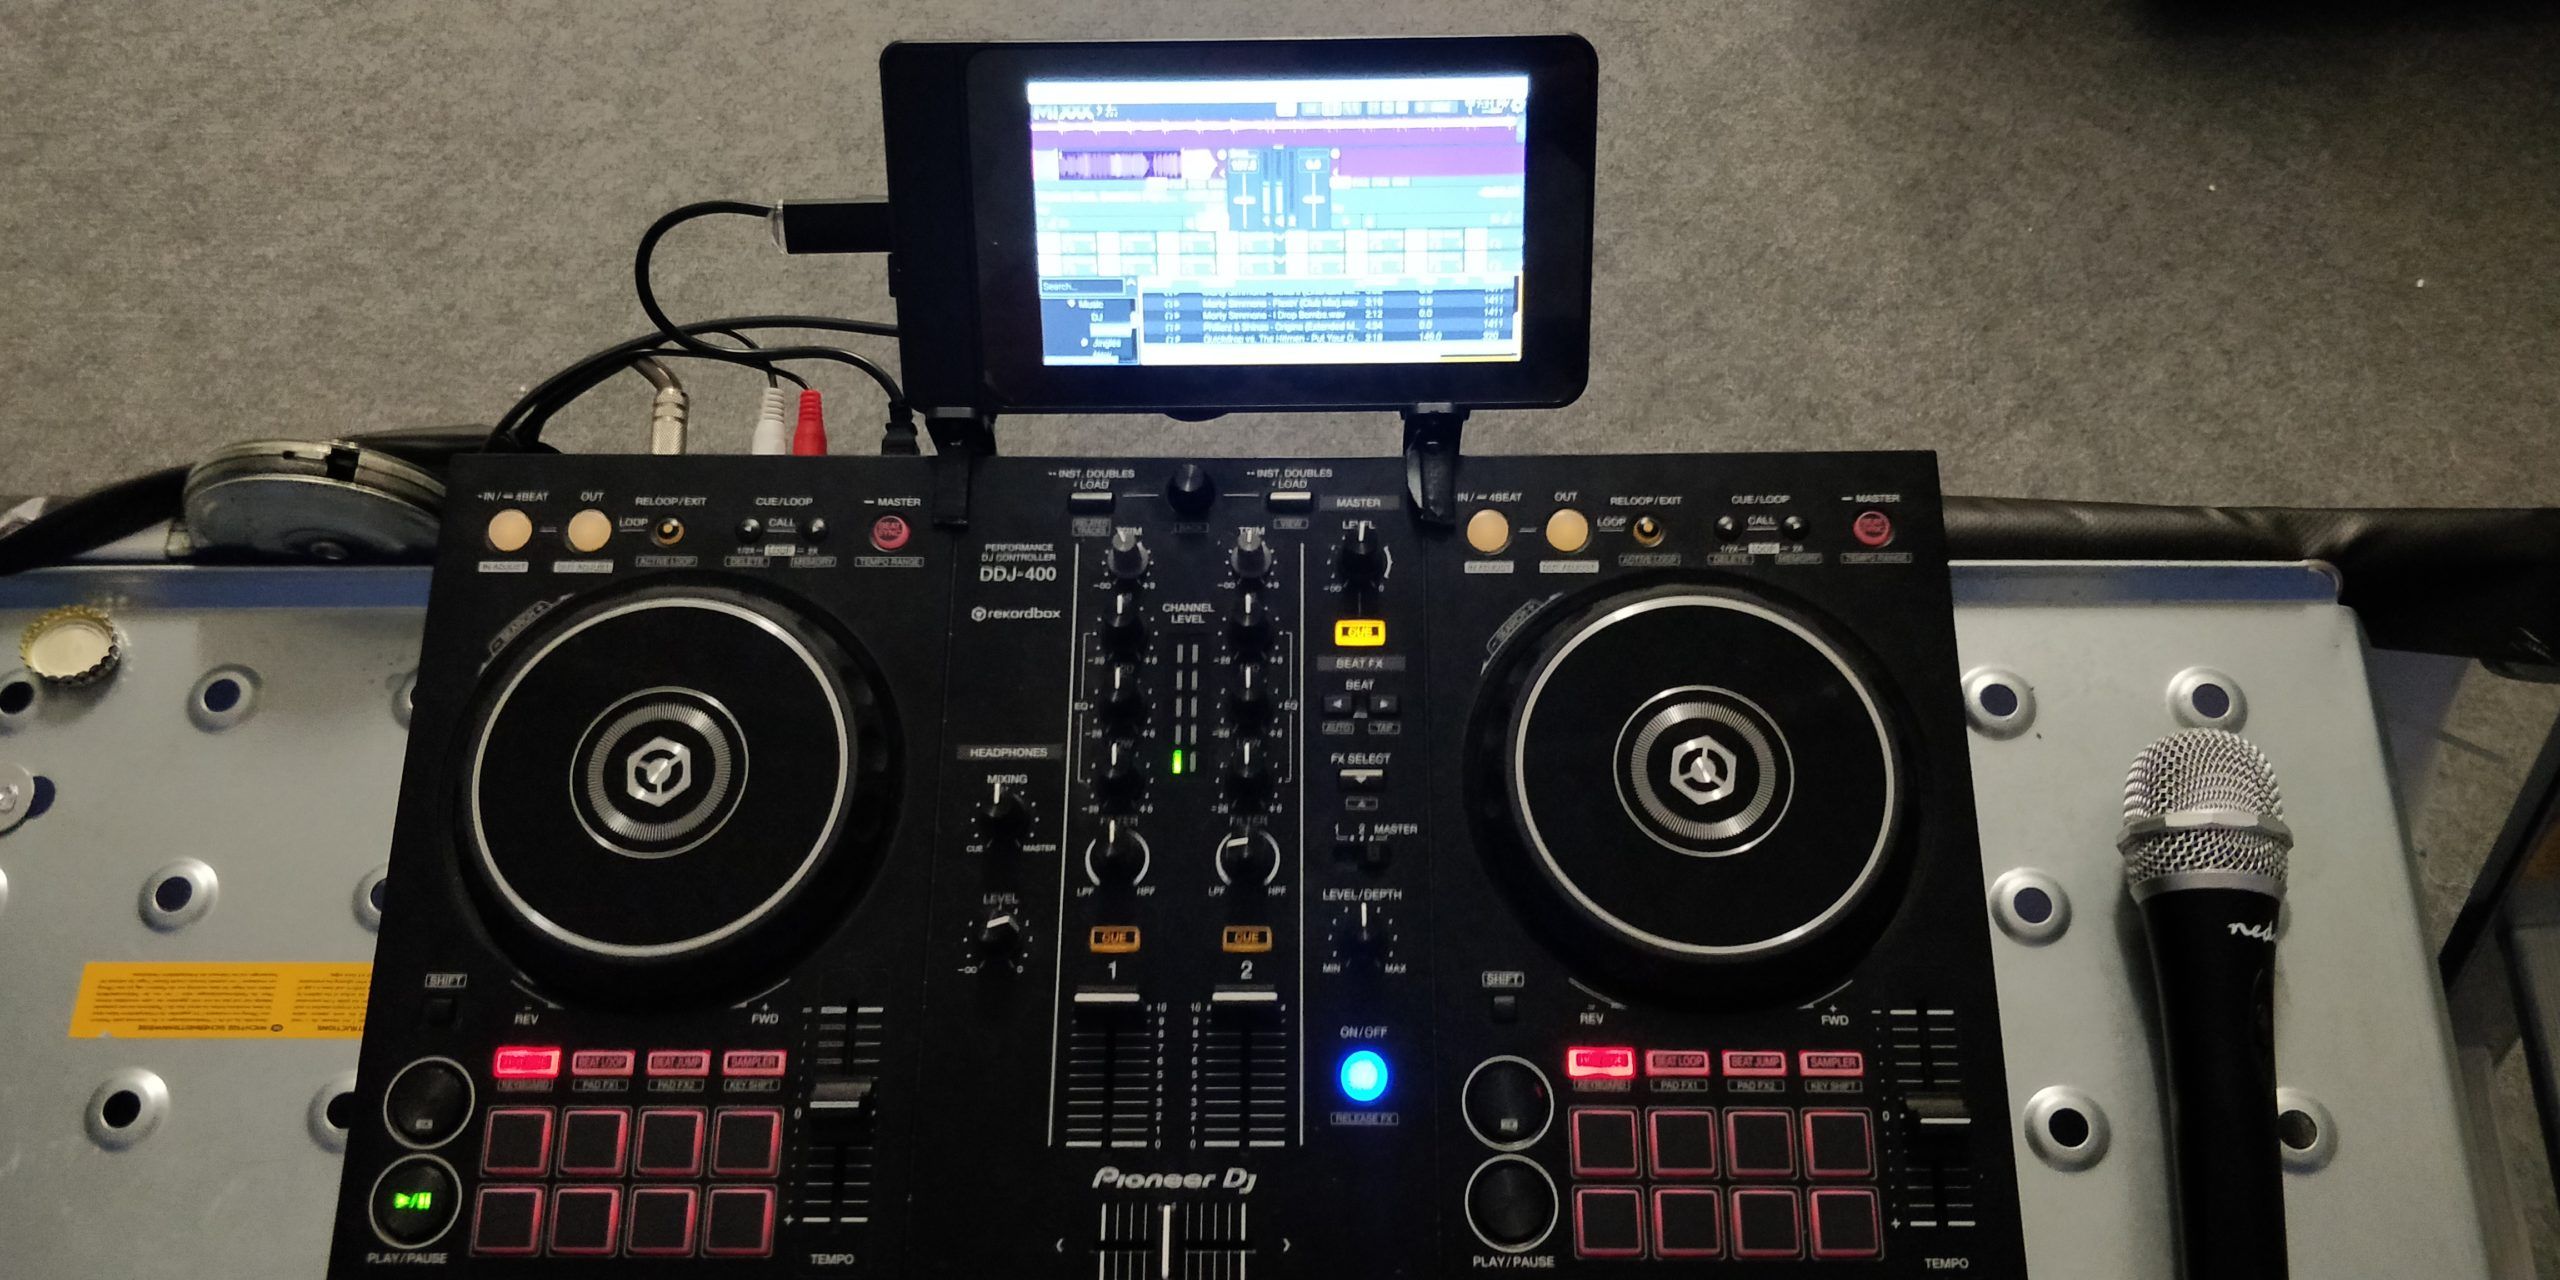
9. Done! Everything should work now.
Building your own – and what’s next:
If you run into trouble while trying to replicate this project, feel free to contact me (find me on Reddit at @TimeWasterNL). It has involved a lot of fiddling around, and may need more tips than I’ve included here.
My future plan for the project is to write a custom Mixxx skin that fits the Pioneer theme and removes a lot of space taken up by controls that are redundant to the physical ones. In my opinion, the waveforms and library are more important than having a big on-screen crossfader.
Keep in mind that this project uses a Raspberry Pi and not a full-fledged laptop. It can run into performance issues as a result, although I think it’s only noticable when loading the track and detecting the BPM and key. If performance is really bad, try altering some of your preferences, like the Waveform renderer. This is easily one of the most CPU-hungry parts of Mixxx, apart from the audio stretching. Another sacrifice that could be made in favour of performance is turning off Keylock when pitching tracks – but I see this as a last resort.
I have used this setup since the outbreak of the pandemic to play livestream shows affiliated with Hands Up Generation. Hands Up Generation is a promotional YouTube Channel where I’m a co-admin; we promote Dancecore and Hands Up music.
Check out TimeWasterNL’s work with Hands Up Generation – drop by if you like by heading here – and keep up with him on Reddit.


