DJ TechTools is excited to announce that the new firmware for the Midi Fighter 3D is now open for Beta testing. This unique hybrid HID/MIDI firmware allows for plug-and-play control of the Traktor 2.5 Remix Decks – an industry first. The firmware is absolutely free, and we’ve also got a new version of the Midi Fighter Utility that every Midi Fighter owner will be excited about.
REMIX DECK CONTROL
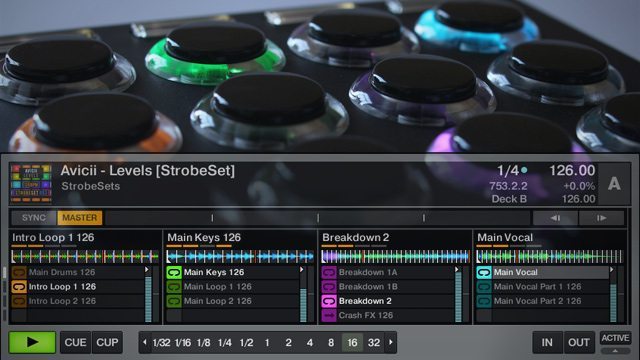
Traktor’s Remix Decks are limited to HID control via the F1 – meaning that you can’t easily map them out on your controller of choice. We’ve designed a special firmware for the Midi Fighter 3Ds that allow them to communicate with Traktor’s Remix Decks. Unlike most of the other projects out there, we’re communicating directly to the Remix Decks – not controlling the position of the mouse or another hack around method. This is real plug and play control with totally unique customizability. Ean gives us a simple walkthrough on how it works in the following video:
Getting this to work is surprisingly easy to set up. Once you’ve downloaded the new Midi Fighter Utility, follow these steps:
- Go to Tools>Alternate Firmware>Remix Deck – (your OS)
- The Utility will automatically load the Remix Deck firmware on your Midi Fighter 3D
- Start up Traktor and switch one or more of your decks to Remix Decks.
While you can adjust the functionality of each button in “HID Controls” in the MF Utility, by default, the Midi Fighter 3D has the following controls:
- Bank Buttons (from left to right): Shift, Reverse, Quantize, Sync
- Left Side Switches (from top to bottom): Page Up in current deck, Page Down in current deck, Bank Stop (hold it down and push a bank button, it stops that column of clips)
- Right Side Switches (from top to bottom): Shift Focus To Previous Deck, Shift Focus To Next Deck, HID Toggle (see below)
- Arcade Buttons: trigger the corresponding clip in the Remix Deck, and change colors/brightness based on actual clip color and if they are in a playing state or not.
One of the most interesting features that we’ve build into this firmware is the ability to turn off HID Mode on the fly and instead send MIDI – allowing you to quickly combine Remix Deck control with any other mappings for the 3D, like Flashflooder’s popular MF3D DeckGratMotion mapping.
Your Questions Answered Now:
Q: What about the Midi Fighter Classic and Pro models?
A: We’ve already heard from a number of users on the forums who want Classic and Pro support. We are going to add limited Remix Deck support to those units in one month (give or take a few weeks) – but the lack of multi-color LEDs and paging systems means that the control will not be at the same level as we’ve managed to accomplish on the 3D.
Q: Can you make my (insert controller here) work the same way with the Remix Decks?
A: Unfortunately, most controllers don’t have easily modifiable firmware – we wrote the firmware for the 3D, so it was a relatively simple process. We encourage you to check out this project on the DJTT forums aspiring to hack the Remix Decks for all controllers!
Q: Can I combine remix deck clip launching (HID) and custom mappings (MIDI)?
A: Yes! This is the most powerful and unique part of the 3D integration. You can layer additional mappings on top of the remix deck clip launching for total personalized expression. No other controller on the market offers that ability.
MIDI FIGHTER UTILITY 2: REDESIGN
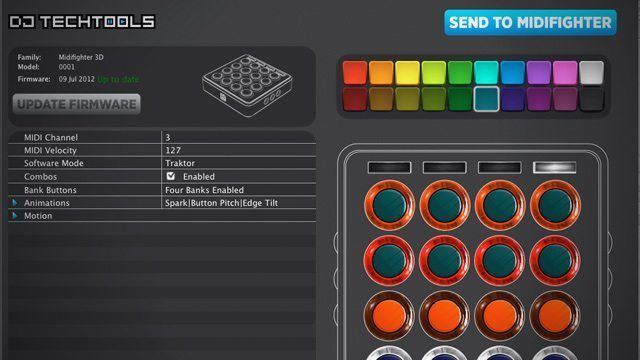
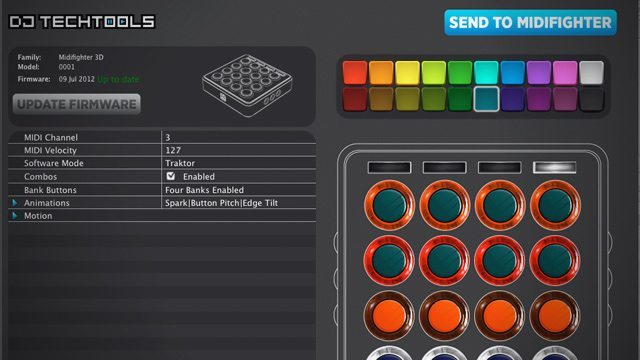
We’ve taken the Midi Fighter Utility and completely redesigned it for a much improved user experience. While functionally it’s very similar to the old utility, we’ve made the user interface much classier – something you’d be proud to show off to your friends.
Download Links:
NEW MIDI FIGHTER 3D MOTION SENSITIVITY
Finally, we’ve also added one important new feature to the Midi Fighter 3D, the ability to adjust the motion sensitivity on the controller. This has been one of the most requested items for the device since its launch, so we’re excited to wrap this new feature into this Beta launch.
The parameters you can adjust are found under the Motion section of the Midi Fighter Utility, as seen in the screenshot above.
Tilt Dead Zone: How many degrees of tilt before MIDI starts being sent
Tilt Range: The range that the MIDI CC is mapped across – in the example above, it takes 70 degrees of tilting to get the end of the range of the CC being sent.
Tilt Sensitivity: How responsive it is to the motion – if it should respond quickly or slowly to tilting.
We need your help making this project the best it can be! Visit this thread on the forums to share your feedback. A full PDF manual is also available in that thread.


