DIY: How To Add Colored Buttons To Traktor Kontrol X1

For most DJs, upgrading to the latest controller takes time and money that they don’t have – so today we’re sharing a DJTT reader’s low-tech solution for adding colored buttons to a Traktor Kontrol X1 MK1. Read on to learn how to do it yourself and customize this controller for a fraction of the cost of upgrading – and in just a few minutes!

DJTT Reader Phoenix Kraundler wrote to us at DJTT when sharing his Kontrol X1 light mod project – his steps are below!  

For some time now I’ve wanted to change the color of the buttons on my controllers and put my personal touch into them to make them unique. On the X1, I wanted to put different colors for different buttons for even easier navigation on the controller. The Kontrol X1 MK2 includes colored cue points and different color transport controls – but some home modification on the MK1 generation was all that I needed.

STEP 1: OPEN THE CONTROLLER

Keep track of all of the screws – use a small bowl or cup!

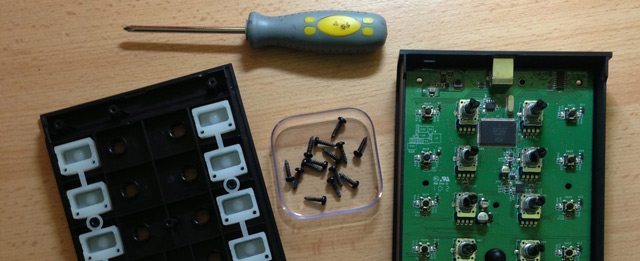
Originally I wanted to change the actual backlights behind the buttons by changing them to different colors, but when I opened the controller I realized that it would be harder than imagined. If you don’t have confident soldering experience and spare color LEDs laying about, don’t try to mod the circuit board.

Opening the controller just involves the screws from the back of the X1 – but note that opening a controller like this will likely void any warranty on the unit.

STEP 2: ACQUIRE TINTING PAPER / FOIL / GELS

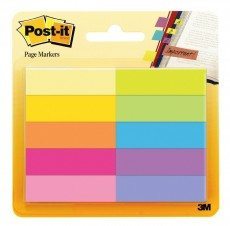
I decided to put a thin foil in different colors over the existing light to would change the colors of the buttons. I wanted to change my play button to blue, and cue button to pink. For this purpose, I used a small adhesive foil which normally serves for bookmarking the pages in a textbooks. You’ll want to make sure the material isn’t too thick in order to allow light through – so other good options include light gels or cello paper.

Shopping list: Here’s a set of Post-It bookmarks on Amazon that could work nicely – with loads of color options for just $3

STEP 3: MEASURE, CUT, AND PLACE

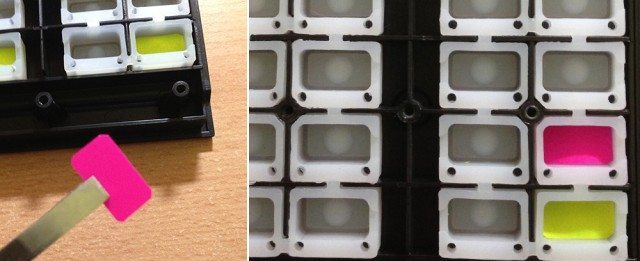
Cut the paper down to the right size for the button you’re changing – and remember that the inside of the button is smaller than the face of it. I cut the bookmarks into small pieces, and inserted them to fill the rubber space where the button is as shown above.

You’ll still be able to see a slight amount of the original color on the sides, so if you wanted to go above and beyond, you could likely add additional even smaller pieces to fix that – but check the results first and see if it seems necessary.

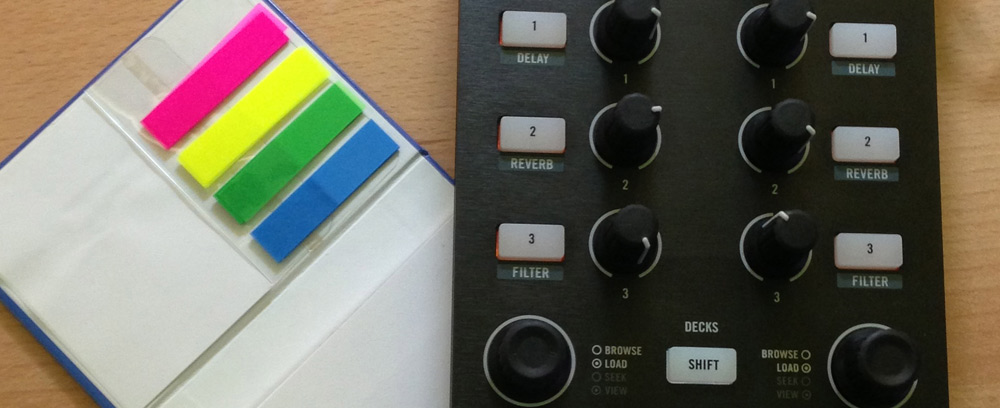
STEP FOUR: COLORED BUTTONS!

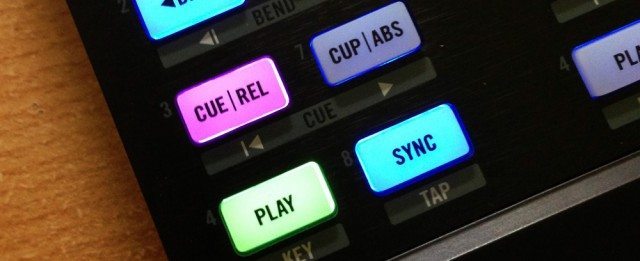
Close up the the controller, connect it to USB and “voilà”!  In general, this will work with many controllers that have rubber buttons in this style – but be aware that not every controller  has easy to access buttons like the X1 MK1 does.

Have questions about this mod? We’ll answer in the comments – or you can reach out to Phoenix directly on Facebook. 

colored buttonsDIYdiy modsKontrol X1Mod
Comments (49)
Add Comment
  • Mike Graham

    This didn’t do much to the colours on my x1. Just turned the buttons lighter and darker shades of blue. I used yellow, purple, pink and green foil .

    • Mike Graham

      I did get this to work now buy doubling the foils. 2 pieces per button did the trick

  • DJ HID

    niiiiice
    i’m gonna do this

  • Ales

    You should try this with florescent markers or spray paint. This way you can color the sides of the button as well.

  • Sorin

    Here is a Video, check it out that might help those who don’t understand how its work

  • Hairy Styles

    How about using food colouring as an alternative method, would that work? Syringing tiny amounts of the dye into the caps, leaving, and then washing and drying (Obviously making sure that it’s perfectly dry). I imagine the colours would be more vibrant due to the light not having to travel through a piece of paper, but I’m not sure if the dye would bond to the silicon?

  • udib

    I can’t seem to open it for some reason.. all the screws are out but it just stuck .. :/

    • udib

      here is the picture

    • UGH

      There is 1 hidden screw behind the sticker on the back of the controller, the article doesn’t seem to mention it. Please revise accordingly.

  • KingRichard1st

    Now this has got to be one of the best from DJTT – Phoenix, this is simply awesome! Even though I don’t own an X1, what a great mod. 15/10

  • DJ_ForcedHand

    I was curious as to which controllers might be able to handle a “DIY upgrade” as typically, the controllers use a driver (with firmware) to control the LEDs. This solution adds one new color as an option, but I think most people will become unsatisfied very quickly with that color and want to dive into the multi-color option. I’m sure someone is working on an “internal solution” that will allow users (with some considerable care and work) to change their LEDs to multi-color… and I think the majority of the people reading this article were looking for that solution rather than adding (what we call in the A/V world of lighting) a “gel” light to changing the color of a light. Remember than anything that changes the color of a light in this fashion will also reduce some of the brightness… that’s just how the physics works.

  • FJM_86

    I thought about changing colors to my X1 Mk1 as well a long time ago, and wondered if I could do it by coding instead of foiling them…I had that idea because, for example, when you turn the device into MIDI mode, the SHIFT botton turns green. I thought that it was just a matter of programming (which, of course, I didn’t know how to do…)…am I completely wrong here?!

  • Chaser720

    NI’s secrets have been revealed! ha

    But great idea and guide. Will definitely be trying this one. Thanks

  • Fabrício Mariani

    I did on my X1 and doesn’t seem like the last one :'(

    • 12inch

      So I must be really daft, but I’m not quite understanding this.

      The LED’s are actually coloured on the circuit board and the rubber buttons are a hazy/clear colour. Unless the LED’s are white, how am I going to be able to change the colour?

      And yes, I did try it with some coloured paper and coloured plastic – both of which just made the blue duller/less intense.

      Confused….

  • Guest

    I did on my x1 and doesn’t seem like the last one 🙁

    • Concerned

      So it’s not as pretty? How does it look and feel?

  • Jean Marc Lavoie

    too bad the S4 has black buttons

    • antifm

      so make your own button covers and place a clear or colored film under them with the text you want on it.

      • Jean Marc Lavoie

        i don’t have the equipment to make/mold buttons for a controller, unless it is much easier than I think.

        • DJ_ForcedHand

          I don’t know if these buttons are black all the way through or if there is a thin skin on the surface. If there’s a thin skin of black on the surface, you could take a mild (high grit count) sandpaper to them and remove the black skin… again ONLY if there is a thin skin (also note anything printed on the button will most likely be removed during this process).

          You could try ordering the new button replacement kit and replace the older version buttons with the new style… these WILL have the printed functions on the buttons.

          As DJTT is an authorized retailer, they *MIGHT* be able to order replacement parts for the new button pad section (I’m not sure this is something that N.I. would allow though).

    • Oddie O'Phyle

      i don’t get it… this is a great fix for white LED buttons to make life easier at a dark party or in a dark dj booth at the club, this does not apply to the S4 mk2 (which has tri-color LEDs). if you don’t like the black buttons, sell it and buy a new one with the shiny buttons. I’d rather remap a couple buttons for the same functionality and spend the $500 on something useful.

      • Jean Marc Lavoie

        because this doesn’t cost $500 to do and black buttons are harder to so see in the dark

        • Oddie O'Phyle

          this tip is for CLEAR buttons…

  • XaxA

    Can the same strategy be used on the Maschine Mikro mk1?

    • DJ_ForcedHand

      Those LEDs are bi-color and whatever you place under the buttons will affect the the orange / blue light coming from the LEDs… I wouldn’t suggest it.

  • electroself

    For those who can make the effort, sell your X1 MK1 and invest little money and buy a X1 MK2. I did it and I am super happy, it works a lot better in my setup and the touchstrip rocks.

    • Traktor Tips

      do you find it more responsive?

      • DJ_ForcedHand

        I just tried it out and I wish that touch strip was on my Twitch. It’s very accurate and very responsive.

        • Traktor Tips

          Yeah I look forward to getting my hands on it someday!

  • laszlomag

    Now this is awesome. Pointless, maybe. But still awesome.

  • Jake Hale

    this is clever, i have some other controllers i want to try this with- an old hercules might get dusted off.

  • chris

    niceee!

    pimp the sound-maker!
    (when you wrangle your eyes, maybe some other synapses will switch on 😉
    ——
    Off topic and btw
    i saw some “arcadia spectacular”
    this is an thrill.

  • IanRaWdriguez

    What a quick, cheap way to personalize! Great DIY, indeed..
    I’ve been on the fence about buying some Chroma Caps, but I think now I might just go for complimenting caps and LEDs.

  • Ean Golden

    I can’t wait to try this on my X1!

    • ChaZ

      Since when DjTechTools.com’s front-end became responsive?

      • Dee Jay Park

        Since people started complaining that Ean was losing time doing “other things” I think

  • antifm

    This is kinda nothing new. Way back in 1992 i had my first car, and of course i bought an aftermarket radio for ti too. Well my friends and i (with their new cars and radios) got bored quickly with the simple white buttons, so we opened the faceplates of the radios, and found out what to do. We did the same thing done in this article. Nice to see it still stands decades later….. wow i just felt old

  • Hiren Patel

    Next to figure out: How to replace Kontrol S4 mk1 buttons with coloured ones.

    • Thomas C Montano

      yo would need the actual buttons from the MK2. The ones on the 1st controller are solid black plastic, the ones on the mk2 are clear rubber.

    • Oddie O'Phyle

      they already are coloured coded, stopped loops show as red, active loops are green and cue points are blue.

  • bigbeatzz

    This is a dope DIY. Simple and straight forward.

  • Rayalon

    Very creative and cool.
    Thanks for sharing 🙂

  • gabivegas

    cool

  • X1 Devotee

    How do the buttons feel? Are they still responsive and squishy? I wanna do this but i don’t want to sacrifice the feel of the buttons,

    • Phoenix Kraundler

      The feel is the same as before. This foil is so thin, you can’t feel it under the button.

    • ChaZ

      How to feel the button from ‘underneath’?