
We’ve heard from a number of DJs who have aging or heavily used Kontrol S4s with issues on their channel faders who no longer have a warranty on the unit and want it to be useable again. Today we’ve got a tutorial from guest contributor and pro audio service engineer, James Oliver, on how to open up a Kontrol S4 MK2 and switch out the faders.
Please note: as with any DIY repair or modification, opening up your unit will void any warranty it carries. DJTT and the author are not responsible for any damage you do to your S4 in the process of following this article and replacing the faders.
A lot of DJs who have put a lot of hours in on their Kontrol S4 (of either generation) have reported seeing some issues with their faders. There’s nothing wrong with the design, but after heavy use, these faders occasionally eventually start to develop issues. We’ve seen MIDI ghosting, dead faders, and of course the classic environmental damage of dust/dirt/drink.
Native Instruments is helpful for warranty repairs, but beyond that they’ll charge you for repairing any damage out of warranty – this includes if you’ve voided the warranty due to your own damage. So if you’ve got an S4 that needs some love, this guide will help you get to those faders. Please note you’ll need to have (very basic) soldering skills!

Log in / sign up (free) to get this special download: Full resolution photographs of the entire Kontrol S4 disassembly process zipped up into a quick reference folder. Click to download now for free!
Equipment Needed:
- Soldering Iron
- Solder
- Solder sucker
- Replacement Channel Fader
- Phillips screwdrivers of various sizes
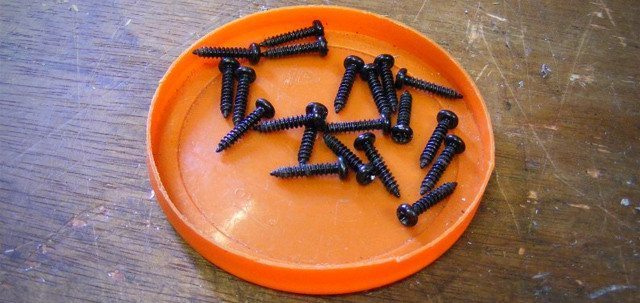
- A small dish/container to keep the screws from disappearing
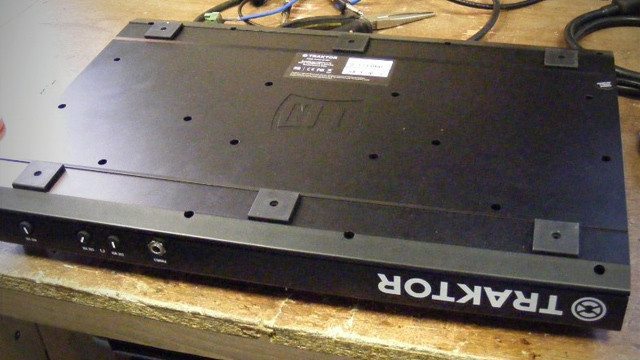
First flip the unit onto its front (we recommend placing DJ gear piece of foam if you invert it to prevent accidental damage) and remove all the screws from the bottom using a standard medium-sized Phillips screw driver. There should be about 21 screws in total – and note that one of them is slightly obscured by a rubber pad.
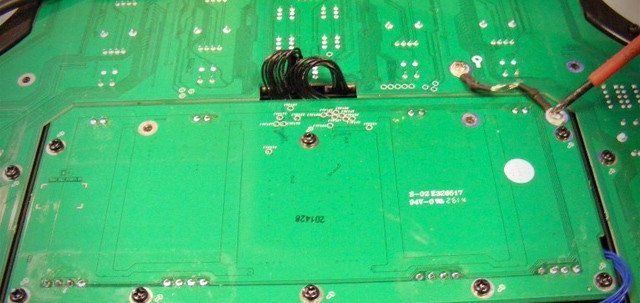
Then evenly lift off the bottom panel away from the rest of the unit. This panel should come off easily. If not, double-check that all the screws were removed – it’s easy to miss one! Once the panel is off you’ll see this:
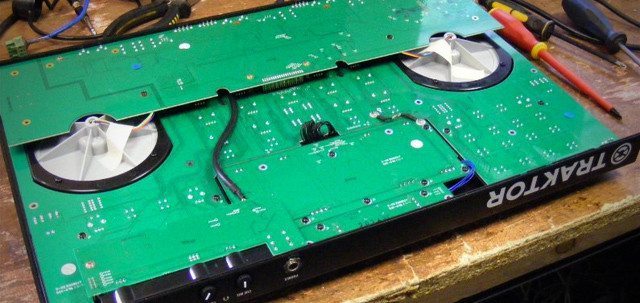
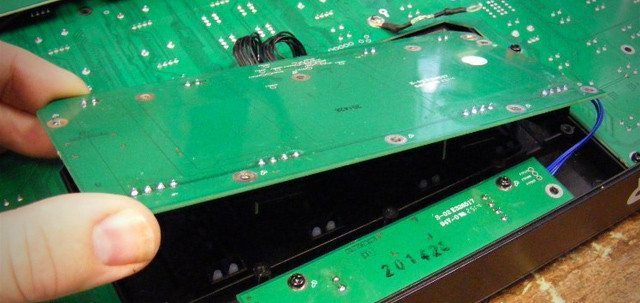
At the front middle, there is a PCB board which the faders are mounted on. This is what we need to remove, but before that we have to remove the board above it (that houses the headphones port and knobs). This is quite easy when you know how.
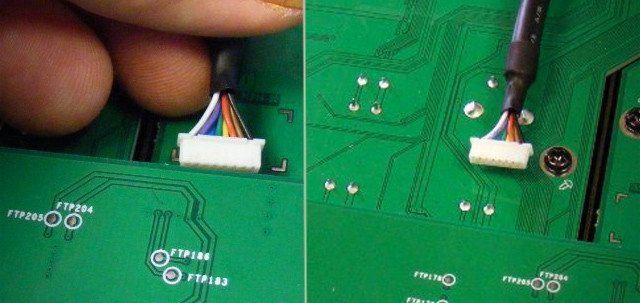
First disconnect the black cable which should just pull out from its socket:
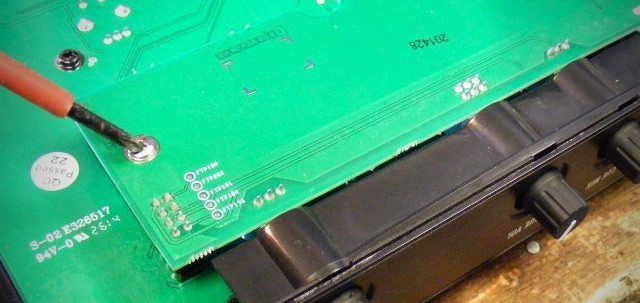
Next, remove the silver screw as indicated below with the red screwdriver. This will need to be a smaller Phillips screwdriver than the one used for the bottom:
Remove the black knobs by simply pulling them off:

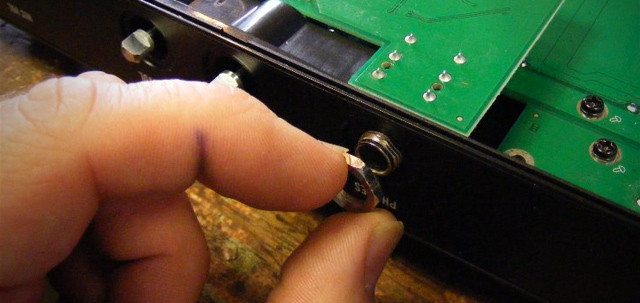
Next, remove the nut that secures the headphones socket in place. Use a pair of pliers to first un-tighten the nut then simply unscrew it with your fingers.
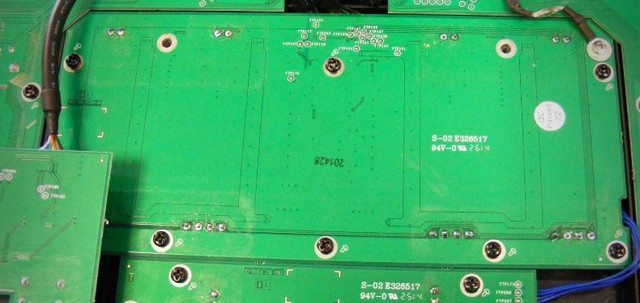
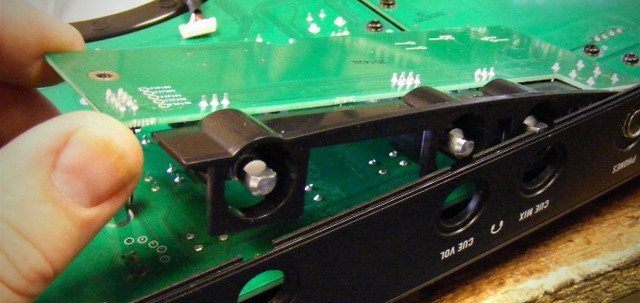
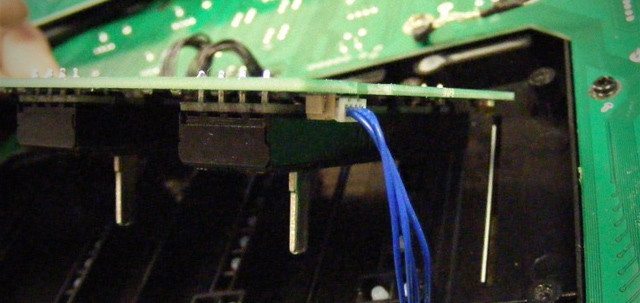
Now the board is ready to be removed, however take note that there is a connector at one end of the board next to where the silver locating screw was, shown here:
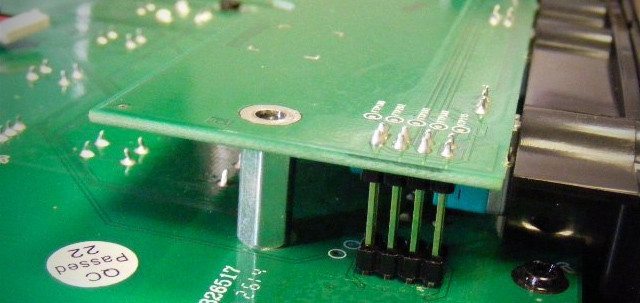
Gently lift up the board at the connector and it will unplug and lift away, taking the black plastic spacer with it. Note that there are guides that the spacer will fit into when you put this board back – no cause for alarm.
Once lifted up, you should easily be able to remove the headphone board out of the way. When you put it back later, you can reconnect the black cable first (the cable with the coloured wires that we unplugged first), then locate the headphones socket into its hole, and then lower the board back into place, making sure you line up the black plastic spacer and then lastly the holes for the connector to fit into on the main PCB below. If you line everything up, you shouldn’t need to force anything, so just take your time.
Next we need to unscrew the earthing strap on the channel fader PCB. Do so at one end, as indicated with the red screwdriver here:
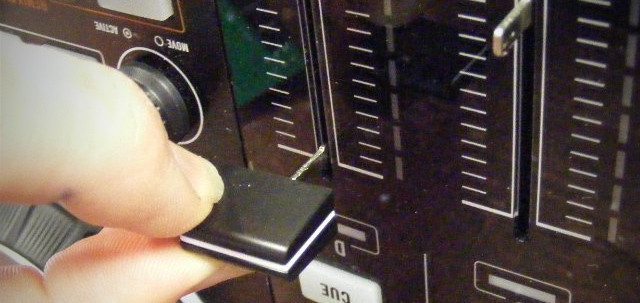
Then remove all the channel fader caps on the top of the Kontrol S4. These just pull off, but you could use a flat bladed screwdriver at the bottom of the fader and twist it gently if they are a bit tight, but be careful not to scratch or damage the plastic as it marks very easily.
DJTT protip: if you have issues removing faders or knob caps and don’t want to use a screwdriver, use dental floss! Wrap it around the base of the fader/knob and pull the cap vertically (not laterally) and it should come off.
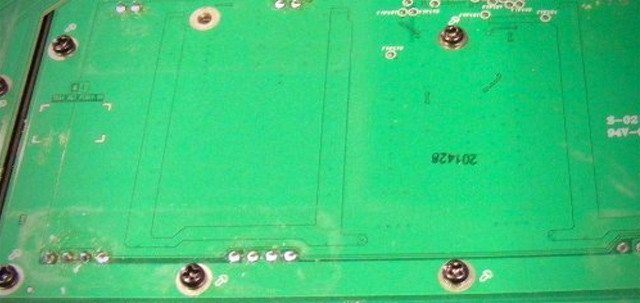
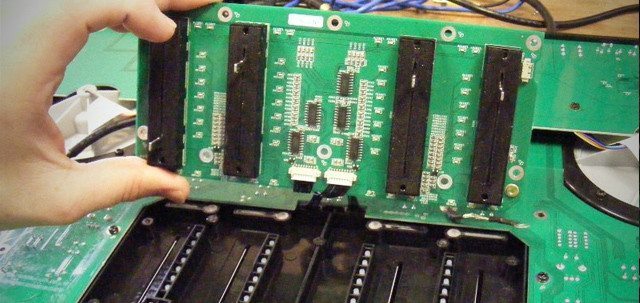
Next, remove all the black screws from the channel fader PCB. There are eight in total, and have a little screw symbol next to them. Note that there are two holes that have no screw symbols in which should be left empty. These are two of the holes used to attach the rear panel, so remember to only put screws in the holes with a screw symbol next to them!
It should then lift out like this, but don’t lift it all the way out as it is still attached to a few wires:
Remove the blue wire, which goes to the crossfader PCB. It just unplugs:
You should be able to lift it a little more:
And then unplug the two black cables – they also unplug straight out – as shown here:

You can now lift out the board completely.
To de-solder a fader, you’ll want to find all the solder points on the PCB (four on one end, two on the other) and remove them using a solder sucker. Be sure you’ve got decent soldering skills for this part- you risk damaging the printed circuit.
For removing these larger faders, it helps to use a nice hot iron (a 60w), then introduce fresh solder, keep it hot with the iron for 5 seconds, then use the solder sucker directly onto the point. Introducing solder helps to flux the existing solder and makes it easier to remove all the solder. If it doesn’t do it the first time, introduce some more solder and try again. You should be able to gently apply force between the fader and the PCB once all 6 solder points have been de-soldered.
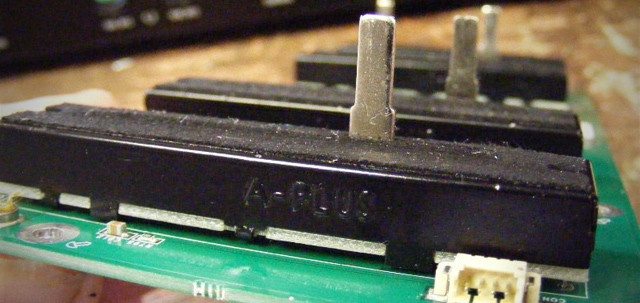
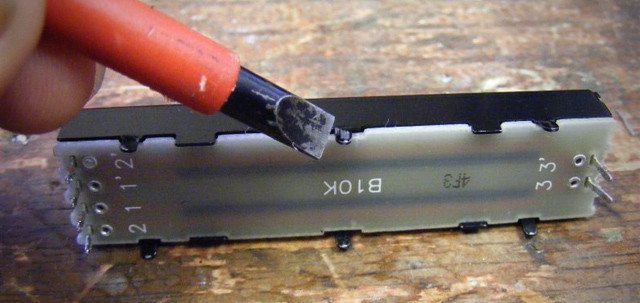
The fader looks like this:

At this point you have a choice – replace or repair your fader. Replacing the fader is fairly cheap if you can find a replacement part – they’re dual linear potentiometers, made by Alpha, are a 45 mm B10K type. There’s no one reliable source for them, so check eBay and consider asking your local repair shop. You shouldn’t pay more than ~$10 at most for these.
For this S4, which had beer spilt in it, I removed all the faders and cleaned the black carbon track inside of the fader assembly with lubricant and a soft cloth. Don’t scrub it vigorously as it will take off the carbon and your fader will be unable to live again.
This fader had to be stripped down completely and the metal rails removed and cleaned with isopropanol (don’t use this on the black carbon, it’s too harsh). I even used my fingers to remove residue off the carbon track.
To disassemble the fader itself you need to gently straighten the 6 black lugs on the bottom of the fader like so:
The inside should look like this:
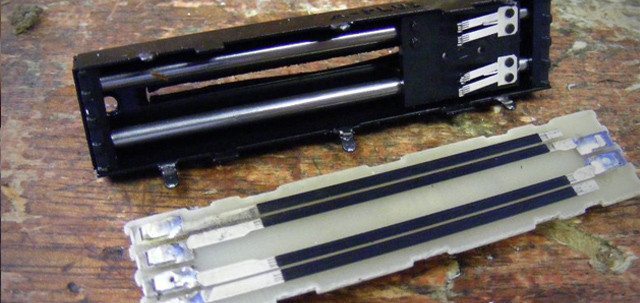
The rails will pop out either end, take careful note of the correct way round when re-assembling the fader. The wipers should be the opposite way round to this picture so the wipers only travel both extremes of the black carbon track.
If you decide to clean your existing faders, then before soldering them back in place, use a multimeter to check there is even travel (with no drop-outs) by slowly moving the fader one end to another, be sure to check both tracks as this is a dual fader.
Put your meter on the Ohms setting – if it’s a manual meter set it to 20k Ohms and connect one terminal to pin ‘3’ and the other to pin ‘2’ . Best using the old style meter with a needle.
To reassemble the Kontrol S4, first solder your faders back on, and then follow the steps in reverse order – re-attach the channel PCB and cables, then the headphone PCB, and then the rear of the unit. Make sure to get it right and read this article in reverse!
James Oliver is the owner of Musicview Services based in Adlington Chorley in the UK. He worked as an electronics engineer before spending 10 years in the music industry as a studio engineer and musician before starting Musicview Services in 2009 to service and repair audio equipment. The company prides itself on a strong reputation for quality servicing to component level.
Have another stripdown/repair tutorial you’d like to see here on DJTT? Let us know below and we can make it happen!


