Want to make your DJ mixes that you record in the club in front of an audience sound professional and live? Guest contributor Cameron Lichtenstein shares what you need to get the cheering crowd into your next mix. It’s a cool effect that makes people listening to your mix feel like they were right there on the dance floor.
Intro
So you threw down a killer set this weekend. Sweet! But the magic doesn’t stop there. More than ever, DJs are posting recordings of their sets so fans can listen back and relive them.
One of the best ways to give your listeners the feeling of actually being at the party, in the middle of the dance floor is to incorporate ambience from the crowd and the room. Done right, it will breathe new life into your recordings and set them apart from mixes done at home or in a studio. The good news is that it’s relatively easy to pull this off with a few tools and a little practice. All we need to do is capture recordings of the mixer and the room ambience, and then combine the two recordings with some post-processing.
The Gear
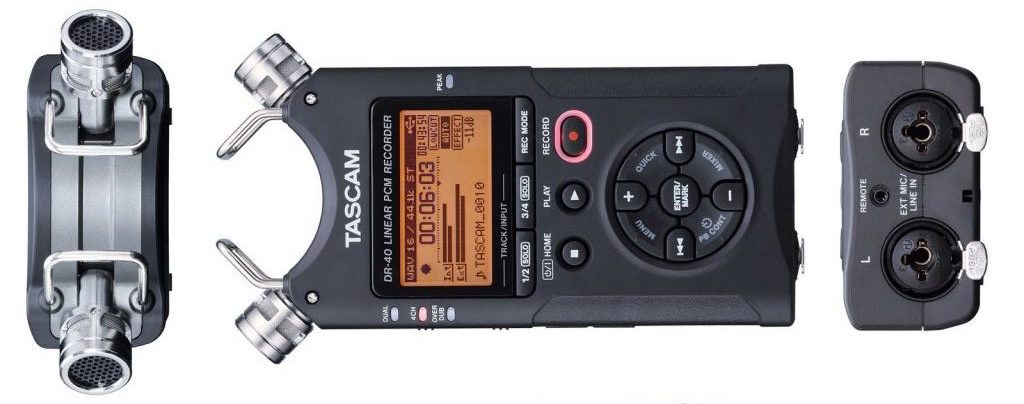
- DR-40 TASCAM (~$176 on Amazon)
- dual 1/4” TRS to RCA cable
- SD card
- USB-A to USB-B cable + outlet charger
- Ableton Live (or any DAW)
Recording Device
For capturing the recordings, I recommend a Tascam DR-40. It’s versatile – with both a line-in input jack and field recording microphones built-in. It’s one of the simplest ways to get a quality recording and is well worth the price tag. If you decide to go with another recorder, just make sure it has plenty of built-in headroom. You can always make a recording louder in post, but you can’t un-distort a clipped signal.
Cables
If using a TASCAM with most setups (including club standards Pioneer DJM-900NXS and Xone:92 mixers), you’ll need a 1/4” TRS to RCA male cable that’s long enough to position the recorder in an ideal place for the mics to record the room.
Tip: If the DJ booth is right next to the dance floor, the recorder may pick up audience chatter, so be aware of the direction the microphones are pointed. If you happen to catch a few words of a vibe-killing conversation right at the dopest spot in your set — well, that sucks. But have no fear! You can edit it out in post. I find angling the microphones up toward the ceiling helps with this.
Power
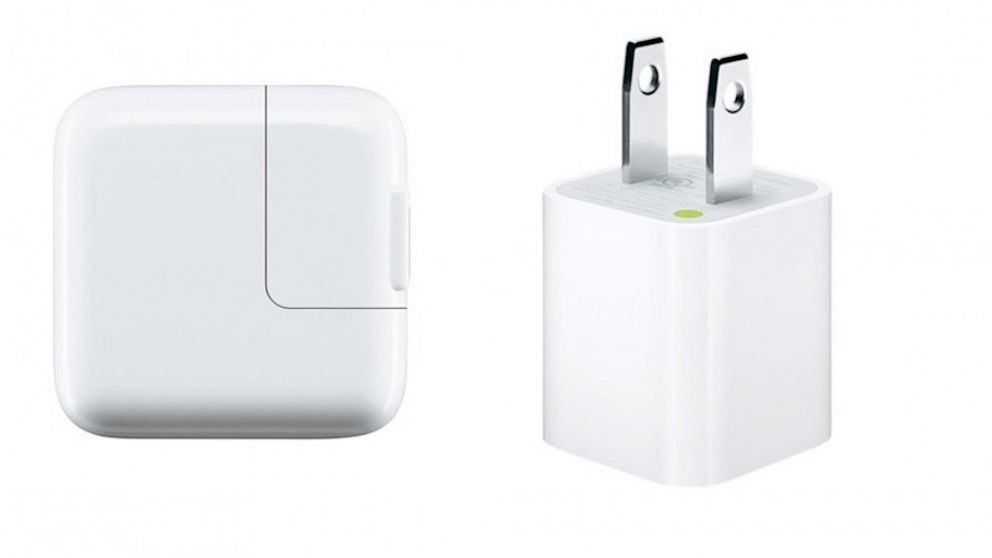
The TASCAM (and similar units) is battery-powered, but also has an option to plug-in using bus power over USB. I highly recommend using the bus power option. It’s easy to set up and the last thing you want is for the recorder to die halfway through the night.
Snag a USB outlet charger brick (a phone charger works fine) and a USB-A male to USB-B male cable and you’re good to go. The TASCAM comes with a USB charging cable, but check to make sure yours is long enough to reach the nearest free outlet in the DJ booth.
Storage
Many recorders come with a small amount of onboard storage, but not enough to record a full set. Remember, you’re recording four total channels of audio (two DJ, two mic). 16 or 32GB will SD cards will be more than enough to record a full night at the club using both channels of the DR-40.
Post-Processing Software
Once you have the recordings, you’ll need to combine them in post. I use Ableton Live, but any Digital Audio Workstation will work. You can even use the free program Audacity.
The Setup
Setting things up for recording is straightforward. Connect the recorder to the mixer’s REC OUT jack, put it in position to record the room, plug it in to a power outlet, and turn it on. Make sure to choose 4-track mode, which enables simultaneous recording of the mixer via line-in and the room microphones. Press the record button and off you go!
Tip: When the TASCAM is powered on, the mixer levels on the display will respond to incoming audio even if not recording. When it’s time to record, make sure the timecode on the display is counting upward (this means the device is actually recording). This may require pressing the record button a second time.
Post Processing
So you got the recordings and now it’s time to combine the two files to finalize them for upload! The process is simple:
1. Importing tracks and lining them up
The first step is to import the two tracks into your software. Your DAW may try to auto-warp the recordings to the master tempo of your project, but we want to preserve any tempo changes made during the set. Thankfully that’s an easy fix — just disable warping.
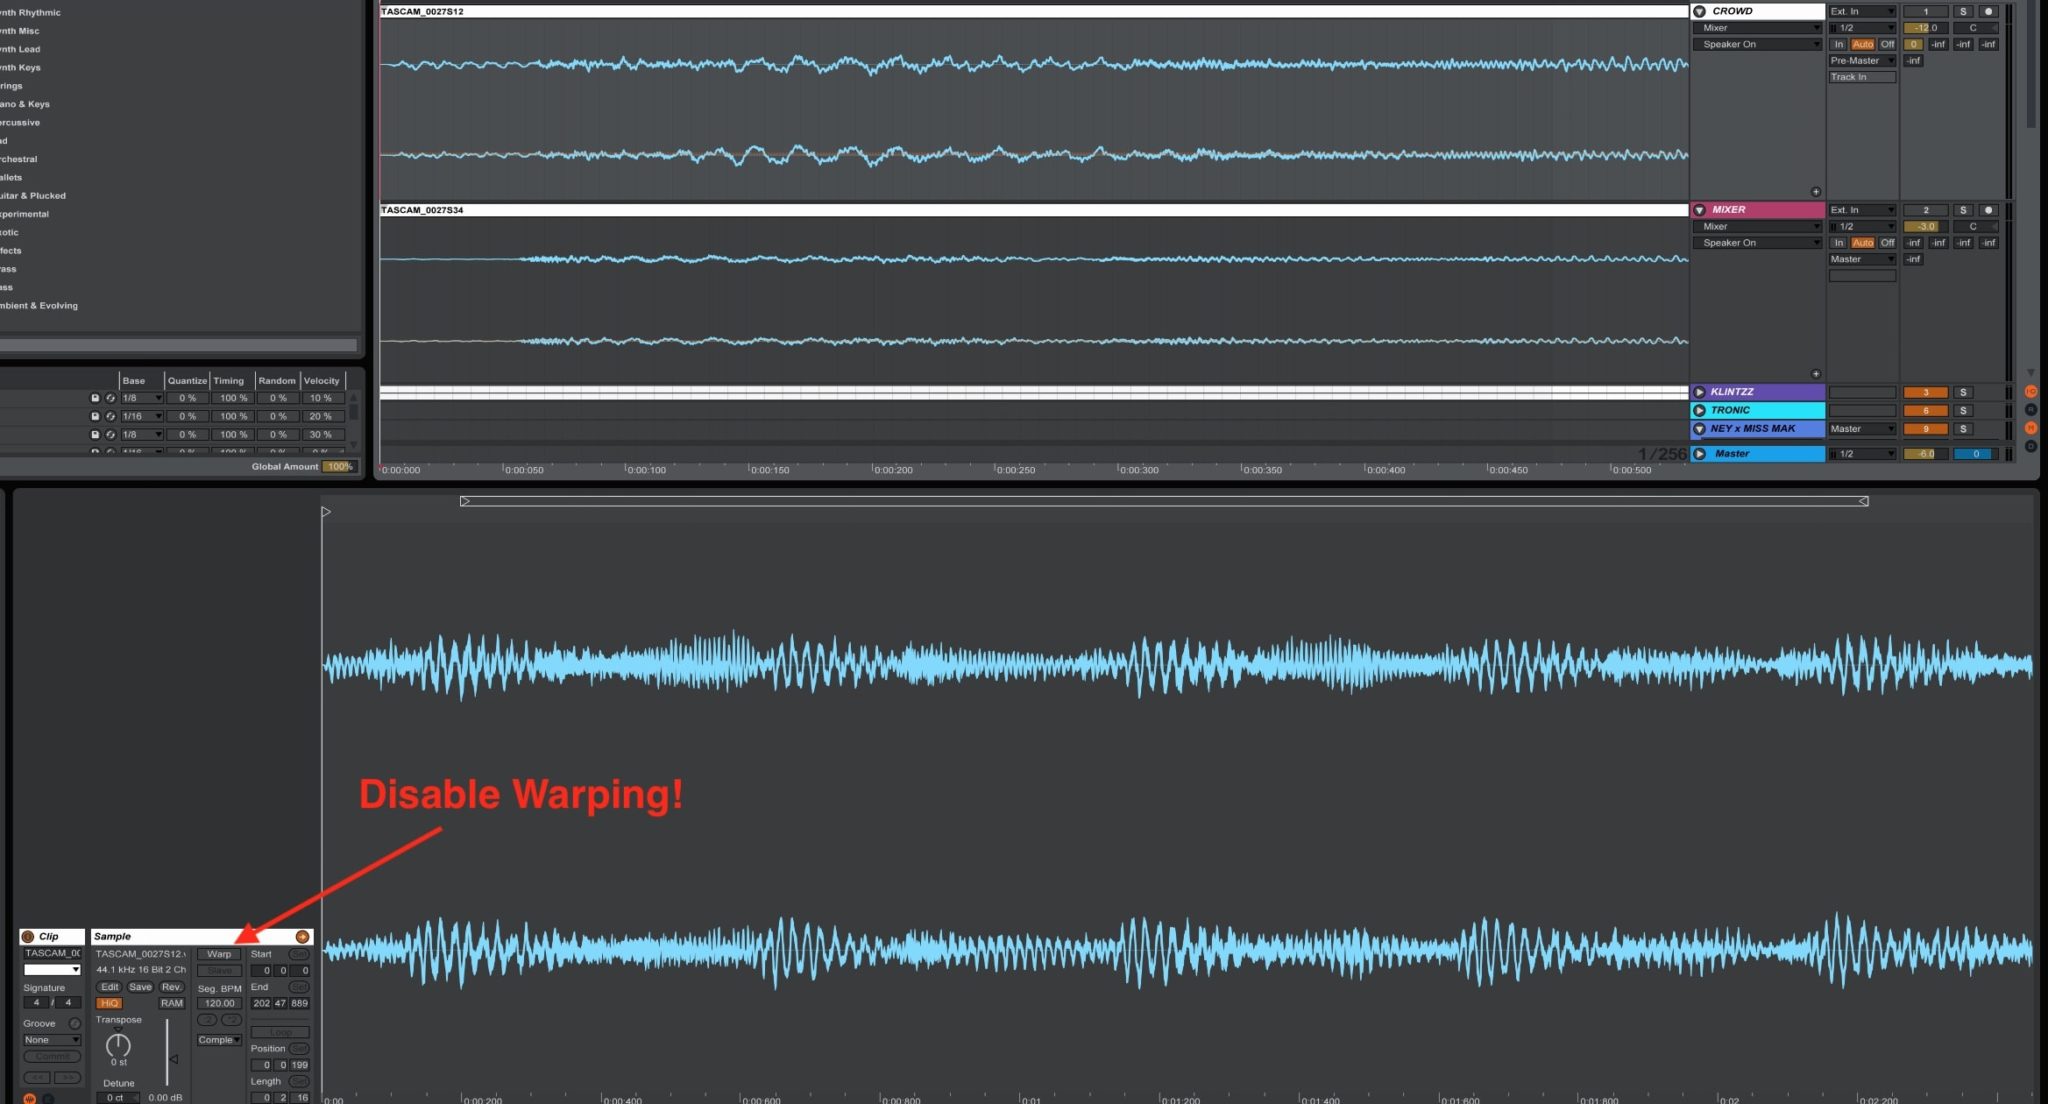
Once the tracks are in, it’s important to line them up in sync with each other to avoid any slight delay effect between them (this is also known as the Haas effect). It can help to pay special attention to the kick drum in this step — just like beat matching.
2. Set the track levels
With the tracks in sync, it’s time to adjust the levels to find a balance that sounds good to your ear. I usually start by setting the mixer output track at a baseline volume and then slowly bring up the volume of the crowd noise track until it adds just enough space to give it that live feel.
3. Apply spot-edits
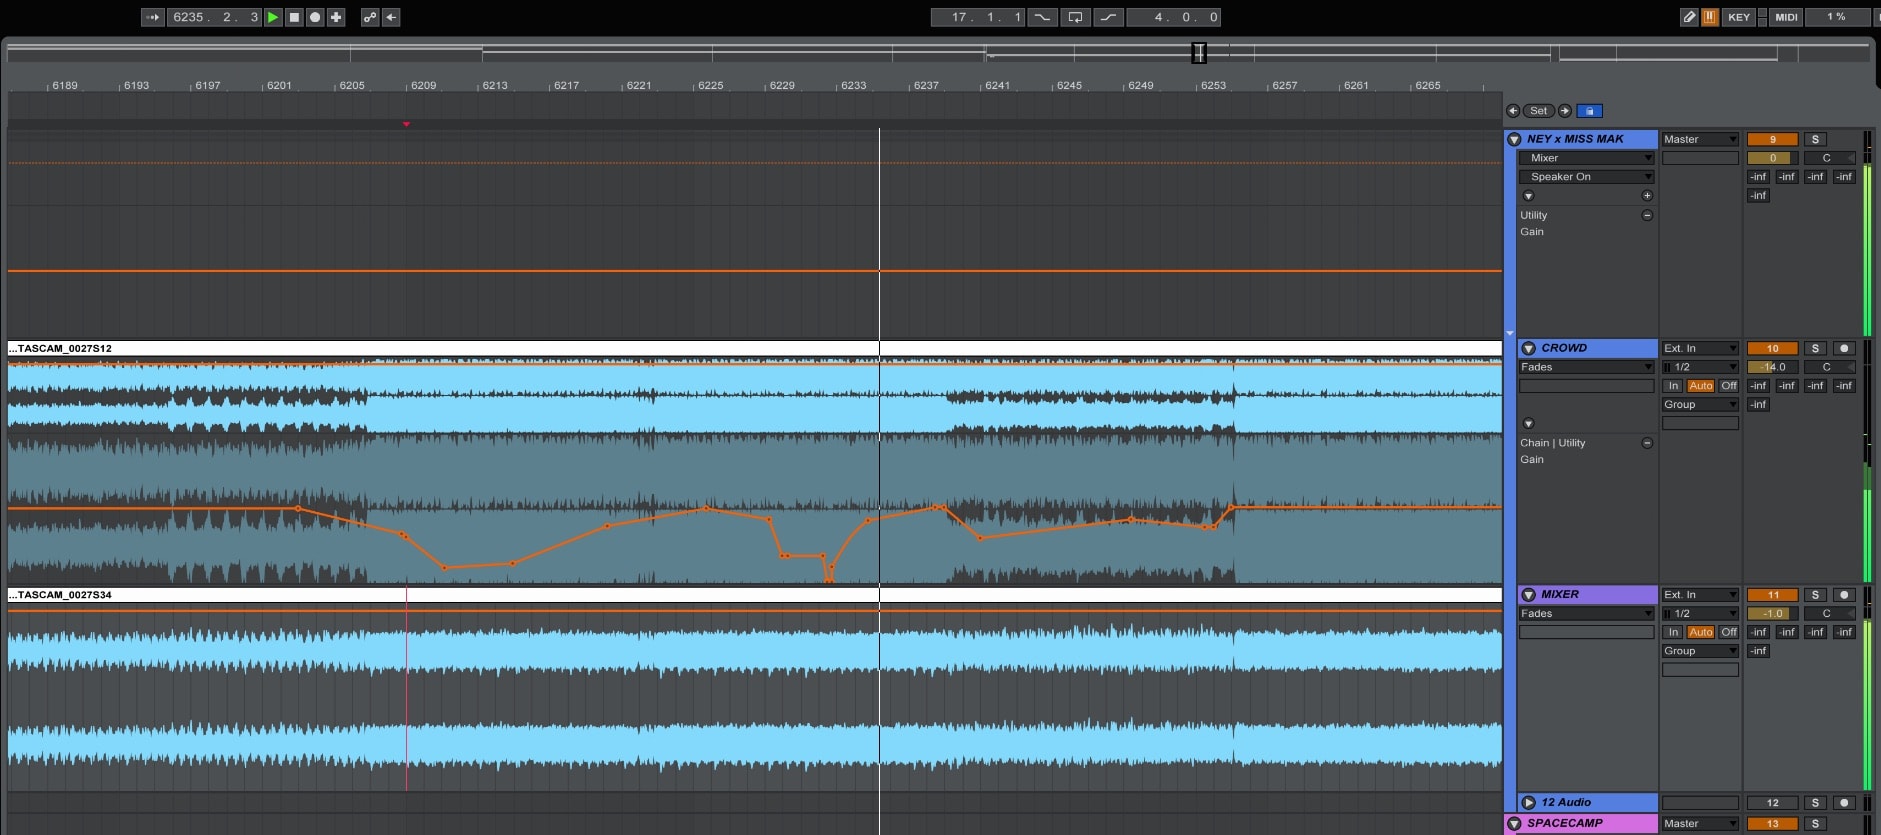
Sometimes the recorder’s microphones will pick up a few too many “WOOOO!”s from the bro who’s had one too many drinks or even a hilariously asinine front-row conversation (hey, it’s a club full of partygoers late at 3am on a Saturday after all). For this, you can add some volume automation on the crowd noise track to drown it out:
4. Final touches
Depending on your taste, you may want to apply a few second volume automation to fade the mix in and out. This makes it a bit less jarring when listeners press play since the recording will often start in the middle of a changeover.
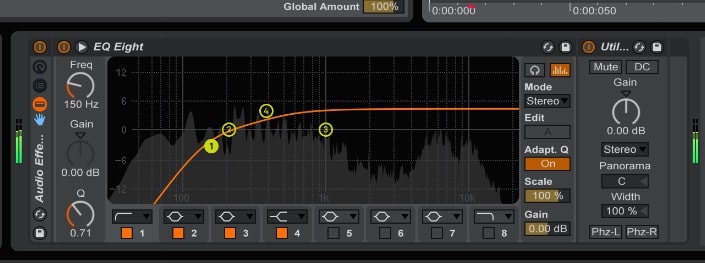
Additionally, it’s a good idea to use an EQ to roll off the low-end of the crowd recording so that it doesn’t interfere with the primary mixer track.
Export & Upload!
Once the edits are finished, export the processed audio track and upload it for your listeners to enjoy! Here’s an example mix I recorded live in SF last month with this exact process:


