Having the ability to control powerful effects during crucial moments in a set – and in Ableton, setting up instrument racks of unique effects is useful both during a show and in the studio. In today’s video tutorial, Ableton Certified Trainer Lenny Kiser shares his technique for a crafting pitch build effect – perfect for modulating vocals or building up to a drop.
Tension-building effects: if used correctly they allow you to keep your audience following along with you until the end of a song. So how do you build tension and keep the listeners interest? For me tension building can be done in a couple of ways such as a gradual move to a higher pitch, repetition of sounds and dynamic volume shifts. Today I’ll going to show you how to create a pitch build effect that incorporates these tension-building theories using the Ableton Simple Delay.
Pitch and Tension

Why have build-ups become such an integral part of dance music?
The answer is in the musical concept of tension and release. When something is rising in pitch, it creates a sense of dissonance and tension. This tension leads to a desire to be resolved, coming to a place of resting and completion. Proper tension-building makes the drop feel right and helps develop contrast and interest in your track. Tension-building can come in many forms, from subtle volume shifts to intense pitch rising effects. In today’s tutorial, I’ll show you how to use the Simple Delay to create a long-delayed signal that repeats and is then pitch shifted up:
Click here to download the .ALP project file with the complete pitch shift rack.
(free dl!)
Simple Delay Transition Modes: Repitch, Fade, Jump

Imagine you are driving a car a hundred miles an hour and then suddenly you are forced to transition down to 20 miles an hour instantly, there will be some abrupt changes! This is similar to what happens if you change the delay time on the Simple Delay while it is processing audio. Essentially it will cause some abrupt changes to the delayed signal. The Simple Delay has three transition modes for how it switches between these changes in delay time (accessed by control clicking on the Simple Delay device title bar):
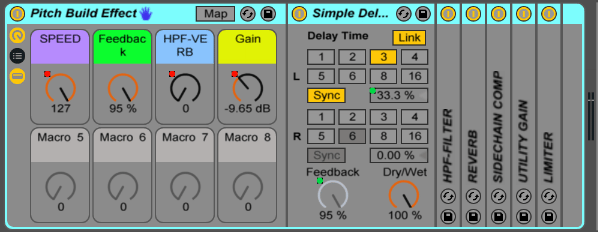
- Re-pitch: This causes a pitch variation to the delayed signal and is the main component of creating this effect!
- Fade: Creates a smooth crossfade between the delay time changes.
- Jump: Jumps directly to the next delay time value and is more abrupt which may cause pops and clicks.
For this effect we want to choose Repitch so that when we gradually change the delay time it will create a pitch rising effect.
Additional parameters that need adjusting on Simple Delay:
- Feedback: The Feedback percentage controls how much of the delayed signal is fed back into the delay unit itself. I think of this as controlling the amount of delayed repetitions that will take place. Higher values equal longer delay times and longer effect tails to work with.
- Link and Beat Offset %: The link button links the delay times of the left and right channels to be the same. For this effect, link the channels to control one delay time for both channels. The beat offset percentage allows you to shift your delayed signal away from the original so it is not perfectly in time. I normally use this for creating swung delays or grooves with drums. For this effect the beat offset % will adjust the delay time and since we have it in Repitch mode this will cause the pitch shifting effect on the delayed signal.
- Sync: This parameter causes the delayed signal to either be synced to the project tempo or free from it. For this effect we will be using sync.
Automating the Return Track

Automation is a necessary function to keep things moving and interesting in your production. Things will get even more interesting when the effects on the return tracks are automated. Start by sending some signal to the return track in a buildup section. Next, automate the delay time or (Speed Macro) on the simple delay to create this pitch rising effect.
Live Vocal Effects Method
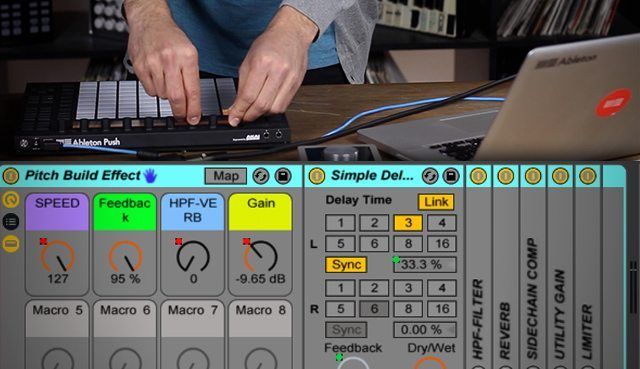
To use this effect in a live situation (it works especially well with vocals) do the following:
- Create a new audio track with your microphone signal routed into it and place the pitch build effect on that channel directly.
- Map a controller button to the device activator.
- Keep the effect off and then turn it on as you say a word that you want to be repeated through the effect. The device activator in this case is essentially used as a button to “sample” a word or phrase into the effect by turning it on.
- Once you’ve said the word use the Speed control knob to increase the pitch.
- Modulate any other effects post the delay for more interest.
Other Devices To Use With This Effect

This pitch-rise effect can be taken one step further by adding some other processing devices. Here are some of the devices I use after this effect:
- Utility device: To makeup for lost volume and create dynamic volume increases to maximize tension.
- Sidechain Compressor: Have the sidechain compressor only turn on when the drop hits so the effect pumps when the kick and bass come in!
- Limiter: Place a limiter at the end of the chain to protect from overloading the channel with high feedback levels and volume.
- Frequency Shifter: Not enough pitch rising? Automate the frequency shifter to keep the pitch going up!
- Filtering: Removing frequencies with filtering can add to the tension of this effect and also create an uplifting feeling.
- Reverb: To add space, depth and dimension.
Performing music live is about the journey that you take the listener on and pitch buildup effects like this one will be one sure way to keep the listener interested and take your audience for a ride.
Keep Reading more tutorials from Lenny:


