Have you found the perfect MIDI controller yet? Chances are the answer is “no,” and you can’t entirely blame it on the manufacturers either. In this fast-paced DIY world, where technology morphs at light speeds, big manufacturers’ R&D cycles will never be able to keep up with your imagination. So stop waiting around for a company to release the perfect controller, and make your own! You may be thinking, “That will take way too much time,” “I have no idea how to do that,” and, “Where would I start?” Those are all legitimate roadblocks, but with a little know-how and a soft push in the right direction, you may find it’s not as hard as you think. Here are two simple ways you can customize your own interface, depending on how much time you want to spend.
BUILT TO MOVE
The easiest way to customize your own MIDI controller is by buying one that is designed to be modified. For several years, a team from France called Mawzer (www.mawzer.com) has been designing just that, and now the company is finally shipping its modular product that allows you to select your own personal MIDI configuration. You are essentially buying one flight case that holds the MIDI “brain” and a set of plug-and-play MIDI modules. Each of the modules is pre-built with different types of controls, including sliders, knobs, buttons and joysticks. Combine the modules of your choice to get the exact position and type of controls you need. The bases of each block are equipped with a pair of ¼-inch plugs that secure it in place and send the control messages to the brain. Daily reconfigurations are easy: Just pop the modules out and move them around to suite your fancy. For this convenience you are going to pay a pretty penny: A full configuration will set you back upward of $3,000. Want to do it for less? Do a similar thing ghetto-style.
BUST OUT THE TOOL SET
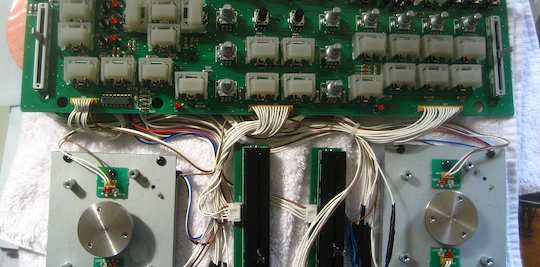
On this page, you see a picture of my modified Vestax VCI-100. To get started on something like this, you need to identify a control surface that has two important things. One, the controller should have almost all of the controls you need except for a few personal tweaks that would make it perfect. Two, make sure it has some extra space under the hood. Sometimes it’s hard to tell until you open up the casing just how jam-packed the innards are with circuit boards. I lucked out because the VCI-100 has plenty of room in the front where I wanted to replace the stock eight transport buttons. If you’re feeling adventurous, take a trip to your local music shop with a screwdriver or play it safe and ask the manufacturer for some schematics. Some controllers may have larger casings, which naturally afford plenty of room, but chances are high that you will need to remove some controls to create the necessary space.
Once you identify how much space with which you have to work, it’s time to source the new controls to add to your gear. If you want to add arcade buttons, visit Happ Controls (www.happcontrols.com). How about four big buttons with multicolor LEDs? Try www.sparkfun.com. This stage is the fun part, when all you need is Google and some creative thinking to come up with good ideas.
Now it’s time to interface your new parts with the existing controller’s structure. First you will need to make some cutouts to accommodate the new sizes of controls you have chosen. If your controller is metal, then a trip to your local machinist will set you back around $40, but he/she can quickly and easily help you create space for the new parts. If your case is plastic, then a bit of planning and a good Dremel tool (www.dremel.com) might be all that you need. The only tricky part here is making the new holes mesh with the old ones so you don’t leave any blank spaces behind. If you do, then a bit of J-B Weld and some sanding will fill in the gaps nicely.
The final step is connecting the controls to your existing circuit board. This is a simple task of rerouting wires from the old controls to the new ones. Some basic soldering knowledge will be required, but trust me, it’s nothing you can’t pick up in a few minutes. This step is really hard to screw up as most basic controllers have only two wires running to them: positive and ground. If you’re replacing a button, for example, then just disconnect the two wires and reconnect them to your new hardware. If you’re adding an extra slider, hijack the wires from an underused knob. In some equipment, the knobs and sliders are connected directly to the circuit board and there are no wires to reroute. In that case, you can solder lead wires right off the board and run them to your new controls. It might not look like a professional job, but believe me, it will work perfectly and no one will ever look inside.
TAKE THE PLUNGE
If you have made it this far and not turned back, you might be ready to take the jump into assembling your own MIDI controller from scratch. Now before you turn the page and write me off, let me just say that you’re already 70 percent of the way there. All you need now are the right suppliers of equipment and a bit of Photoshop design work. There are several existing DIY MIDI kits that take all the electronics know-how right out of the equation so that you would be just connecting two wires to a lot more controls and asking your machinist to build the case from scratch, rather than adapting an existing one. So stick around until next month, when I will personally tackle building my own MIDI controller from scratch and take you through the process step-by-step.
The original article came from my digital dj column in Remix Magazine.


