Swimming to the top of today’s hyper-crowded pool of talented Djs can be a menacing task. Everyone’s grandma is now djing with auto beat matching software and music blogs are serving up endless supplies of hot tracks that everyone has within a few weeks. In this increasingly level playing field, one of the best ways to set yourself apart from the crowd is to produce custom edits and remixes of popular tracks. You are probably wondering how that might be possible without acapellas or stems (parts of a song). In this article we are going to look at one way to extract stems from a finished song you already have and use those stems to create a custom remix.
Edits, Remixes, Stems Oh My!
Outside of the production world most people think stems come with flowers attached. A stem though, is a group of similar tracks that have been mixed or “bounced” down to a single stereo track. Drums are a good example. Say you started out with five tracks of drums, one for each drum sound. A drum stem is the composite of all those tracks mixed down to a single track. So if you were to be commissioned by a label to do a remix they would most likely send you a folder with files labeled Drums, Vocals, Synths…ect. Those are the Stems with which you make a “remix”. If you don’t have those files you are technically making an “edit”. In our case we are going to make our own stems, then remix them.
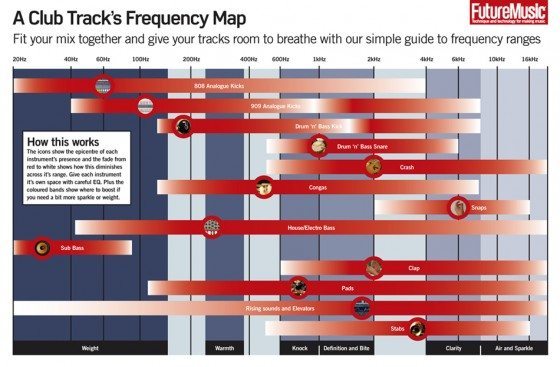
Take a look at the Frequency Chart above. This is your key to tearing apart a song. You will also need some sound editing software with a nice EQ. The EQ is your main weapon in separating specific instruments and sounds from a track. Most of what you will be doing is using the high and low pass shelving filters to cut off the sonic ends of your loops which will leave you with just the sounds in that frequency band. For example if you just wanted the Congas you would cut the lows from 30hz to 300hz and the highs from 20khz to 1khz, roughly. If you are not able to get a sound isolated from the rest of the track, try playing around with effects plugins to mangle the loop into a unique sound that can them be mixed back into the group. The goal is to get as many individual “stems” that can then be re-mixed together to create a new result. If possible, avoid boosting the EQ to minimize phasing issues. I’m using Logic Pro but you can get most of this done in Audacity or Ableton.
The first step is to listen to the track very carefully and note anywhere there is a solo instrument cleanly separated from the group. Common examples might be an intro/outro beat or a characteristic synth in the breakdown. Most popular songs have receptive hooks that weave in and out of the mix- your goal is to isolate each hook so they can be recombined in any order you wish.
Scalpel please
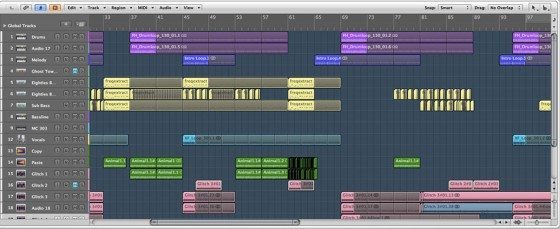
There are an infinite number of ways to dissect a track and each song is going to require specific tools to achieve the results you want. The photo above is from the logic session I used for remixing Miike Snow’s “Animal” without actually having the official stems. I picked this track because there were parts where the vocals would be easy to extract with very little instrumentation under them.
Step 1. Separate
First, I went in and sliced the track up into all parts I thought were interesting and might be useful in the remix. These loops are then placed on different tracks so they can be blended together and re-arranged independently.
Step 2. Isolate
After separating the loops out, I used the frequency chart above to isolate the parts of the loops I needed most. One example, cutting the lows and highs from the vocal with a shelving filter.
Step 3. Duplicate
I wanted to replace the main synth hook with something less adult contemporary future muzak sounding so I replayed the main melody into a loop of midi notes that could be used with any synth and bounced these to their own audio track . By filtering out the original synth and placing your own custom creation on top, its easy to create a much fatter sound.
Step 4. Beef it up.
I now had the original track separated into stems and an original synth sound cleanly seperated but I still wanted an animals gone wild sound, sorta like a riot at the petting zoo. I focused on accomplishing this by building more dance floor worthy drums and layering them on top of the parts.
Step 5. Press it!
Miike Snow “Animal” (Nisus Remix) by Nisus

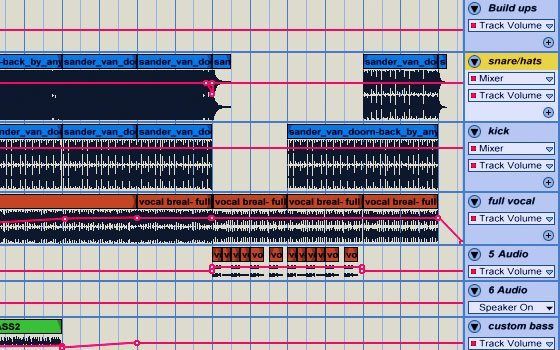
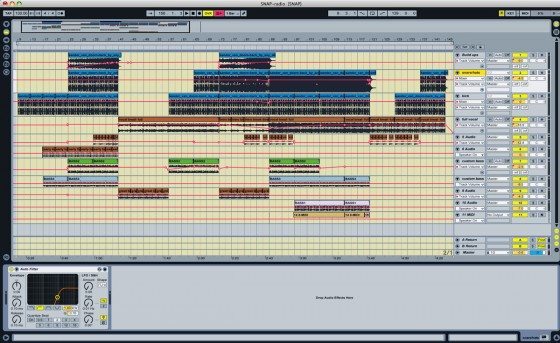
To give you an inside look into this process, I brushed off my production chops and created a quick remix of Snap’s “Rhythm is a Dancer”. Using the technique’s described above I pulled a few choice loops and vocal phrases from the original, using filters to separate the parts. Then I brought in a newer song, Sander Van Doorn’s “Back by dope Demand”, for extra umph and some much needed build ups. With both songs I was able to create room and engineer fake stems just by using filters creatively.
Download the “Rhythm is a Dancer” remix here:
[audio:http://djtechtools.com/Rythym%20is%20a%20Dancer%20%28Ean%20Golden%27s%20Edit%29%201.mp3]Download the Original Ableton Session + Samples Here
Of course, ears are your most important tool… always be listening! The stereo separation of headphones is handy sometimes, but you’ll need a pair of studio monitors to produce a properly balanced mix.
We suggest the Rokit 6 monitors, available in our webstore!


