There’s something in the air around the Naonext Crystall Ball MIDI controller: your hands, coaxing any parameter you assign to its five infrared sensors. The accompanying 24-button pad grid either assigns parameters to the sensors or works like traditional pads. With 24 banks of 5 control sets each, there are thousands of programmable controls to give your airborne hands plenty more to do than just pump up a crowd. Let’s see how it performs with software like Traktor and Ableton Live.
Reviewed: Naonext Crystall Ball
Price: $599 (available now in the DJTT webstore here)
Communication: MIDI over USB
Ships with: Editor Software (download), AC power supply, USB cable, Ableton Live Script with starter Sesstion (download), Traktor mapping (download).
Weight: 2.8 pounds (1.26 kg)
Dimensions: 12.5 x 7.6 x 4.3 inches (31.7 x 19.2 x 10.9 cm)
Minimum System Requirements: Mac/PC: Free USB 2.0 port or free MIDI port; minimum requirements of any MIDI software used with the Crystall Ball.
The Good: Five infrared sensors with adjustable sensitivity range. Clever programming modes for splitting the controller between sensor use and normal pad triggering. A whopping 24 banks stored in ROM, each with 5 sets of 24 controls each (2,880 total controls in memory). Incredibly strong chassis build. Controls for locking the sensor values in place.
The Bad: Potentially long learning curve for mastering sensor manipulation. Curious pad action sometimes frustrates playing.
The Bottom Line: Anyone with the wherewithal to become proficient in triggering MIDI commands with the Crystall Ball’s sensors and the moxy to cook up some creative MIDI mappings could find a valuable live performance ally for DJing, VJing and performing live, particularly with Ableton Live.
GAZE INTO THIS
We always love to see a new player on the controller scene particularly when that player has a certain panache to its game. Tiny French company Naonext just launched in 2012, and it first concentrated on creating custom electronic music creations for individuals. For its first mass-produced controller, the Crystall Ball, this new outfit clearly implies that it’s looking into the future of digital media performance. While the Crystall Ball doesn’t really present any new control technologies, it does present a compelling package.
BUILD AND DESIGN
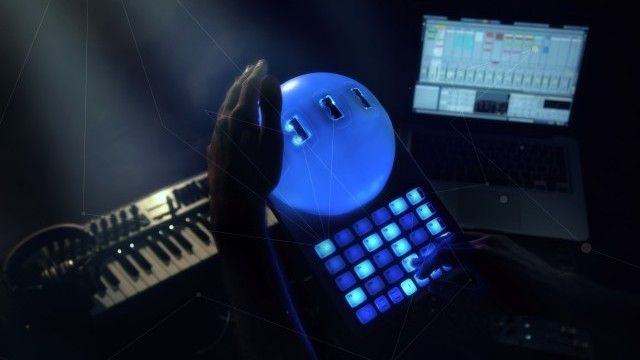
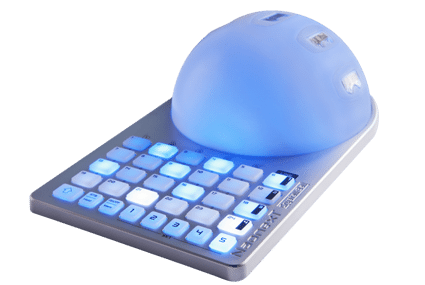
The Crystall Ball combines a button-grid control scheme with five assignable infrared sensors arrayed across its blue-glowing dome piece. Probably due to the infrared sensors’ power needs, it requires an AC adapter for power, and with USB as well as MIDI ports, it can control any MIDI-compatible software or connected MIDI hardware.
The controller’s name also speaks to the solidity of its build. With a strong metal alloy faceplate and extremely tough molded polycarbonate dome and bottom plate, the Crystall Ball feels up to the challenge of any touring rigors it would likely face. In fact, you can watch a convincing stress test video from Naonext where they run over the Crystall Ball with a small car and then continue to use it.
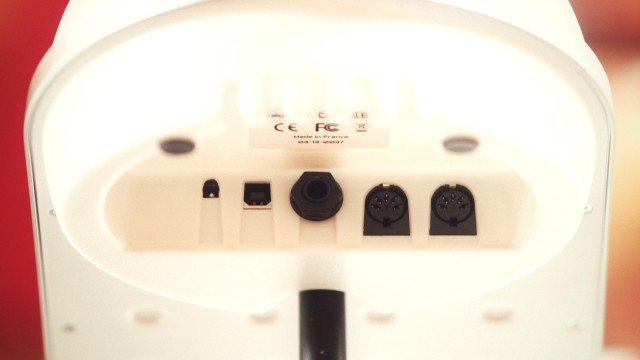
Its connections also include a footswitch jack, and you won’t have any problems finding a stand for the Crystall Ball; there’s a screw mount on the bottom for attaching it to a standard microphone stand.
CONTROL SETUP AND PROGRAMMING
While the unit’s control scheme is straightforward enough—24 playable pad buttons, a bottom row of “navigation” buttons, and five infrared sensors—Naonext’s clever programming options make it even more interesting than at first glance.
The 24 pads and 5 sensors can send any MIDI note, program change, or control change message. But on top of that, the pads can be set to Crystall Ball mode (where 5 columns of 4 buttons can assign their controls to the 5 sensors) and Pad mode (where the pads send MIDI messages traditionally). In either mode, the “Line” column of buttons (alternately numbered as rows 1-4) can work to quickly enable/disable the whole row of sensor assignments in Crystall Ball mode, or in Pad mode, they can send/stop a whole row of effects or note messages.
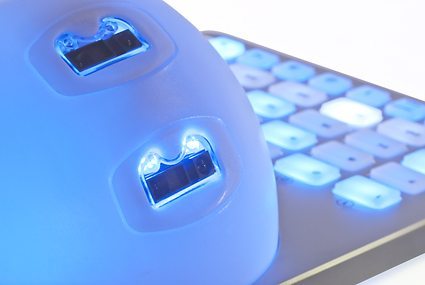
The bottom row of navigation buttons is also crucial. The Crystall Ball can hold 24 banks of assignments in its ROM (so the unit stores them even after you power it off). You select one of the banks by holding the Shift (up arrow) button and pressing one of the 24 pad buttons. Additionally, each bank has 5 Sets of 24 controls, which you select with the 1-5 Set buttons along the bottom. So with 24 banks with 5 sets of 24 controls each, that’s a total of 2,880 control assignments that Crystall Ball can save at a time.
While any MIDI controller lets you save as many setups as you want on a computer through editor software, it’s pretty awesome that Crystall Ball has such an extensive and easily accessible memory. You can have several banks of controls set up for all your favorite MIDI software, and probably still have banks to spare. And you can switch from bank to bank and control multiple open programs at once.
Two more navigation buttons, Mem/AllOff and Hold/STB, help you make the most of Crystal Ball’s sensors. When playing one or more of the sensors with your hand, pressing the Mem button keeps the value of the sensor where it is, so you can take your hand off. Pressing Shift+Mem sends the AllOff message, which clears all the sensor values.
The Hold button simply locks all the current Crystall Ball values where they are, so you can’t accidentally alter them by moving into one of the sensor fields. Shift + Hold, or the “STB” function, again locks all the values in place but also disables all the LEDs.
EDITOR SOFTWARE
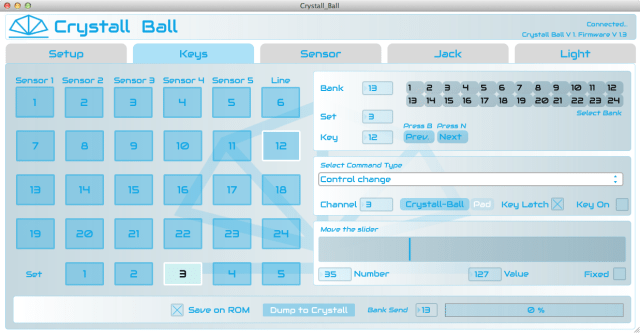
To get the most out of the Crystall Ball, you’ll almost certainly need to make use of the Crystall Ball Editor software. It reads and writes JSON files for its templates, and you can import any existing JSON files for the Crystall Ball (such as Naonext’s Ableton Live 9 and Traktor Pro templates) into the software and then dump them to a bank or banks in the controller’s ROM memory.
Most of the programming takes place in the software’s Keys tab, where you can set the pad values for all 24 banks and 5 Set per bank. Any Key can send from any MIDI channel you choose. In each bank Set, any one row of Keys can be in Crystall Ball or Pad mode. For example, if you had the first three rows in Crystall Ball mode, you could set three possible values for each of the sensors, and pressing the Key would assign that value to its corresponding sensor. Buttons that are in in Crystall Ball mode will be backlit in blue, while the other buttons are backlit in white.
For Keys in Pad mode, you can set them to Latch (where you press once to send a MIDI message and press again to stop sending it) or Unlatch (where it sends the MIDI message for as long as the Key is pressed).
The Editor also lets you set the sensor range from 0-100%. The minimum sensor range is 5 cm, and the maximum is 35 cm.
Finally, additional Editor tabs let you set up the MIDI message to send from the external Jack port for a footswitch or external sensors, and you can the brightness of the key, sensor and dome backlights.
For any values you set in the Editor, you can dump them to the connected Crystall Ball with a single click with the option to save those values to the hardware’s ROM.
Software Integration: Live & Traktor
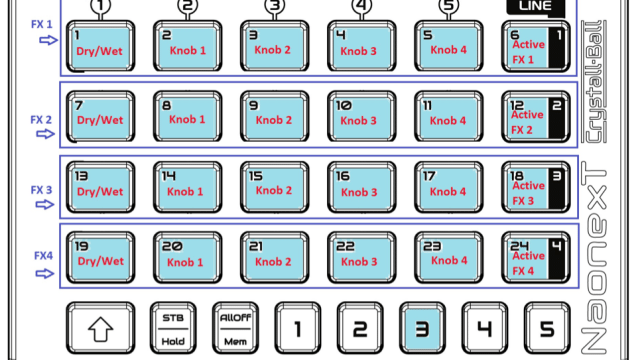
As of this review, Naonext supplied preset templates Ableton Live 9 and Traktor Pro, both of which made very specific choices of how to setup and control the software. Both also give you a very good idea of the various ways in which you can use the Crystall Ball, and could both serve as decent jumping off points for your own modified mappings.
For Traktor, you have to both load a JSON file into the Crystall Ball, and then load a TSI file into Tracktor. Set 1 of the Traktor bank provides transport, tempo and EQ controls for Decks 1 and 2. Set 2 somewhat redundantly provides more EQ controls for Decks 1 and 2 and has a Crystall Ball mode row for controlling Deck 1 and 2 loops with the sensors.
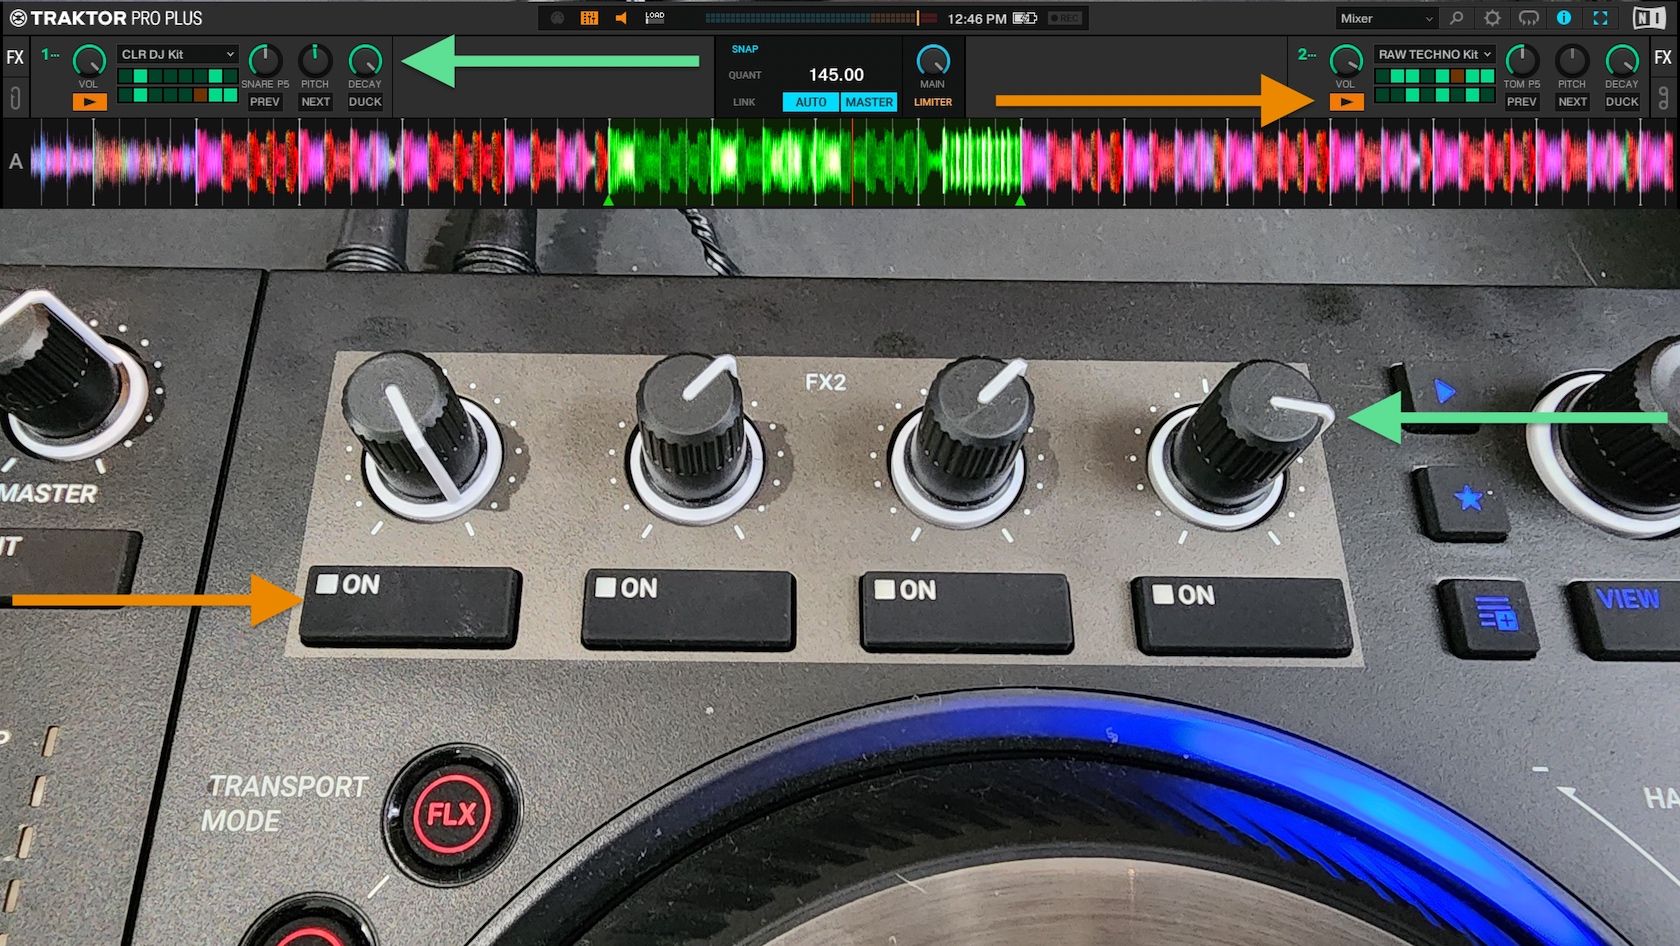
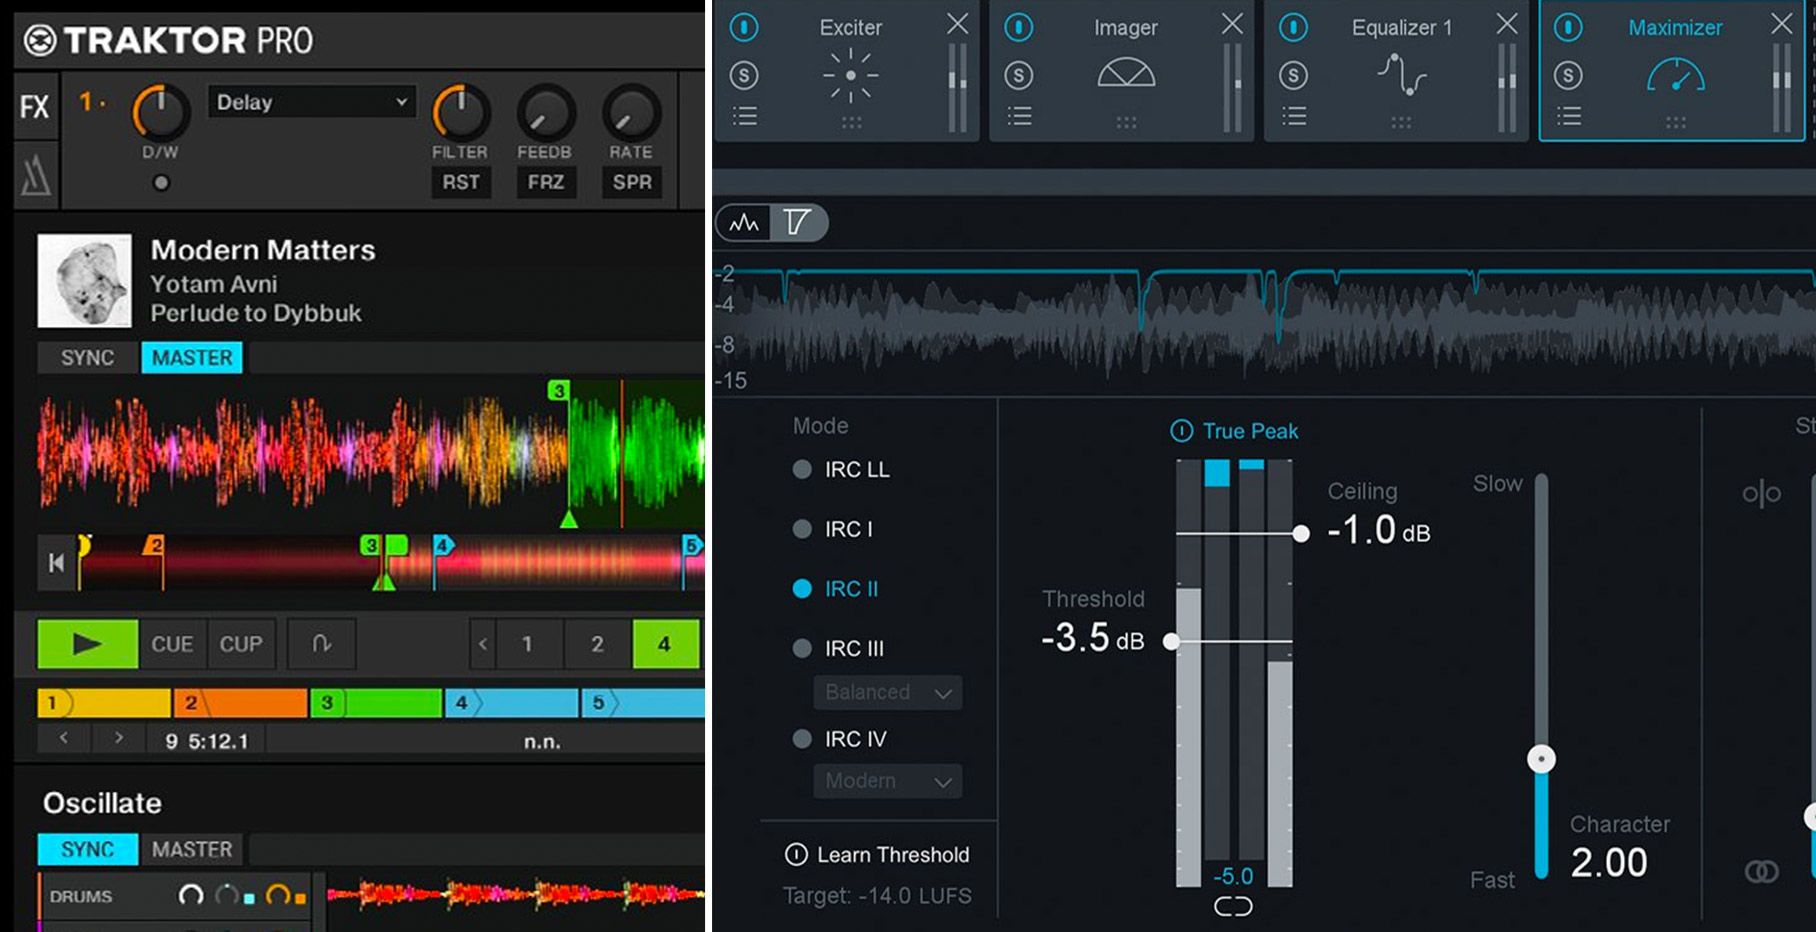
All the rows in Set 3 are in Crystall Ball mode, and they control four single-effect Traktor FX decks with wet/dry knob and effect knob 1-4 controls being sent to the five sensors. This Set really demonstrates what you can do with the Crystall Ball’s sensors. For instance, you could use different sensors to control one parameter from each effect unit at once, or lock in settings for one effect unit using the Mem button and then move on to a different effect unit.
Set 4 is conspicuously empty, but seems like it would be great for using to control cue points or the Remix Decks. And Set 5 includes track browsing/loading, master volume and recording functions. Overall, this Traktor template shows what the Crystall Ball can do, but to make it really complete, you’d probably want to modify it by taking out some of the redundant EQ controls and filling in some of the missing pieces.
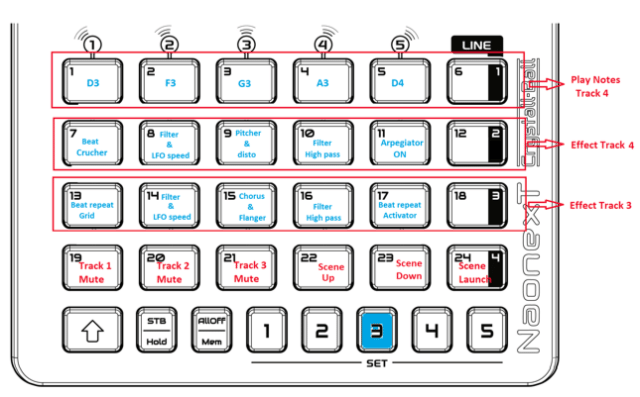
For Live 9, Naonext has a Quick Play Bundle for download that includes and Ableton control surface script for the Crystall Ball, a two-bank JSON file for Live 9 control, and a custom Crystall Ball Ableton Live Session complete with three tracks of loaded clips, a synth track, a finger-drumming track, and a “Scratch” track, where you can load sounds into a Max for Live device and scratch them from the Crystall Ball’s sensors.
Over 2 banks of 5 Sets each, the Crystall Ball Live template lets you launch clips and scenes, move the launch box, move through tracks, arm them and record new parts, play synths and Drum Racks, move through devices and control effects. The device for scratching sounds with the infrared sensors is pretty cool, but you have to have Max of Live installed to use it.
CONTROLLER PERFORMANCE
The Crystall Ball’s sensors responded very well, with no perceivable latency. However, the trick is becoming comfortable with the spacing around the Ball for triggering the sensor that you want (and no others) in the right position of its sensing range that you want. Just like playing any new instrument, it will take you some time to get used to positioning your hands in the right spot, particularly if you’ve never played a theremin or other spatially sensitive instruments or controllers.
As such, with the Ball five sensors spaced the way they are, it’s quite possible that you will trigger two when you only want one, or one when you’re trying for two with one hand. It’s good fun, but don’t get the idea with you’re going to step right up into wowing a crowd with your hands in the Crystall Ball’s air space without putting in a lot of practice first.
As for Crystall Ball’s button pads, they feel noticeably more finicky than most other pads we come across. They often seem to depress in two distinct stages and fairly often, particularly with the Line column of buttons, they would momentarily stick in a depressed position before popping back up again. That type of action made them less than ideal for actions that required really sensitive or rapid-fire triggering, like finger-drumming routines.
It did seem that with more and more use, that inconsistent pad action may have lessened, so it may be a matter of having to “break in” the pads. However, that’s an usual case for button controllers.
[Editor’s note: Naonext was aware of the pad problem we experienced and has attributed it to its first run of 100 Crystall Ball units, one of which was the unit we reviewed. The company is now well beyond the first 100 production units, so according to Naonext, any Crystall Ball units bought from here on will have pads the stickiness problem fixed.]
FORTUNE TELLING
Whether or not there’s a Crystall Ball in your future is a very personal choice. Not everyone is going to be enamored with manipulating light sensors like these on the Crystall Ball, and it would make no sense to put down this kind of money on the product if you weren’t going to use the sensors copiously. Because the sensors can be tricky to manipulate with precision, you should really value the effect of showmanship they can bring to a live performance, and/or have some great ideas for how you can make good use of them in your sets in order to make the Crystall Ball’s learning curve and programming really worth your investment of time, effort and money.
While we had some concerns with the pad action, Naonext has built the Crystall Ball for impeccable durability. VJs, DJs, and live performers with a flair for showing off on stage and a mind for creative MIDI programming should really be able to work some magic with this new tool.
We’re selling a few units of the Crystall Ball in the DJTT webstore – check it out here!


