For many producers and live performers, being able to have a few basic DJ tools at your disposal while still playing from inside of your DAW during a gig is critical. So how do you keep all of your effects in line and ready to use at a moment’s notice? Gary Harper shares a quick guide to setting up a DJ effects rack in Ableton in today’s tutorial.
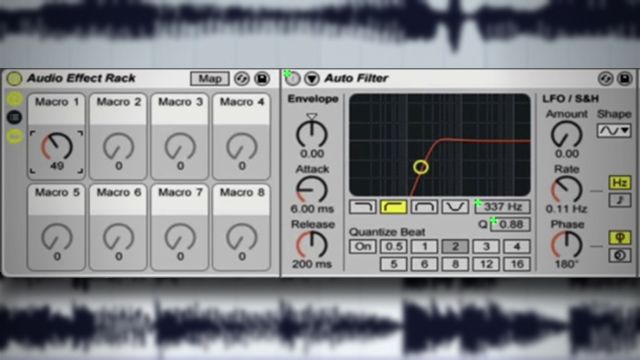
When it comes to making a simple yet effective transition between tracks, there’s nothing more satisfying than creating your own. Ableton’s Audio Effect Racks are great for just that and you don’t need any third-party plug-ins to create some really cool sounds.
With this rack, I’ve used just 4 effects:
- Autofilter: Set macro 1 to control the low-cut as well as the resonance for that classic filter sweep.
- Flanger: I like the macro to control the dry/wet amount so as you turn the dial, the amount increases. Any modulation effect would work well here so try chorus or phaser too, or both!
- Ping Pong Delay: In this example, I’ve increased the bandwidth of the filter to maximum and set the beat division to be quarter notes and set macro 1 to control feedback and the dry/wet mix so, like the flanger, as you turn the dial, the sound gets more spaced out but the delay repeats help keep the rhythm stable.
- Reverb: With the decay time set to about 4-5 seconds again I’m setting macro 1 to control the dry/wet amount.
The beauty of these racks is the freedom to experiment – so why not break convention and mix these effects around? The extra stage to this process is to MIDI-map the macro knob to your MIDI controller. This is as simple as right-clicking the macro you want to control, move the dial/slider of choice and then exit midi-map mode by pressing escape twice and you’re ready to go.
Do you have a different way that you approach DJ-style effects in Ableton Live? Share in the comments below!


