Ever wondered how edits are made? With the advent of record pools, Beatport and Top 10 charts, it can seem like every DJ is playing the exact same music in their sets. Luckily, learning how to make edits can help you stand out. In today’s feature, DJ Techtools contributor Tenova walks you through the basics of making a simple vocal mashup to spice up your sets.
In my last article on this topic, I went over Why Every DJ Should Be Making Edits.
We talked all about how making DJ edits can help you create shortened, predictable versions of your favorite records that makes mixing a breeze by eliminating uncertainty. Since then, we’ve gotten plenty of emails asking for a more detailed discussion on how to create unique DJ edits that only you have access to. Today, I’m going to take you inside the details on how to make a simple vocal mashup.
Note: I’m going to assume you already know how to drop clips in Ableton, and a few other extremely basic features of the program.
Below is an example of one edit that I’ve recently retired but was crushing in my sets for quite some time. I’ll be showing you how I made it today. The original track is called “Under,” by Frederick & Kusse, one of my favorite new acts.
Tools Needed
- Ableton Live 10 Suite – Any DAW will work, but this is my preferred workstation
- Endless Smile – A new plugin that makes creating buildups a breeze
- Fabfilter Pro Q-3 – My favorite EQ on the market
- Valhalla Vintage Verb – Any reverb will work just fine, but I find this one easiest to use
Step 1: Prepare Your Parts
At the root of any DJ edit or mashup is a track you like, an acapella, and perhaps some FX that spice up the track a little bit.
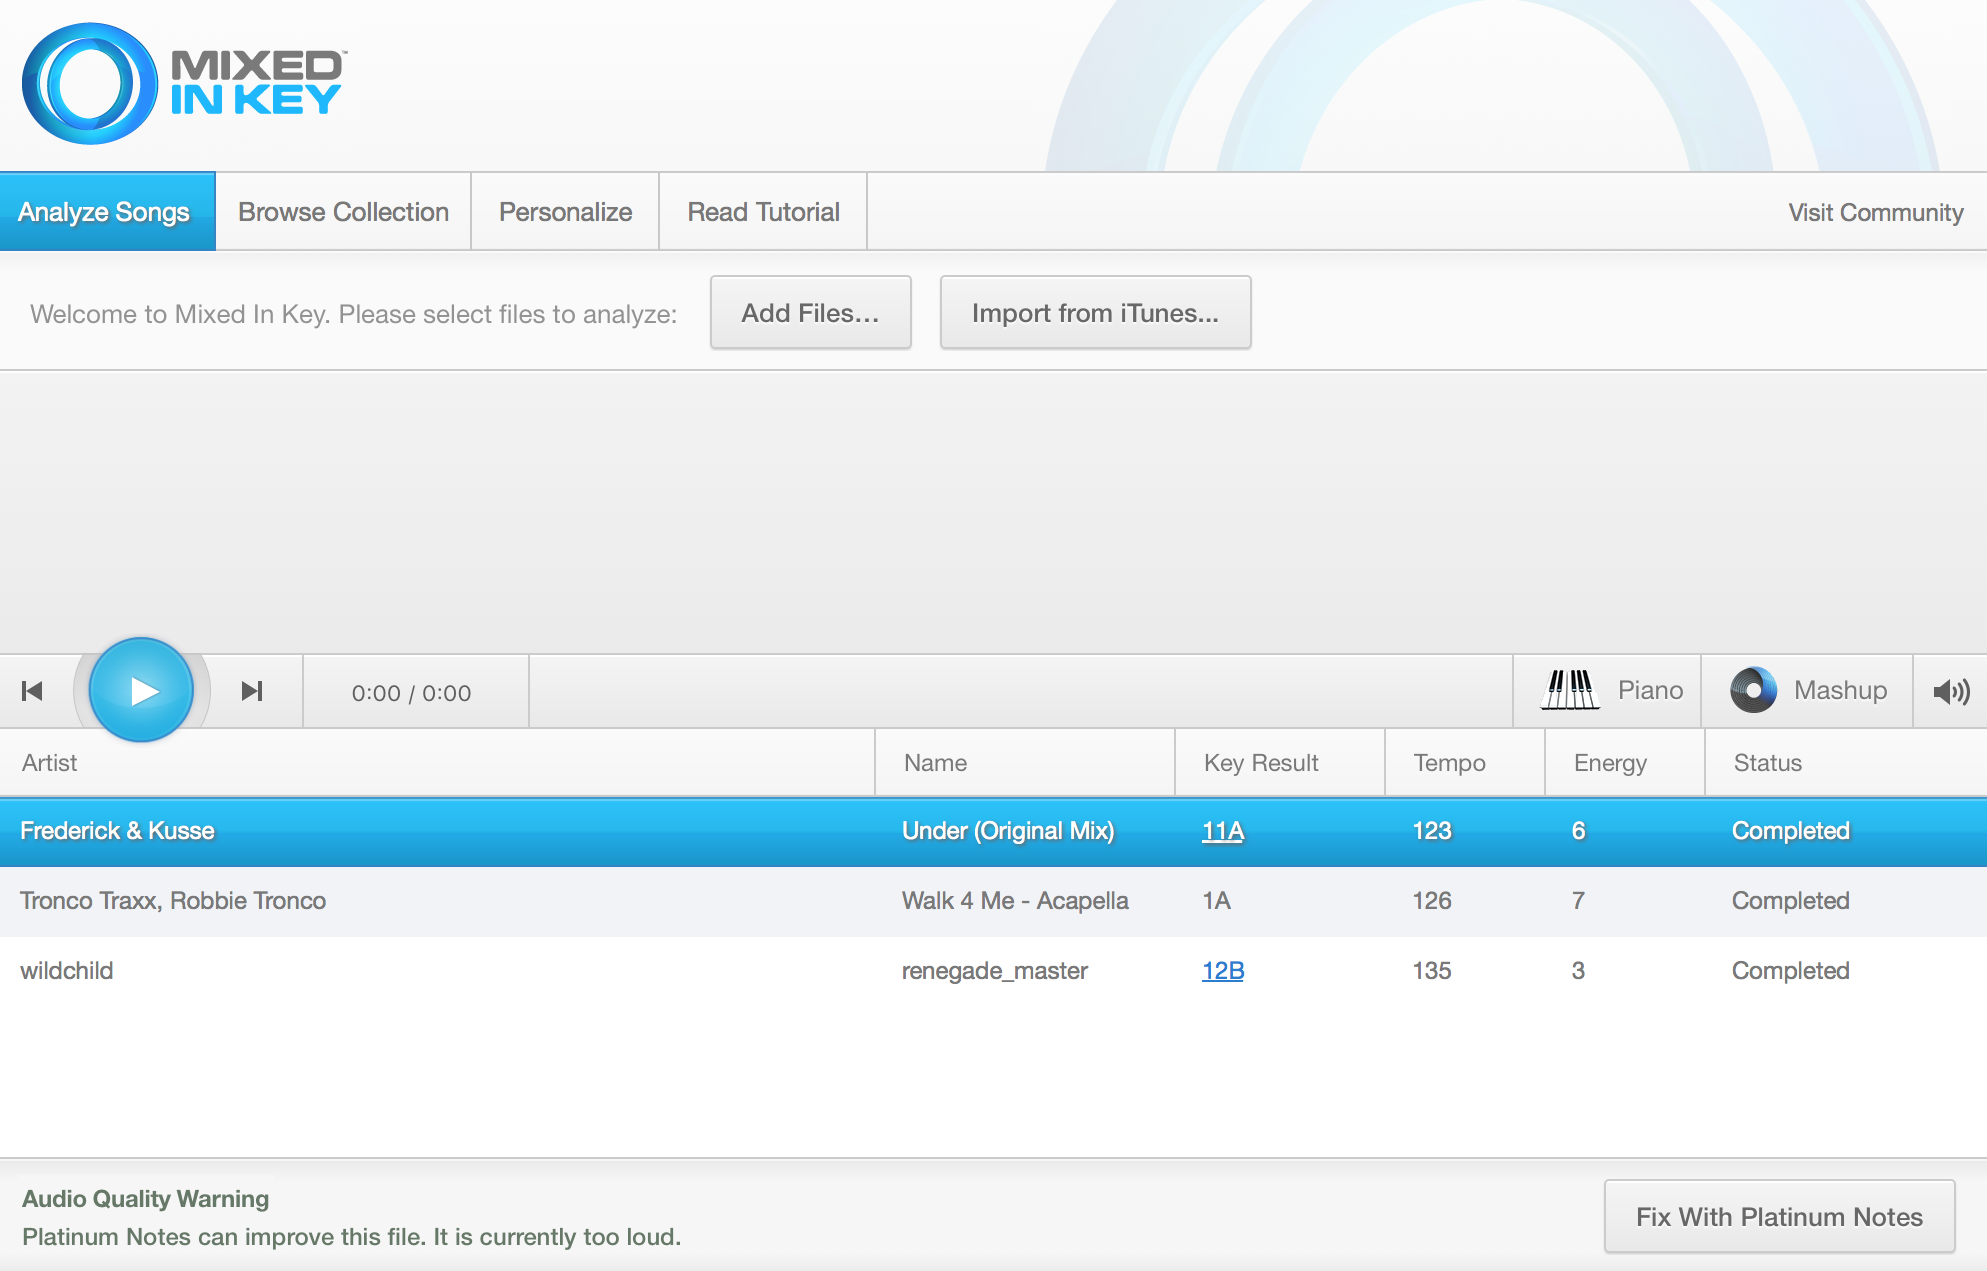
For this specific edit, I chose Frederick & Kusse’s “Under” as my backing track, Wildchild’s famous “Renegade Master” acapella, and even Robbie Tronco’s “Walk For Me.”
Pro-tip: If you’re a bit tone deaf, you can scan both your track and acapella in DJ software or Mixed In Key to ensure they are in compatible keys. However, sometimes the key does not matter so much. In the end, it is a call that the producer will have to make.
Line Up & Time Stretch Your Vocals
Time stretching can be a tricky process for new producers. I’ve attached a great tutorial from Slynk below to explain it in full detail.
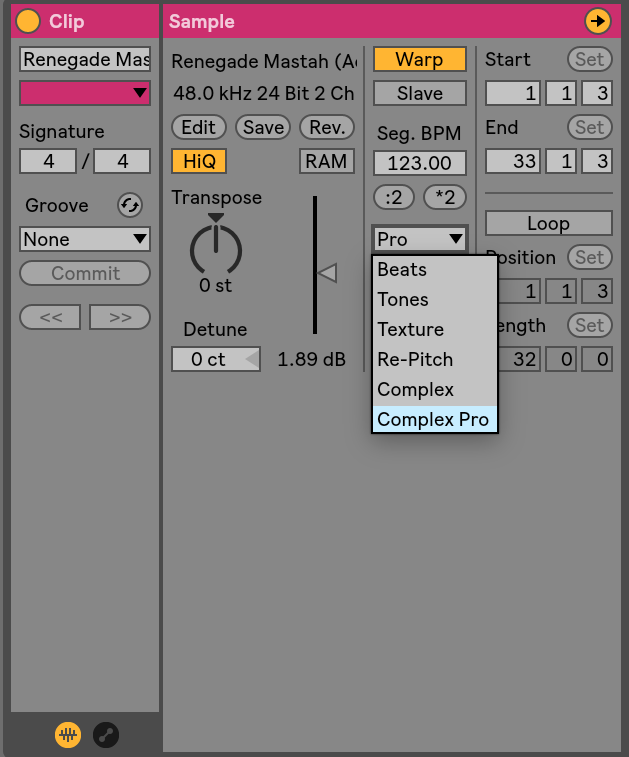
Sometimes, time stretching is not always necessary, especially if you are only speeding up or slowing down your acapella by a few BPM in order to make it fit. Luckily, I didn’t have to do much time stretching in my edit. I simply made sure that I had selected “Complex Pro” as the warp mode on my vocals and that the “Segment BPM” was accurate. If you’re feeling particularly lazy, you can even look up the BPM of your acapella, punch it in, and you should be good to go!
Arranging the vocals was rather simple.I felt that they would be best in the breakdowns of the track as there’s not much else going on, and would be a solid way to keep people on the dance floor.
That being said, if you mess this up, your edit is going to sound pretty terrible. Similar to when two records are out of time with one another and they begin to train wreck, you have to make sure your vocal is perfectly on time with your track.
Spend as much time as you need on this arrangement step, it is the most important one!
EQ The Vocals
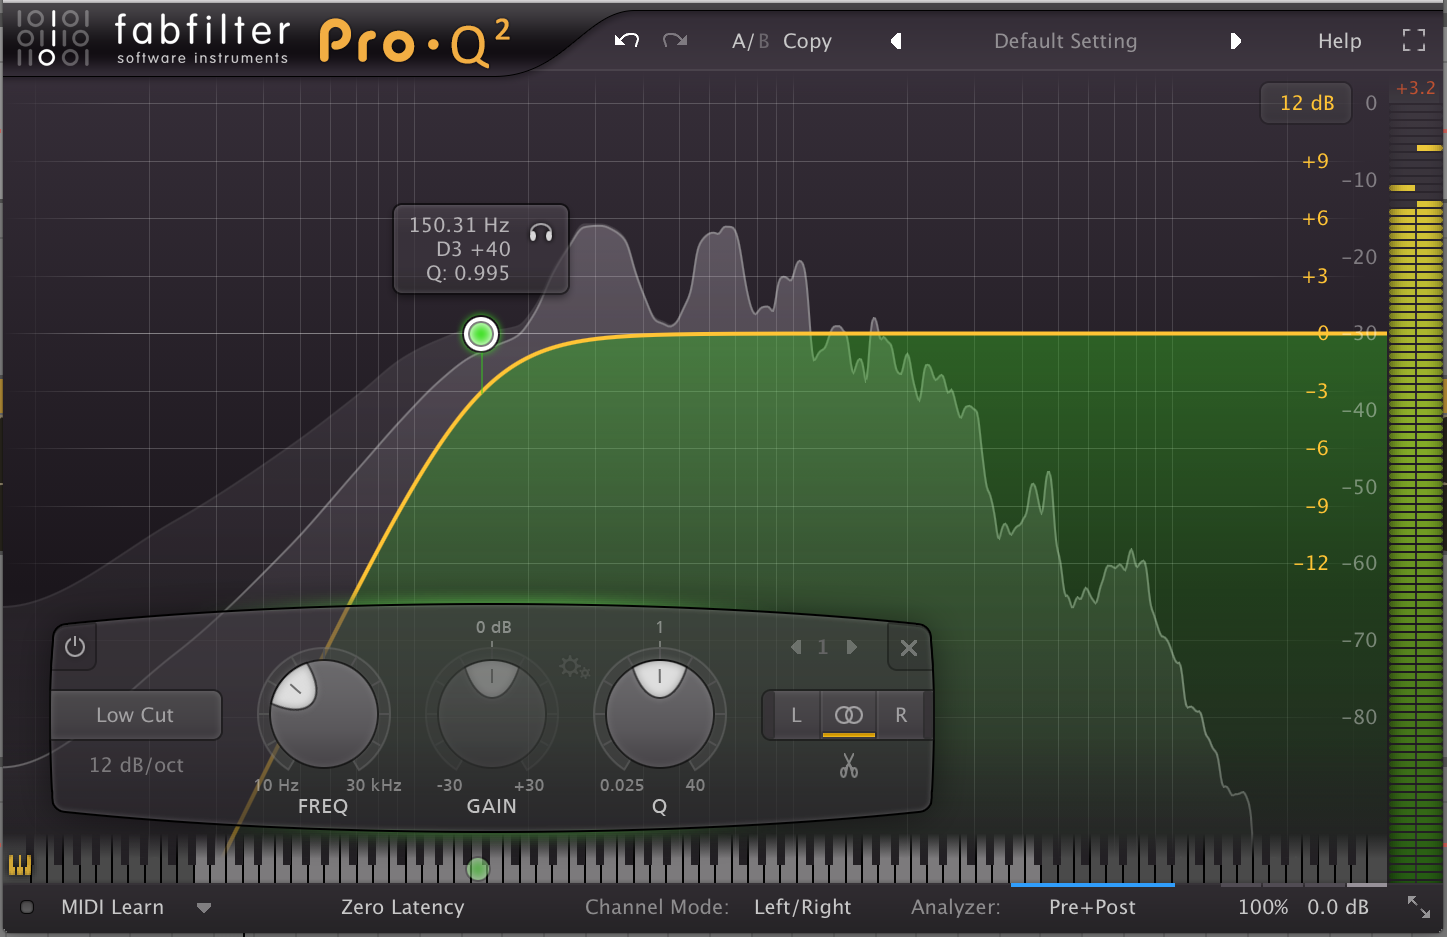
EQing vocals is such an expansive topic that it is literally worthy of its own tutorial. Generally, when making a mashup, you can apply a high pass filter to all frequencies below 80HZ. This is where sub-bass lives, and vocals have no need for such frequencies most of the time. Similar to how you would not mix two tracks with both of their basses up while DJ’ing, it is important to make adjustments when working with audio.
In fact, you could probably cut up to 150HZ in most cases. This can be done on any EQ. Fabfilter Pro Q-3 is my favorite choice.
Add Reverb?
DJs will often simply add an acapella over top of a track and call it a day. The problem with this is: when you put a bone dry acapella over a professionally mixed and mastered track, it hardly ever sounds good, unless there is already FX on it. What you need is a little bit of reverb!
Put simply, all reverb does is put a particular sound in a “space.” So many people make a simply application of reverb insanely difficult, when it is anything but.

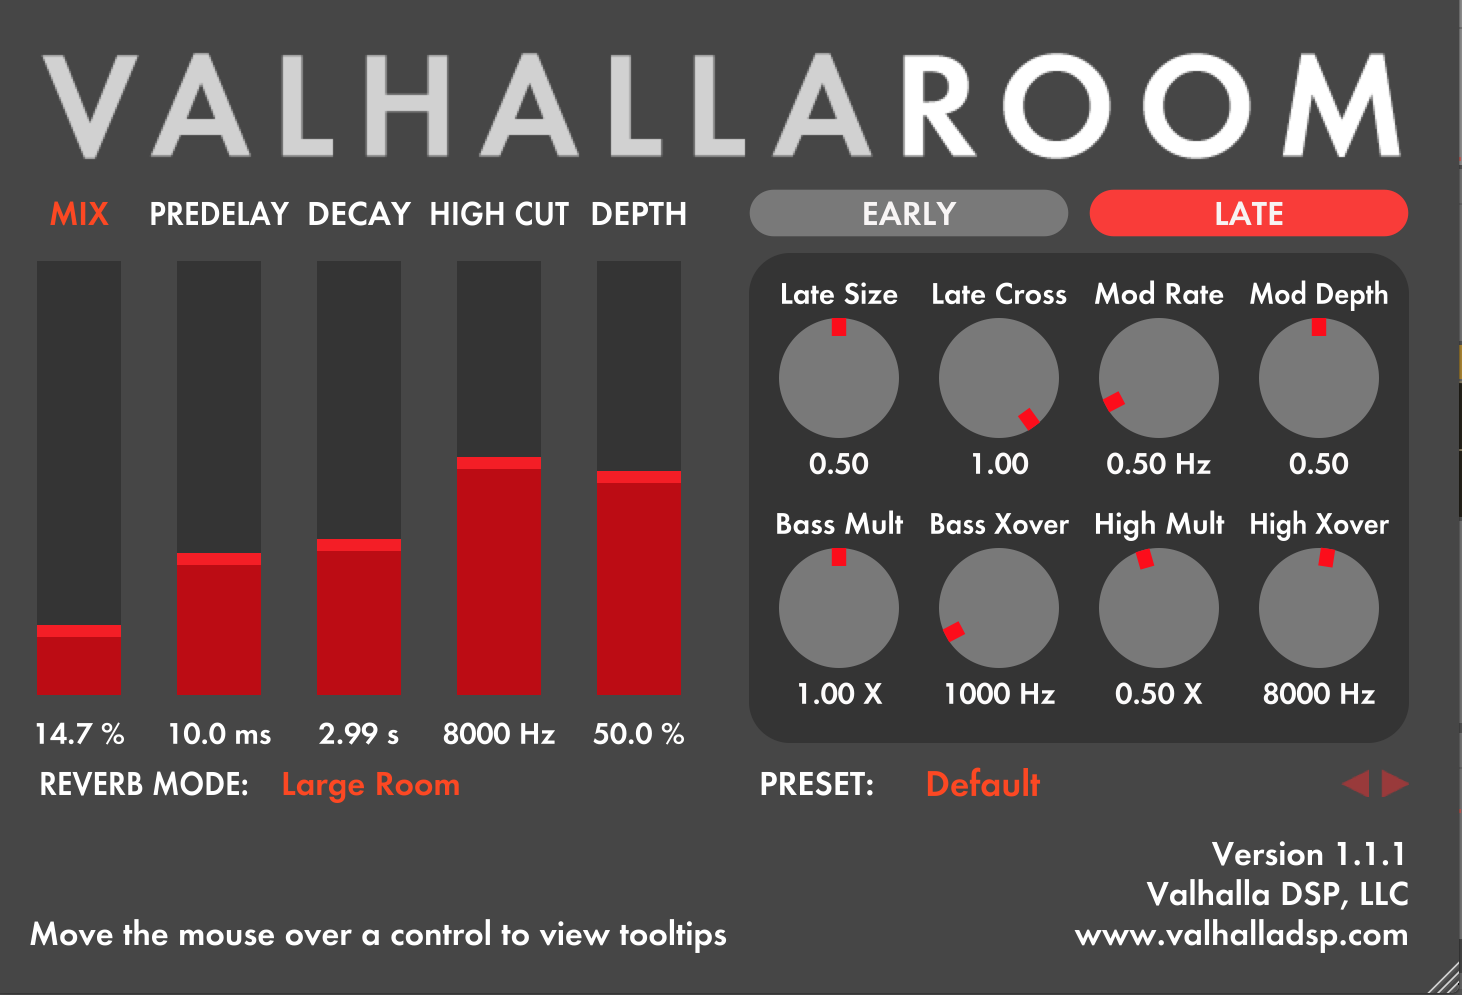
For those looking for a shortcut, grab ValhallaRoom reverb. It is the EASIEST to use reverb plugin I have ever seen. Nine times out of ten, you can simply tweak the mix level and the decay time and come up with something perfectly acceptable for these purposes. Below is a screenshot of the settings I used on my first acapella in the track. Notice how every other setting has been left to default except for the two parameters I mentioned earlier.
Endless Smile
While Dada Life is often known for their electrifying DJ sets, any producer in the know is aware of the fact that they’ve been making world-class plugins for years. As a follow up to their popular Sausage Fattener, they’ve released Endless Smile.
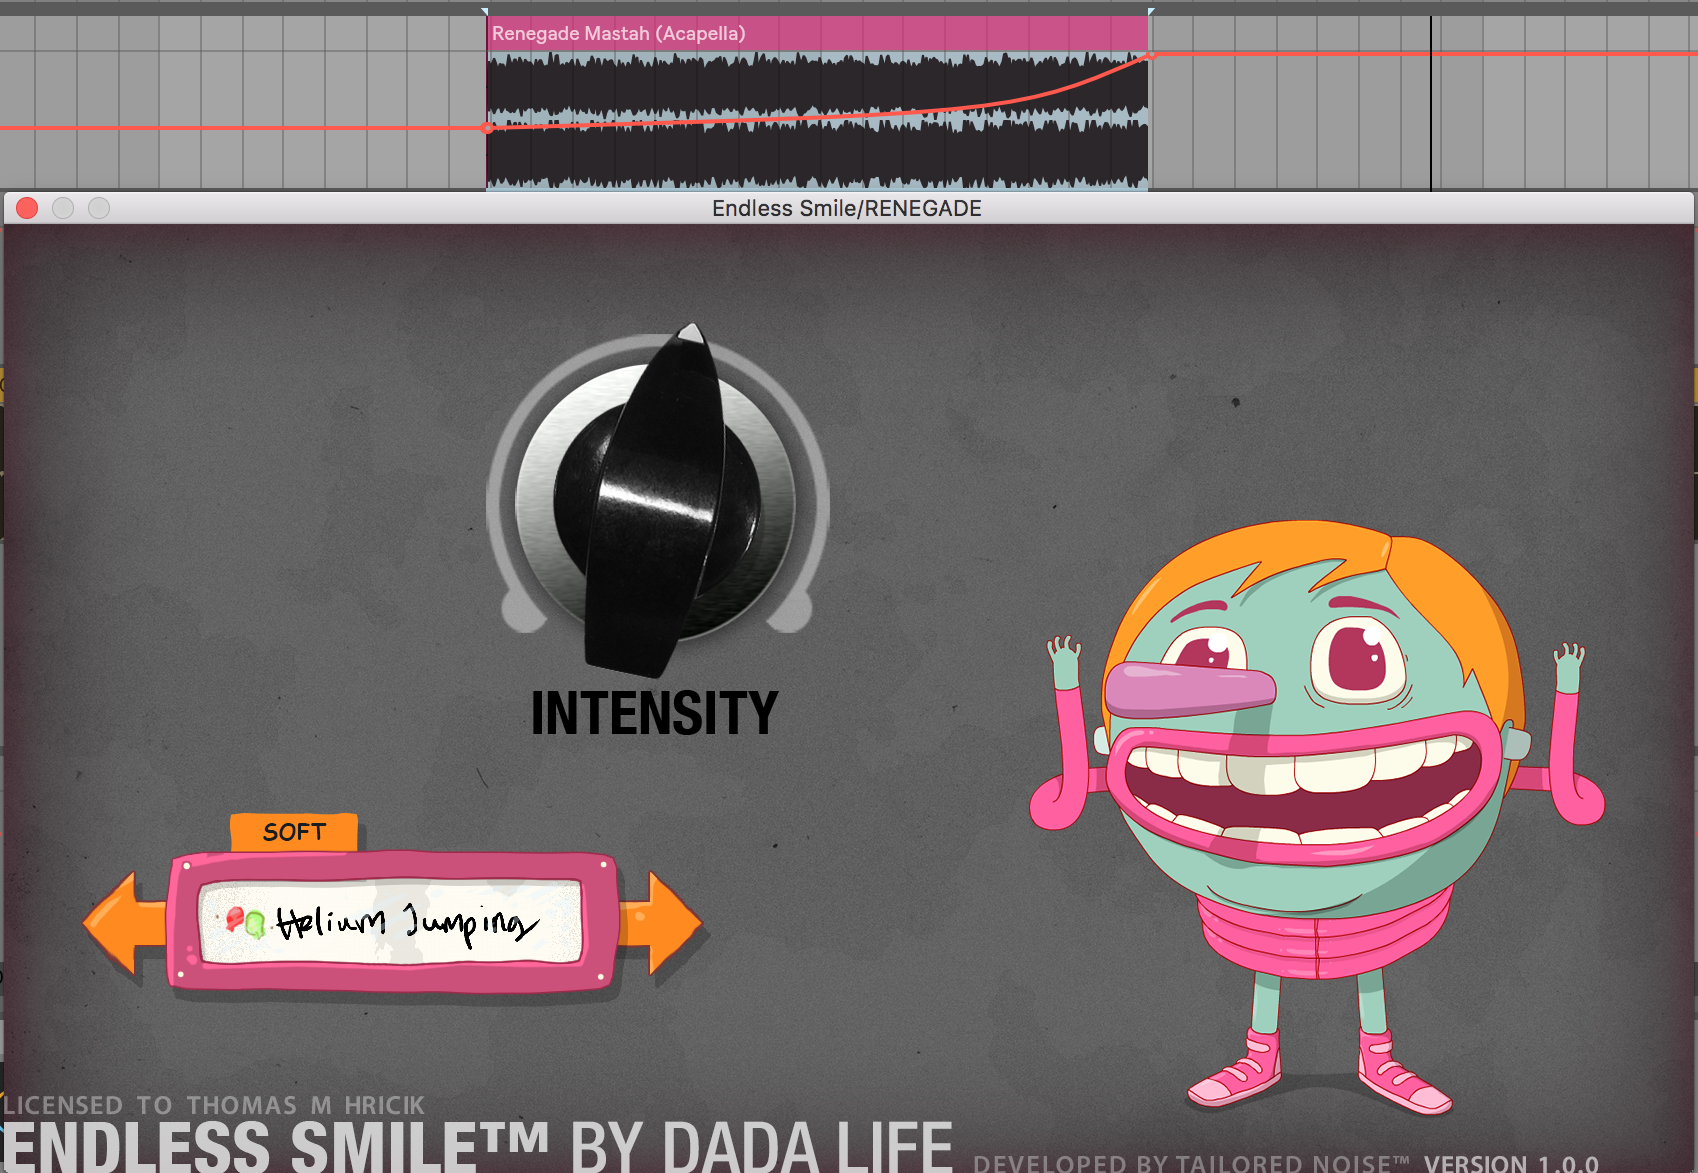
Endless Smile is one of the most simple plugins I have ever used. With one knob, you control a whole host of effects that include filters, delays and reverbs. The result? You can create a solid buildup in a track with the click of a button. It really is that easy.
The possibilities for using Endless Smile are genuinely limitless. You can put it on your vocals, on your track, or even on the master channel itself. In this case, I put it on the vocals in conjunction with the ValhallaRoom to make them gradually wash out. It is as easy as drawing in an automation line.
Mixing
Even though this is just a simple mashup, you will be required to adjust the volume on either your track and your vocal to make everything fit. To keep this as simple as possible, I would suggest you gradually turn up (or turn down) the volume on the vocal until it sounds “right” to you.
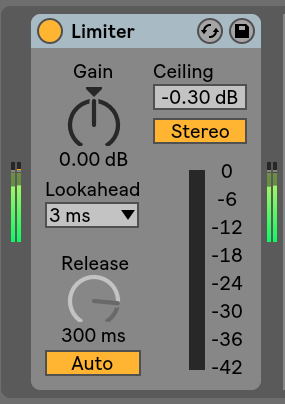
Check your master channel. If you are clipping just a little bit (turning the meter red), that’s okay. Ableton’s metering is notoriously sensitive. This is one instance where you will have to trust your ears. If you ensure that your edit is not actually distorting, you can use Ableton’s Limiter to make sure no distortion is taking place. Below is a screenshot of the settings I’ve used.
It Takes Time – Keep Making More!
If you’re coming from having no production experience whatsoever, there’s a good chance your first few edits may not be that great. This is totally okay! There’s no need to rush the process, and I encourage you to think hard before you put any of your work up for download if you’re totally new. Make some edits, try them out in your sets, and see what works. It always helps to befriend a few experienced producers to ask what they think, as well.
Regardless, making edits is a great way to “get your feet wet” with production techniques and learn some of the most basic functions of Ableton. Once you’ve mastered the process, they’re a great way to gain acclaim among other DJs and get your name out there in the DJ world.
Good luck, and happy editing!


