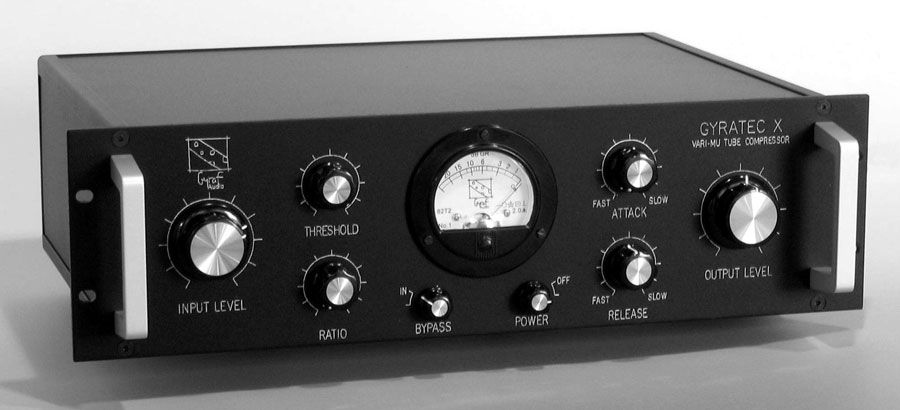
With the rise in availability of musical technology (DAWs specifically), more and more producers are surfacing, and more DJs are incorporating production techniques into their workflow. Compression is by far the most used (and therefore, abused) of these techniques, simply due to lack of knowledge of what a compressor does, and how to work one properly. These processors can truly make or break a track or live recording by either giving the music the extra thump it needs, or making it painful to listen to — it all depends on the knowledge the user has. Let’s go through and break down different aspects of compressors, how they interact with each other, and how to integrate them correctly into a production or DJ workflow.
The Concept is Simple
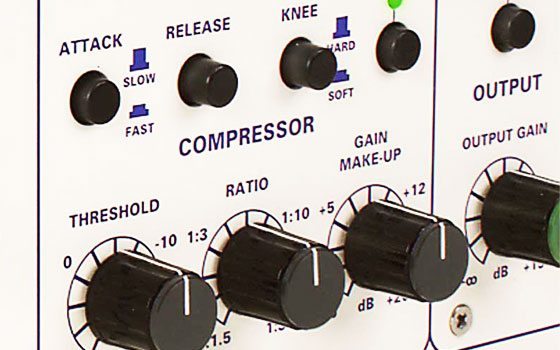
A set amount of signal (threshold) passing through the compressor has its dynamic range (how loud or soft the signal is) lowered by a set amount (ratio), at a certain speed (attack, release, knee).
Okay, maybe that didn’t sound very simple, so in very simple terms: Variations in volume are eliminated. Usually, in live recording situations, compressors are used to make a vocalist sound more consistent, give a bassist or kick drum a fatter sound, or over a whole mix to “glue” it together. As you can see, compressors have various applications, and are an integral part to any recording. Unfortunately, it is also the most misused and abused.
There has always been a hot debate amongst recording engineers about how to go about using compression: heavy, light, staged, etc. — and there are valid arguments for each method. In the end, it comes down to what the end result *sounds* like, regardless of what the compressor’s settings say. In this article I’m going to demonstrate how to use a compressor in-depth, in different situations, and then show you how to set up a way to make your DJ mixes sound a bit more professional.
First, let’s define some terms you will come across:
Threshold – As stated earlier, this is how much signal you are sending to the compressor, measured in decibels. With the threshold at its highest, only the peaks of the signal (if any) will be recognized by the compressor. At its lowest, all of the signal will be seen. Think about this as the bar for the high-jump competition: The higher the bar, the fewer people (bits of signal) make it over, and vice versa.
Ratio – After the signal passes the threshold, it starts to be compressed. The ratio determines by how much. A typical 2:1 ratio means that for every 2dB that crosses above the threshold, the volume is lowered by 1dB. For example, if a signal is holding at a constant 0dB, and the threshold is set to -2dB with a 2:1 ratio, the post-compression signal will hold at -1dB.
Still with me? Good.
Attack/Release – These settings (measured in milliseconds) control how fast the signal is attenuated (lowered) by the ratio (attack), and then how fast it, well, releases the compression on the signal. For instruments with transients (impact sounds: kick drums, snares, hi-hats, etc), a fast attack is usually necessary to capture that initial hit and hold it down. Over a whole mix, however, the attack may be slower since there are other instruments in the mix.
Knee – Probably the most complex aspect of compression is the Knee, which basically controls how fast the signal reaches the threshold, and how it acts after the threshold is crossed. A “soft” knee is what is sounds like: a gradual curve that applies the ratio at a slower rate, and therefore is more transparent, which comes in handy when you have a very high ratio. A “hard” knee is the opposite, a sharp curve that applies the ratio very quickly (according to the attack/release times). Not all compressors have Knee settings.
(Makeup) Gain – Since the level is being attenuated by the compressor (remember our 0dB signal ending up at -1dB after compression), it is necessary to add level to the signal to boost the compressed signal back up to it’s original level (or higher).
With this knowledge, you now know everything you need to operate a compressor successfully. It may seem a bit overwhelming at first, but like I said, it’s really a simple concept! Reading is not sufficient enough to know how a compressor really works, you need to train your ears too! The best way to learn is to start twisting knobs in every which way, or by loading up presets to get the general idea. Now let’s go into some examples of how to use compressors in different situations:
Side-Chaining
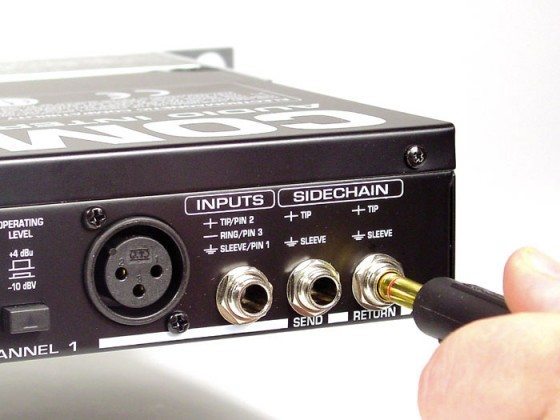
Probably the most used compressor setup in dance music is called Side-Chain Compression. You may have heard this on an exaggerated scale if you listen to French electro-house, it is typically put on a bass, with the kick drum being the input. The bass seems to disappear very briefly when the kick drum hits, giving a “pumping” sound to the bass. Here’s how to set it up:
1. Put a compressor on the bass
2. Route the kick drum to its own bus
3. Set the compressor on the bass to read from the bus the kick is routed to (different compressors vary in how this is set up, look for either a Sidechain option, or possibly Input)
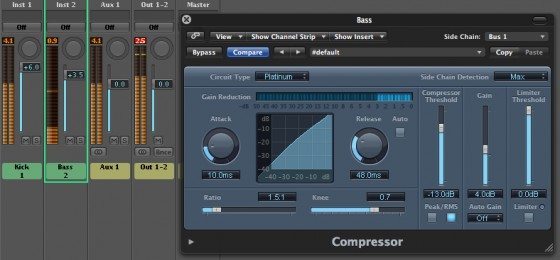
Pre-Compression: [audio:https://s11234.pcdn.co/wp-content/uploads/2010/05/uncompressed_example.mp3]
Post-Compression: [audio:https://s11234.pcdn.co/wp-content/uploads/2010/05/compressed_example.mp3]
Hear the difference?
The bass will now be compressed each time the kick drum hits, lowering the volume of the bass and letting the kick drum stand in the forefront of the mix (you may need to play with the release time to find something that works for you). Using it heavily can achieve the “pumping” sound described earlier, but more subtle uses can help a very resonant kick drum and bass get along better with each other, and help to avoid clashing frequencies.
Side-Chaining also has an important use in live DJ work. Usually used for radio broadcasts, a mic may be set to be the input of a compressor that is inserted over the entire mix, so that when the DJ/MC begins to talk, the music is dipped or “ducked”. When the shout outs are finished, the music comes back to its original volume, without any manual fader/volume knob moves. Very helpful! Some mixers even have a ducking feature built-in these days to achieve this effect all-in-one.
Parallel Compression
It sounds like an oxymoron, those two words next to each other, and is an effect used in music production that seems to defy logic for beginning audio engineers. Parallel Compression is used to blend the round sound of an uncompressed kick drum (usually), with the hard impact of one that is heavily compressed. However, there is one problem: Compressors, along with all Dynamic Range Processors, are usually routed in a Serial connection (or Insert). This means the *entire* signal is sent through the processor, and then back out (“in series”). A Parallel connection can be told how much signal it will receive (usually with an Aux Send), and is mainly used for time-based effects (delay, reverb, etc). Knowing this, we can see the confusion these beginning engineers face. How does one send a partial signal to a processor that operates in series? It’s actually very simple (really this time):
1. Set up a bus with a compressor on it
2. Send your kick drum (uncompressed, or just very slightly compressed) to the bus using a Send
3. Slam the compressor that is on the bus (ex: 4:1 ratio, hard knee, fast attack, medium release)
4. Blend your compressed signal with the original until you have a good mix between clicky-impact and round bass. Congratulations! You now have the best of both worlds. And it sounds fat, too.
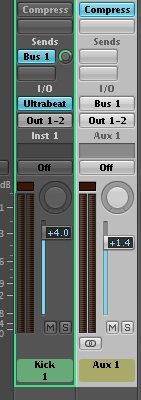
Pre-Parallel Compression: [audio:http://djtechtools.com/wp-content/uploads/2010/05/parcompoff_example.mp3] Post-Parallel Compression: [audio:http://djtechtools.com/wp-content/uploads/2010/05/parcompon_example.mp3]
Makes a bit of a difference, no?
Styles of Compression (in the studio)
I would like to now briefly touch on the different styles of utilizing compressors, as I don’t want to overwhelm you with how in depth this discussion could go.
Method 1 – The 1 Step Brick
A heavy compressor/limiter/maximizer over the entire mix, sometimes combined with running each track through heavy compression beforehand as well.
Method 2 – Staged Compression
Several compressors are run in various stages (ex: one on kick drum, one over entire drum bus, and one over entire mix), but very lightly (2-3dB gain reduction tops). The end result is a very fat sounding track, and transparent compression.
Compression in the Mix
Other than using side-chained compressors for live radio broadcasts like I described earlier, compressors can give your set a little extra thump, and correct any accidental volume jumps between tracks. To set this up (in external mix mode), route an output of your mixer to an input of your soundcard, open up your DAW and set a channel to read that input. Now put your favorite compressor on the channel, and start running part of a song that you consider to be pretty loud. Dial in the compressor so you’re averaging 2-3dB of gain reduction, with a medium attack and medium release, and a maximum ratio of 3:1. Now record your mix through this channel, and you will have a fat sounding mix!
There are a few other ways of using compression, including Multiband Compression which is commonly used in mastering, but I believe them to be beyond the scope of this article.
Side Note on Limiting
Limiting and Compression are one and the same as far as processing is concerned. The only crucial difference is the ratio setting. A typical compressor ratio is 2:1 all the way up to (technically) 10:1, although in my experience I have never encountered using a ratio higher than 5:1. Limiters are basically just compressors with a 10:1 ratio or higher. It’s that simple! (told you so)
Happy ‘Pressing!
-CT


