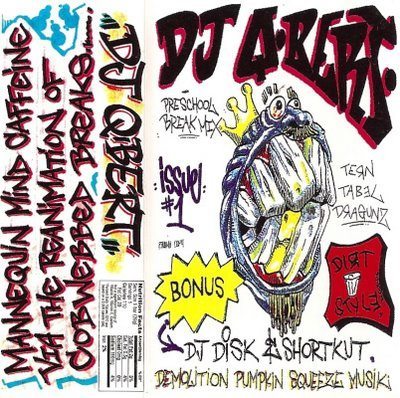
Mixtapes are still one of the best ways to hone your DJing skills and promote yourself. This guide will hold your hand through the process and have you making professional sounding mixes in no time! While cassette tapes are now things that you might only dig out to show your kids how you used to listen to music on the move before the MP3 player was invented, the term “mixtape” lives on. Originally a collection of unmixed tracks recorded to a tape, usually to give to friends or a boy/girl that you were trying to impress, then a term for a mixed DJ set recorded to a tape, the mixtape took another step up the evolutionary ladder in the early 1990s with the availability of affordable multitrack recorders. Back in 1994, I bought a couple of mixtapes via an advertisement in a hip-hop magazine. One of these mixtapes was called “Demolition Pumpkin Squeeze Muzik” by DJ Qbert. This, along with another mixtape called “Comprehension” by DJ Babu of the World Famous Beat Junkies, were the first multitracked mixes I ever heard and they opened my eyes (and ears) to a world of possibilities.
Regardless of the equipment you use for DJing, there are limits to what you can do when performing live. For instance, you can’t do two lots of scratching at the same time. Making a multitracked mixtape requires a combination of traditional DJ skills and production. You’re no longer bound by the equipment you use or the number of arms attached to your body. While some consider multitracking to be cheating, an accusation that has been levelled at pretty much everything in the DJ world that isn’t Technics 1200s and the most basic of mixers, much like with modern DJ software that can automatically sync tracks for you, it’s what you do with multitracking that matters. If you use it to produce a perfect, but ordinary sounding mix to pass it off as if it was recorded live, then you’re missing the point. SO, IF YOU WANT TO TRY THIS, WHERE DO YOU START? I’m going to explain the basic concepts and then break down the basics of multitracking for you with audio examples and screen shots, which will give you an idea of the kind of thing you can achieve. Depending on the gear you use, you may even be able to incorporate some of these ideas into your live sets. The techniques discussed in this article are not only useful for creating multitracked mixtapes. You can also use them to create mash-ups, remixes, or to create edits of tracks for mixing with. Part 2 (which will go up on the site next week) will give you practical examples of simple techniques to get you started, including several audio samples.
SOFTWARE AND GEAR SET UP
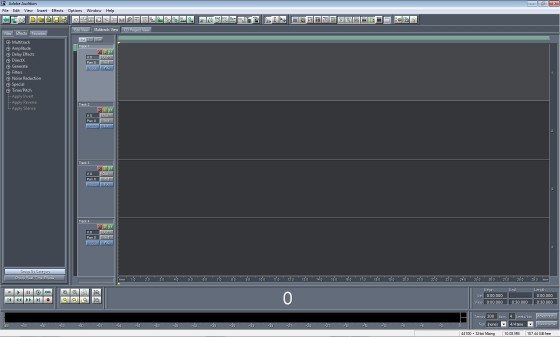
First off, you’re going to need some multitrack recording software. I use Adobe Audition, but Audacity is a good free option that’s available for Windows, OS X and Linux. Connect an output from your mixer to the line in on your computer’s sound card, and connect the output from your sound card to your amp, powered speakers or headphones. Connecting things this way will allow you to play back what you’ve already recorded and add to it, while being able to hear what you’re adding as you’re doing it live. If you’re mixing solely in software, you’ll need to use an application that can route the audio from your chosen mixing application into the multitrack recording software. Examples of this are Soundflower for OS X, and Virtual Audio Cable for Windows. GETTING FAMILIAR WITH MULTITRACK RECORDING. As I mentioned, Adobe Audition is my software of choice, so any screen shots you see here will feature Audition, but I realise that many people will be using different software. While I will refer to Audition frequently, all of the information in this article will easily translate over to a different application.
The multitrack view of the recording software is your blank canvas. In Audition, for example, there are 128 tracks that you can record on independently. This allows you to create layers of sound to build up your multitracked composition. There are a couple of different approaches to this when using it to create a DJ mix:
- You can record an entire mix as you normally would, then edit it and add to it.
- You can record one song at a time and build up the mix in stages.
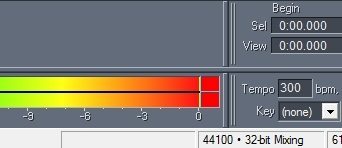
I use the second approach, as it gives me more freedom to be creative during transitions and work on each one as I go along. Be aware of the recording level. Aim to have the levels bounce up as close to 0 dB as possible, but without the sound clipping (going into the red). You can adjust the volume of each track, each block of audio, and the overall project afterwards, but if an individual piece of audio is distorted due to clipping, the only way to fix that is to re-record it, so try and get it right the first time. Also, bear in mind that as you layer audio, there’s a high chance that clipping will occur, so you will need to adjust the volume of individual audio blocks/tracks at times.
When playing back what you’ve recorded, there are two other features of the software that you’ll find useful and use frequently: – Mute – This allows you to mute one or more tracks. Sometimes, if you’ve got several layers playing all at once and things just aren’t sounding right, muting one or more tracks can make a huge difference. Sometimes, less is more. Solo – This allows you to single out just one track for playback, so it’s essentially a more convenient equivalent of clicking mute on all of the other tracks. Finally, be careful that you don’t accidentally record over something! There are buttons that let you prime each track ready for recording, so it’s easy to select track 2 without remembering to deselect track 1. Before you record anything, make sure that not only is the correct track selected for recording, but that you have deselected any tracks that you don’t want to record over!
EDITING AND WORKING WITH AUDIO
There are a handful of common tasks that you will use a lot when working with blocks of audio:
- Cutting up audio blocks into parts and moving them around.
- Locking audio blocks in place so they can’t be moved.
- Duplicating audio blocks to create loops.
- Grouping audio blocks together.
- Adjusting the volume and/or EQ.
- Deleting or muting audio blocks and layers.
- Using the undo button!
- Adding effects or panning the audio left or right (discussed below).
A good starting point is to record a song into your chosen software and then experiment with the tasks mentioned above. Try chopping a song into blocks, then duplicating certain blocks to create loops. Rearrange the order of the blocks to change the way the song sounds. Layer blocks on different tracks of the multitrack to create your first little composition. Try muting different layers to see how it sounds. Experiment with panning and effects. Doing this as a first step familiarises you with software that you may not have used before and gets you used to concepts of multitracking that you will use regularly should you decide to go ahead and make a full mix this way.
ADDING PANNING AND EFFECTS
One of the great things about multitracking is that you can experiment with adding panning and effects after you’ve already recorded the audio. You can try out different ideas and if an idea doesn’t work, it’s easy to undo it. In Audition, for example, there are buttons on the main toolbar that display “envelopes”. There are envelopes for volume, panning, effects and tempo. Once a particular envelope is activated, it causes a coloured line to be displayed on all of your audio blocks which you can then drag up and down. For example, if you enable panning envelopes, a blue line runs down the centre of all audio blocks. Dragging the line up pans the audio to the left. Dragging it down pans the audio to the right. You can click on the line at any points you like and drag it up or down to apply the panning. The more you drag the line up or down, the more the audio is panned in that direction.
Multitracking software will usually come with some built-in effects. These effects can be added on a per-track basis. Obviously, adding an effect to a track will affect all audio blocks in that track. You may also be able to use VST/AU plug-ins and effects, depending on the software.
BOUNCING TRACKS DOWN AND EXPORTING
Bouncing tracks down can free up space if your project is getting a little out of control in terms of the number of tracks and effects you’re using. It can reduce the amount of resources used up by your system too. Basically, what you’re doing is mixing down everything you’ve done so far to a single file. You can then insert that file into track 1 of a new session and carry on working on it. Any effects, panning etc. that you applied to individual blocks or tracks will obviously be present in the bounced down version. Only do this if you are absolutely sure that you’re happy with what you’ve done so far, as your project will no longer be spread over multiple tracks and therefore you can’t edit individual blocks of audio, tracks, effects etc!
Once your project is complete, I would recommend listening through it a couple of times just to make sure that you’re happy with everything. If you are, you can export it to a single file. I export to WAV as that retains audio quality and I can easily convert it to MP3 later on if I want to share the mix on the web. If you want to split your mix into separate tracks to burn to a disc, you can. There are guides available on the web for the various pieces of recording software, for example, here’s how to split a long mix into separate tracks with Audacity: http://audacity.sourceforge.net/help/faq?s=files&i=split
Part 2 of this article will be up on the site next week, so don’t worry if you’ve read this and you’re left thinking “I still don’t know how to get started!”, because in part two DJ Sigma will be demonstrating some simple techniques that you can try which will become the key building blocks of creating a multitracked mix, along with audio examples . For now, here’s a taster of something Sigma’s cooked up of the kind of things we’ll be learning about.[audio:http://djtechtools.com/wp-content/uploads/2011/07/Jurassic-5-Multitracking-Example.mp3|titles=Jurassic 5 Multitracking Example]


