After a long night of drinking, the snare often fights with the kick about who is more important to the song. Here is what we do know: great versions of both are required to make people really dance. We already covered getting the perfect kick last month, so now it’s time to trigger the second beat and make a great snare. Ableton-certified Trainer Lenny Kiser certainly knows a thing or two, and will teach us how a great snare is made through proper sample selection, layering, offsetting, and finally, processing.
Many producers first choice is to load up a series of samples, and find the best-sounding snare. In fact, great snares are not found: they are built. There are many different ways to design snare drums, and my intention is to show you one way that can then be applied to your own workflow in any software.
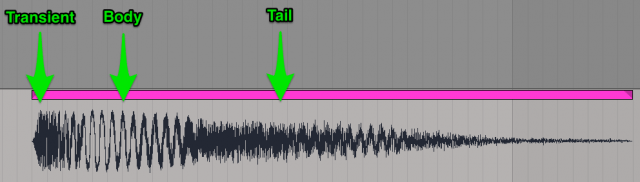
When looking for samples or synthesizers for sample material, you will want to think about three main components that make up a snare:
- the transient
- the body
- the tail
Rather than looking for one perfect sample, instead layer elements that provide the key elements.
THE TRANSIENT

The transient stage of the snare is that first initial spike and click sound that we hear. This transient develops when the drumstick hits the top of the snare drum membrane, which defines a sound and gives our brains a lot of information about what the sound is.
The characteristic sharp transient helps us differentiate a snare from other drum sounds. Defined by a sharp click or spike sound, this part of the snare helps our sound cut through the mix and grab the listener’s attention. When looking for a good transient sound you want something that has a nice sharp attack, click or crunch to it.
THE BODY
The body of the snare relates to its physical size and impact. After the snare is hit, the body resonates within a particular frequency range depending on the size of the drum. This is usually in the frequency range from 120hz to 220hz depending on the size of the snare.

The smaller the drum is the higher the pitch and the larger the drum the lower the pitch. Acoustic snare drums range from 10” to 16” wide and 3” to 10” deep, with most averaging around the middle range: 14” wide and 5” deep. The beauty of working in a digital audio workstation is that we can create massive snares by over-accentuating the body!
Body Tips:
- Use a Tom drum from a drum machine sample as the body and adjust the pitch transposition to hit in the 120hz-220hz frequency range.
- Use distortion, compression and EQ to accent and emphasis the body.
THE TAIL
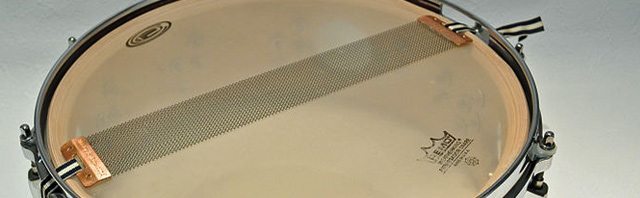
The last part of the snare is the tail. This stage is defined by the metal wires on the bottom of the snare drum known as the snare wires. When the snare drum is hit the sound vibrations cause the wires to rattle and create a cracking and sizzle sound. This is the final stage of the snare and is often re-created in electronic music with the use of noise.
Tail Tricks:
- Pick a sample with some noise at the end for the tail.
- Add reverb to the tail to give it depth and dimension.
- Use two separate noises in different frequency ranges and lengths for the tail.
LAYERING & OFFSETTING
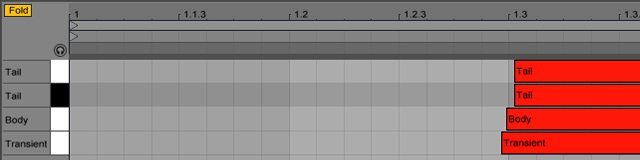
Once you’ve found your samples it’s time to layer and offset them so the combined sounds is greater than any one of them on their own. Samples are offset so they are not competing with each other and combine to form the various stages of the snare.
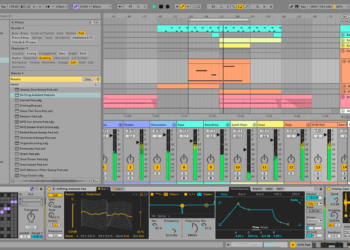
Layering can be done in many different ways, but many prefer to put them all in one drum rack for ease of processing and programming. Some producers prefer to have them on individual audio tracks in the arrangement view so they can visually see the waveforms and line up the samples appropriately. The benefit to layering and offsetting is that we get the best parts of each sample and we can later process and balance them individually to make a greater sounding snare.
Layering Advice:
- Precede the body sample with the transient sample
- Use a synthesizer to generate noise for the tail. Using a synth will provide more granular control over release time and tone.
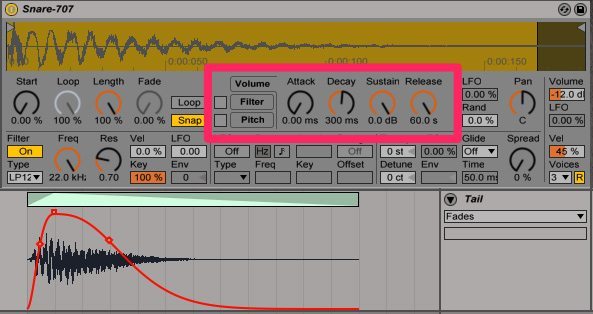
- Use the volume envelope in the Simpler device to adjust how fast the sample starts and ends. (Fades on the arrangement can also be used)
- For the body and tail it is helpful to make adjust the attack time slower so the transient cuts through
- Adjust the overall length of the snare during playback using the decay time on each element.
PROCESSING
Now that you have your samples picked and offset it’s time to processes them. I recommend processing them individually, then as a group and finally in the whole mix of your song. You may have an awesome snare on it’s own but when you put it in the mix it may need further processing and refinement. Processing your snare can involve a lot of devices and techniques but the standards are level balancing, EQ, saturation, compression, distortion and reverb:
Levels: Start processing your snares with simple volume balancing. You’d be amazed how much 1 or 2 db can alter the sound and mix of your snares together.
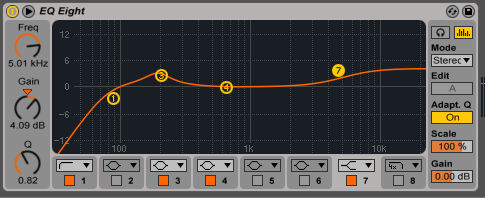
EQ & Filtering: This is easily one of the most important things. You will want to separate your samples so they are living in their own frequency ranges and not fighting with each other.
The EQ should be carving out space to make room for the other samples.
Grab an EQ8 and use it to roll off (Cut) some of the low-end on your transient and tail samples. This is done to make room for the body which will hold down most of the low-end. Additionally boost any high frequencies if the snare needs to cut through the mix more.
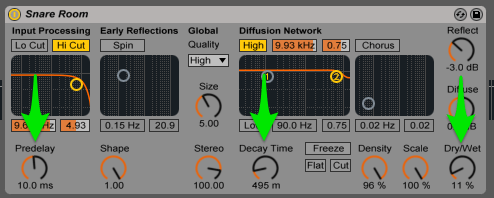
Reverb: Add reverb if you want to create more space, dimension and depth. Look for something with around a 500ms decay time for a nice tight reverb. If you want a long sustaining reverb use a plate or hall verb with a long decay time. The three most important controls on a reverb for me are:
- Reverb Pre-Delay or the amount of time between the dry sound and the first early reflection.
- Decay time or how long the sound continues in the space after the sound has stopped.
- Dry/Wet Ratio or how much un-effected signal to how much effected signal.
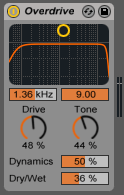
Distortion: Distortion is great for adding grit and fattening up your snares. Grab the Overdrive device and go nuts! Use the Dry/Wet ratio to determine how much distortion is used.
Saturation: If your sound isn’t hitting hard enough, adding some saturation can help round off the edges. A saturator will allow you to add either a bit of warmth or extreme clipping and distortion depending on how you set it. Be careful with this as too much will flatten your snare and make it lifeless. Use the Dry/Wet control on the saturator to mix the level of Saturated to Non-Saturated sound!

Compression: If we reduce the peak volume of the transient stage with a compressor we are changing the relationship it has to the body and tail. The trick here is to tap the peaks down a little bit and thus elongate the decay stage. This creates the perception that the body and tail are louder without turning up the volume.
Tips:
- Start with compression ratios from 4:1-10:1
- Start with a fast to medium attack 1-10ms
- Set your release time so the gain reduction meter is recovering completely before the next time the snare hits.
GROUP PROCESSING

Now that you have processed your sounds individually it’s time to process the group of sounds together so it sounds like one cohesive sound. This can be done by using a drum rack or grouping your tracks together. I commonly add a bit of distortion, compression, saturation and reverb. After processing the group together an EQ can be used to process and mix the snare within the whole song.
Some other devices you could experiment with are: Redux, Frequency Shifter, Erosion and Gate.
Important Advice for your hearing Be mindful of volume levels and time spent on processing your snares when working. A snare is a fast and loud sound that can potentially be damaging to your hearing especially if you are working on one for hours. Be especially careful when dealing with distortion, compression and saturation as these processors can make the sound extremely loud and more fatiguing.
VIDEO + CONCLUSION
As a producer your ability to craft a completely original and unique snare sound so don’t just settle for a simple sample! For some more inspiring snares check out some of the new Mad Zach sample packs here.
Lenny Kiser is an Ableton Certified Trainer – to follow what he’s up to, get more Ableton production tips connect follow his Facebook page – or check out his previous article on making a great kick drum.