Believe it or not your percussion samples may be completely out of tune! Even atonal sounds like kicks and percussion samples can be out of key and pitching these samples is often overlooked. Paying attention to the pitch of your sounds, even percussion, will make your productions and more importantly your music, sound better. So to prove that your kicks can be melodic as well as rhythmic, we are going to create a melodic kicks rack.
Finding Your ‘Tops’ Samples
The first step to building this melodic kicks rack is to choose a handful of kick samples – the more character, the better. These samples are going to be the ‘top’ of our kick, so don’t worry if they aren’t the deepest kicks you can find, in fact it may be best to find interesting samples that need that little extra ‘umph’. Now it may not be easily detectable by the human ear, but your kicks have a definable pitch that can be identified. You’ll want to be able to tune these samples to the same note, because even though they are kick samples they can in fact be tuned to fit the key of your track, or in this case to play in harmony with the synthesized kick we are going to lay underneath.
Tuning Your ‘Tops’ Samples
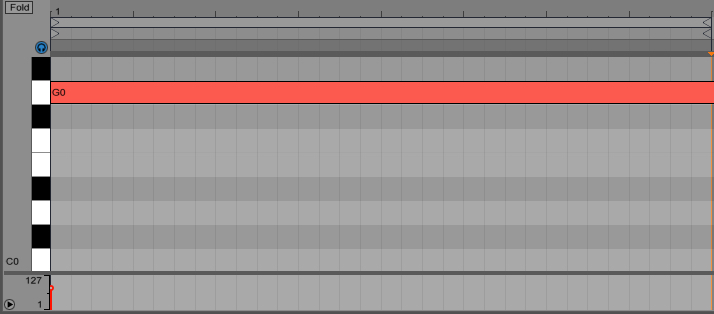
Tune my kicks? At first it sounds silly, but after you’ve exhausted every kick sample in your library looking for that perfect right-out-of-the-box kick you may realize that you’ve had the right sound all along. So we’re going to use the “Convert Melody to Midi” feature in Ableton Live 9 device to find what frequency, and ultimately note, our kick samples are hitting at and then set the Root Note in Sampler so that the kick samples transpose correctly. To use “Convert Melody to Midi”, drag your kick samples into empty Ableton clips, right-click a click and click “Convert Melody to Midi”. Ableton will create a new midi track with the midi clip with the “note” of the kick sample.
Setting Up ‘Tops’ Chain
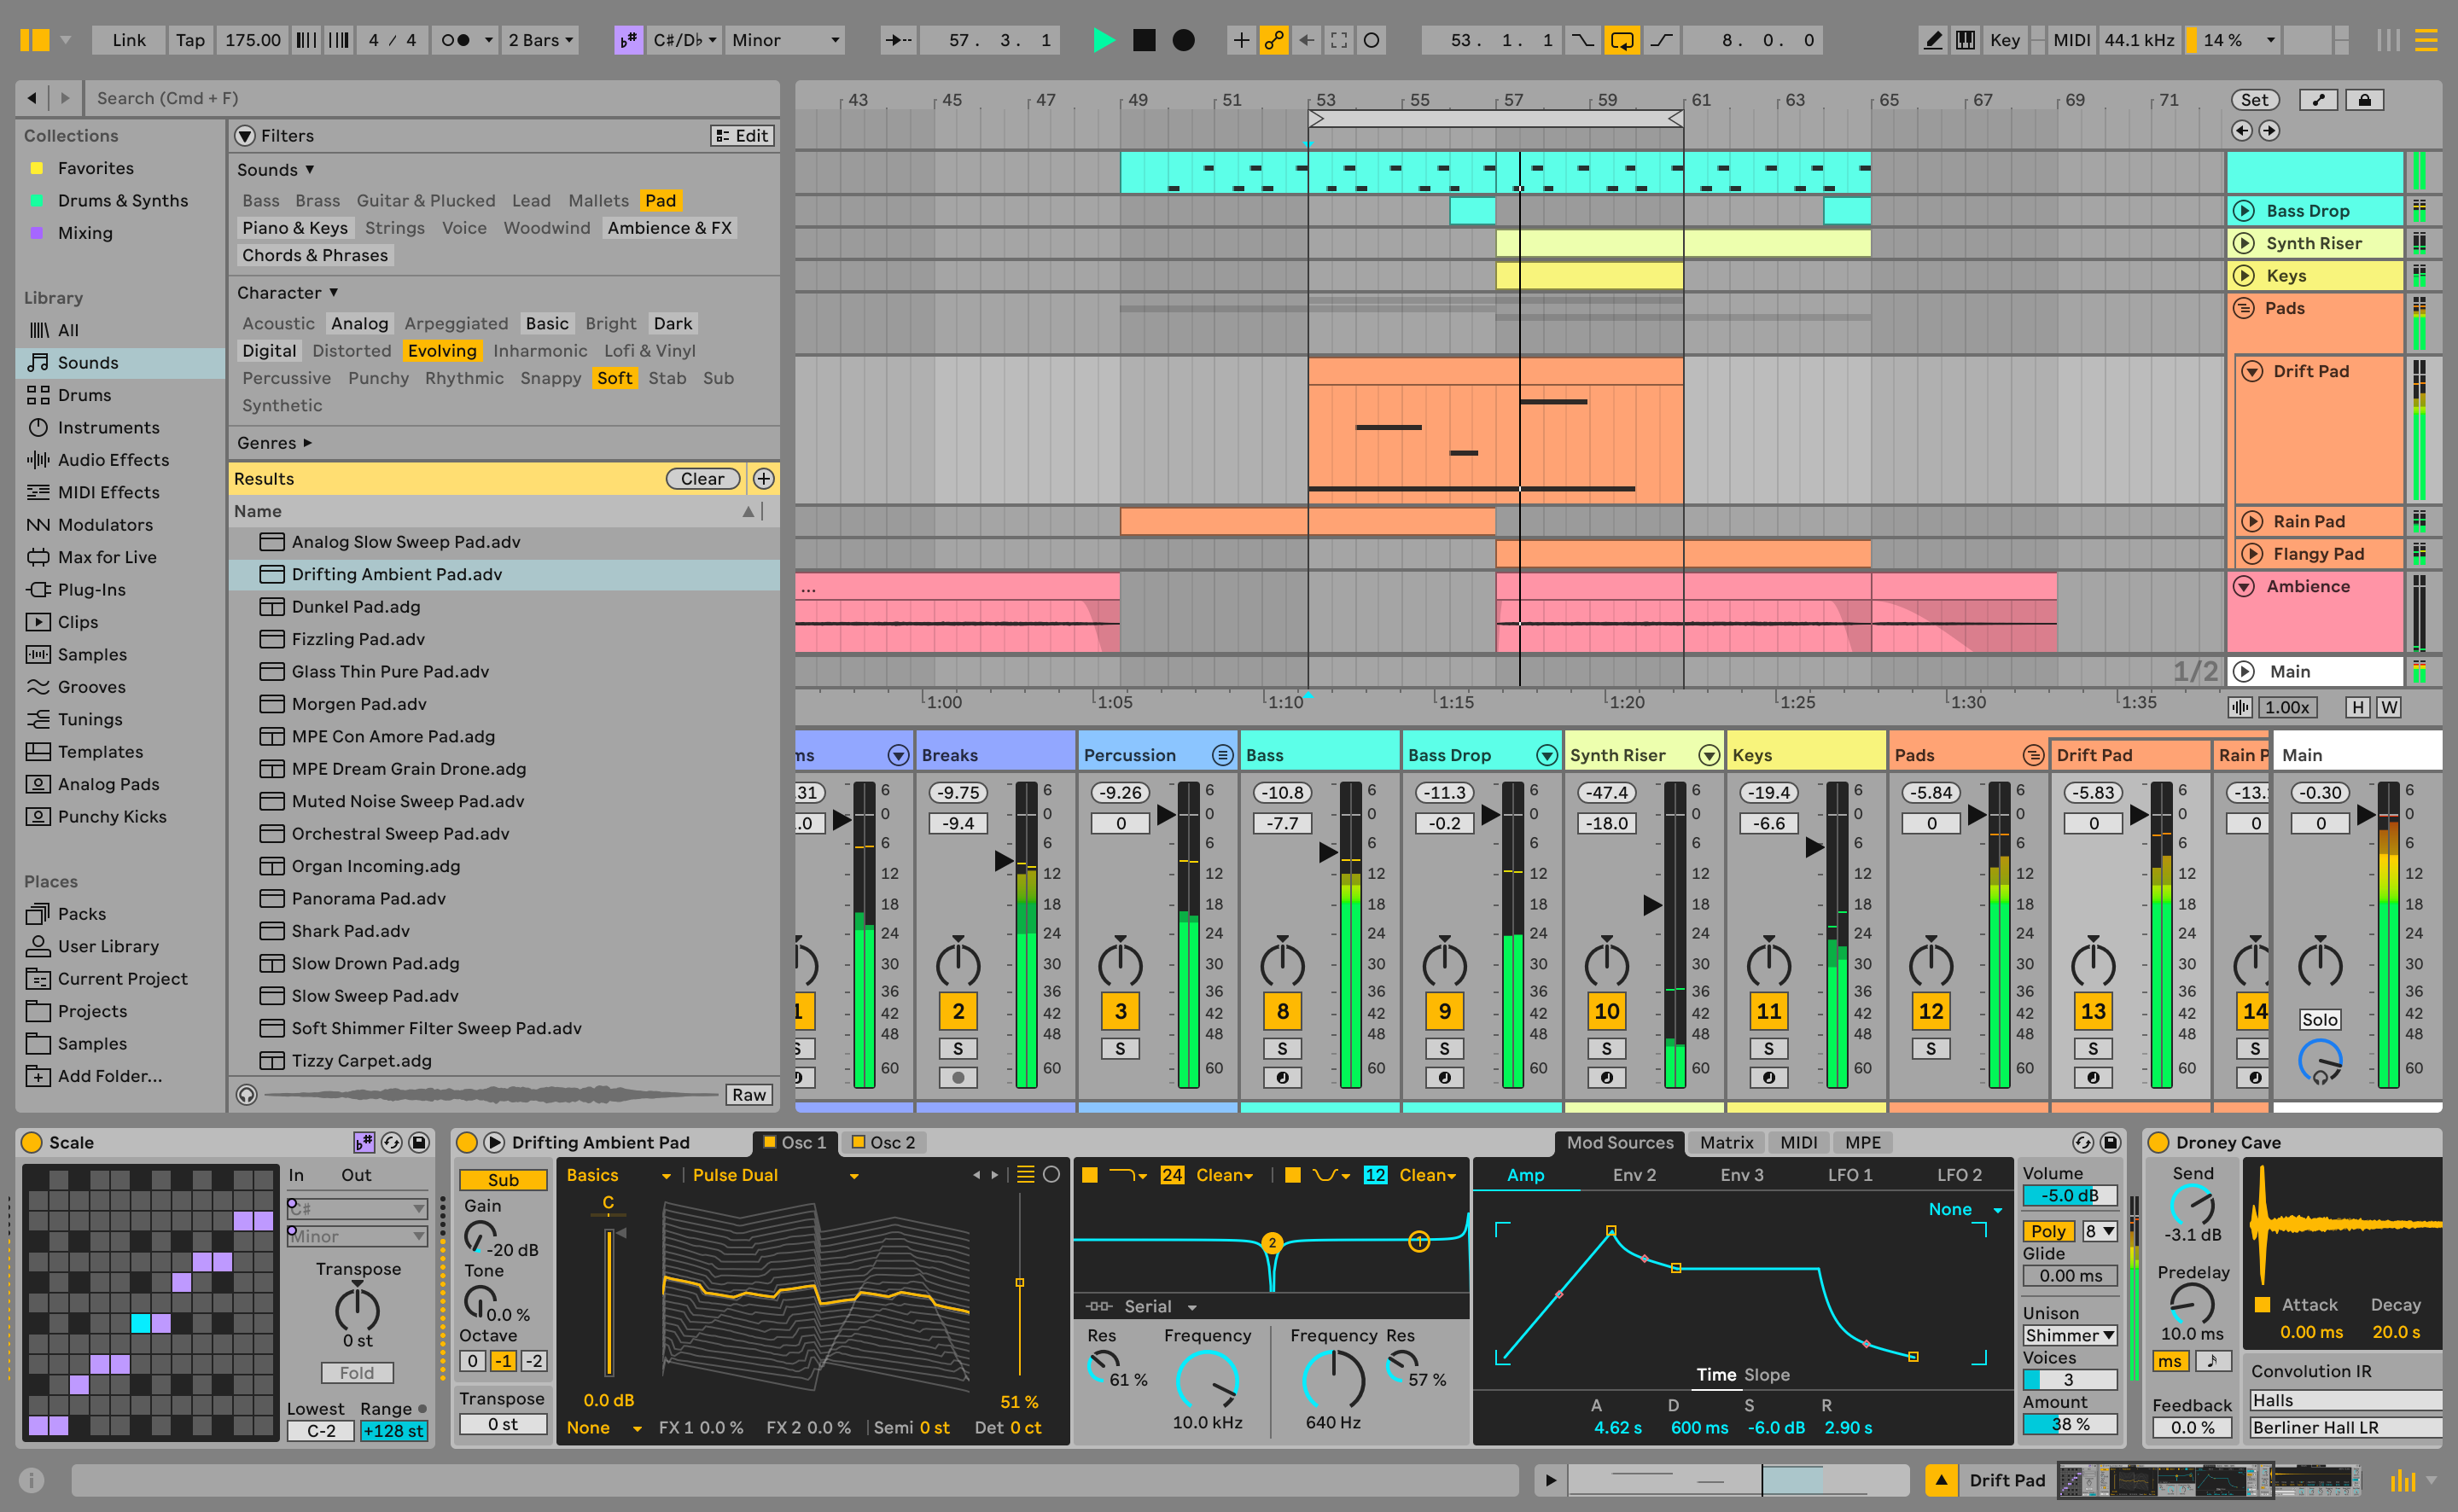
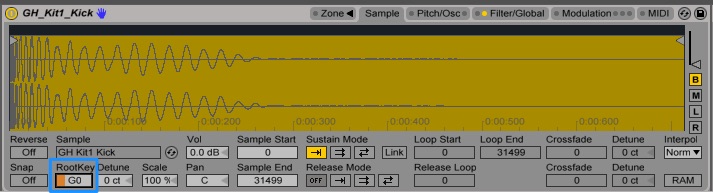
Once you’ve determined the root note for your kicks you can drag an Instrument Rack onto an empty track and then drag all the kick samples into that instrument rack. By default the kick samples will load in “Simpler”, you’ll need to convert it to “Sampler”. This is what allows you to set the root note for the kick samples. For each kick sample in the chain, right click and select “Simpler -> Sampler”. Then go to the “Sample” tab and change the “Root Note” from C3 to the correct root note for each kick sample.
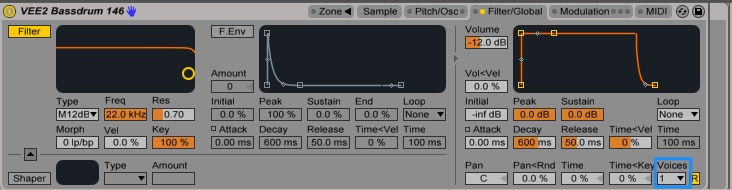
Next go to the “Filter/Global” tab and set the Voices to 1. This ensures that only one kick note can be triggered at a time.
Now that we’ve got our range of ‘tops’ samples we are going to come up with an easy way to flip through and combine our samples. The best way to achieve this is to map the chain selector to the racks macro knobs. Click on “Chain” and drag any one of the chain ranges out all the way to 127, and right click and choose “Distribute Ranges Evenly”. Now we can flip through our kick samples with one knob, but lets go one further and set up our chains to fade between each sample, so that we can combine two tops samples to create a completely unique kick character.

Creating The Synthesized ‘Bottom’ Of Your Kick
There are two parts to every kick, the initial thwack of the beater hitting the drum head and the subsequent thump of the drum itself. When creating our own digital kick rack we can use this information to our advantage but also deviate from what truly happens in the real world when we hit a kick drum with a beater head. Not all kick samples are created equal so we will synthesize the bottom end for ultimate control of our sonic profile while also keeping our sounds interesting by using samples. Learn how to create your own great kick drum.

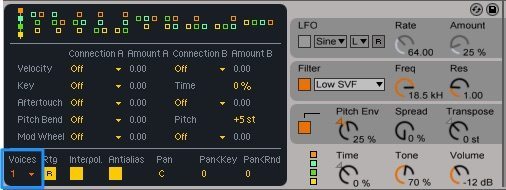
Take the ‘tops’ rack that we created in previous steps and Group this device. Now drag an Operator device to the chains list to create our ‘bottom’ chain. Set the oscillator to Sine wave and adjust the ADSR so that the Operator is playable by tapping the notes and/or holding them. Make sure you set the “Voices” for Operator to 1 to avoid multiple kick notes overlapping.
If you’re clever you can set this up so that a quick tap will be a bouncy full kick drum and a longer tap-hold will result in a longer release 808-style sound. You can use the Pitch Envelope to create a downward pitch-bend effect which mimics a real kick drum sound and also helps accentuates the ‘umph’ by starting at higher frequences and sweeping down for maximum body and punch.
Final Touches And Macro Mapping
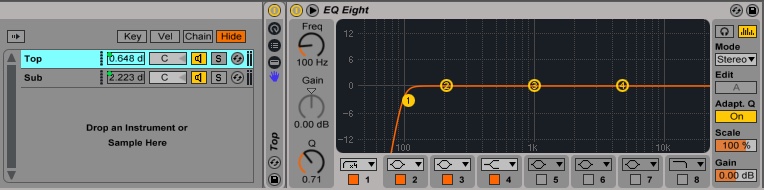
Now for the final touches to polish up the Melodic Kick rack. We will put an EQ on the Tops chains to help filter out some of the low end that the Sub frequency will occupy.
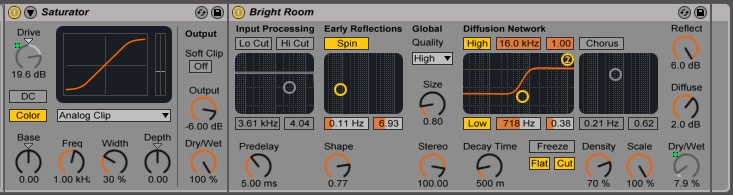
Next to give the Sub some character. We can do this by adding a Saturator for some warmth and Reverb to give the sub some space. You’ll want to add these to the Sub chain after the Operator device.
The last step is to add some macro mappings that will give you more control over the sound and character of the melodic kicks. You’ll want to map the decay, sustain, and release of the Operator oscillator to shape the sub chain. Then you’ll want to map the Top and Sub chain volume to control the mix of two chains together. Finally mapping the “Drive” of the Saturator and the Dry/Wet of the Reverb will give you quick access to effects control for the Melodic Kicks rack.
Download Multiplier’s Melodic Kick Project
If you want to just start playing right away Multiplier has included the Melodic Kick project file. Even if you’re not running Ableton Live 9 Suite, you can still open the project and Ableton will automatically enter trial mode, so you’ll be able to play with the rack, you just won’t be able to save it. To open the project follow these steps:
- Download the Melodic Kicks project
- Double click the .alp file, you’ll be prompted to choose a place to save the project (Desktop is fine)
- Go to the Melodic Kicks project folder and open the “Melodic Kicks”.als file, this will open the project and you can start playing with the Melodic Kick rack