When it comes to DJing, controllerism, turntablism and the like, all too often we think of things from a purely club based angle when there’s rich potential for many techniques in the context of routine based DJing. Making your own showcases with a looper is just one of those techniques…
GETTING STARTED
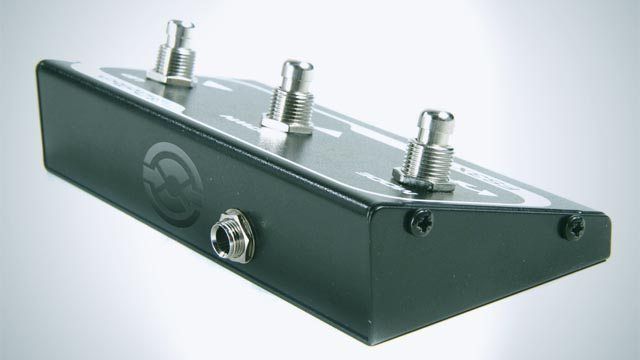
There are, as usual, plenty of options when it comes to tools to use for the technique at hand. Loop pedals – popular with guitarists and turntablists alike – are the most time honoured way, but software solutions such as Ableton Live and Traktor can furnish us with some very creative opportunities. Ableton Live since version 8 has had live looping built in, but today we’re going to focus on Traktor Pro, whose loop recorder has some very cool secrets to unlock. So, Traktor Pro aside, what is it that we need? Well, something that’ll make things more practical for us is a foot pedal; ideally when you record a loop your hands will be free to be busy creating music, so activating by foot is a big plus. To do this, you can use anything from a keyboard sustain pedal to a dedicated foot controller (we reviewed the SoftStep controller a few weeks ago), or even botch together a DIY model from a butchered computer keyboard and some stiff card. We have the software; we have the hardware. Now we just need some creativity.
CONCEPTS
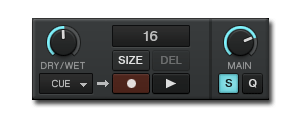
There’s one important thing to decide before you start recording: Loop length. The loop recorder will allow you to mix different loop lengths together and ensure they stay synced up, but it’s usually easiest (and more organic sounding) to stick with a loop length and play all the way through. Keep it short and you’ll be able to make quick changes and minimise the risk of recording an error at the expense of variation, make it long and you’ll have potential for a more interesting loop, albeit a more difficult to record one. I think a four bar loop is the ideal compromise for most loops; you can perform a shorter phrase twice with a flourish the second time, and if needs be you can always increase the loop size to eight bars for longer sections. To select loop length, just hit the ‘size’ button in the loop recorder. While we’re up here, set the wet/dry knob to 50% too (that’ll allow you to hear the loop and your decks equally), set the recorder to record from your cue (you’ll need to do this to ensure you only record the deck you want to each take) and snap is probably a good idea to make sure you get nice, clean loops.
One thing that all good loop routines have in common is a solid foundation. Whether we start with drums or instrumentation it’s important that we nail the timing to ensure that the rest of the loop hangs together, and we can do this in one of two ways: Pre-selected loop or metronome click track. If you use a pre-selected loop, you can be sure that the timing will be spot on if you ensure that the track playing the loop is set to master; just hit record and you’re off! If you want to build things up totally from scratch, make use of the metronome. It hides behind the left hand FX panel, and pressing the ‘tick’ button sends the master clock’s tempo out to your monitor channel, so have your headphones ready. Once you’ve recorded your first loop, you might want to turn it back off again. What else are we missing? Oh yes: sounds! You’ll already have an Aladdin’s cave of sound to mine for your routine in your music library; think of your favourite tracks with open hits, drums, melodies and basslines and how you could wrench those sounds from their constituent tracks and meld something entirely new. If you want to get truly original, and perhaps gain an appreciation for an entire artform in itself, it’s time to go crate digging. Little loops and sounds, be they from classical, experimental rock, jazz, or what have you, are just waiting to be recorded from old vinyl, tended to with cue points, and then unleashed on your routine. As a final suggestion, sample packs are a rich resource of one shots and loops just waiting for your care and attention.
TECHNIQUES
There are a handful of basic ways to use sound to record a loop. First is to literally loop an existing piece of music. It could be from a track you have in your collection, a sample pack, or you could have made it yourself. Sometimes the best sounds can be had by looping something recognisable or just too damn cool to need to chop up, but beware that creating a loop composition based entirely on already existing loops is not really the most exciting way to show off your skills. To raise the excitement – and skill – quotient, we need to start thinking about creating those loops live. Here are just a few techniques you could use, from obvious to crazy:
- Put some cues on your tracks and play them like instruments (Ean demonstrates this with the bassline in his Ozzy routine).
- Load samples into a sample deck to allow you to play them polyphonically – great for drums. You could either load in single drum hits you’ve acquired from sources such as sample packs or put loop markers around drums you’ve found in tracks and then drag them into the sample slots.
- Give plooping – DJ Shiftee’s affectionately termed ultra-short loop effect – a try. For the nitty gritty, look here.
- Loop a tone up and play with pitch, filter, and effects to create things like dubstep basslines and screaming electric guitars (Ean puts this to good use in his Ozzy routine).
- Combine some – or even all – of the above with scratching. Scratch the odd note in the middle of a cue juggle or scratch out an entire vocal line for aural bliss.
ADVANCED MAPPING
Okay, so by now you should be getting the idea: building a looper routine has a bunch of possibilities. With the loop recorder just getting fuller and fuller the more loops we record, though, the dynamics of a loop routine tend towards starting small and building into a crescendo before exploding into nothing. What if you want to create something a little more sequenced sounding? In that case, I’ve developed a mapping idea that, with a single button press, allows you to send the loop recorder to the next available sample deck slot and clear the loop recorder ready for more recordings. This technique will allow you to (assuming you use an entire, single sample deck) have four independent sample layers which can be muted and unmuted as you please, giving much more flexibility.
- Set up a pedal to initiate recording of the loop.
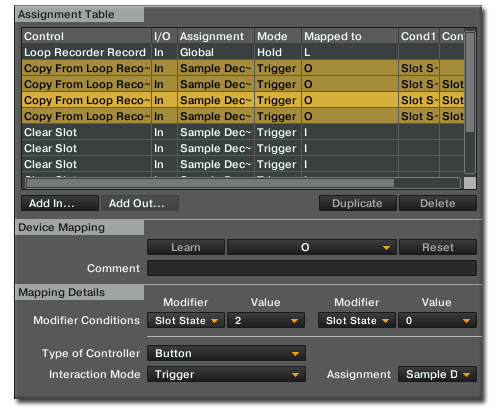
- Set up another pedal, or a button, to copy from the loop recorder to the first slot of the sample deck you want to use, but set a modifier condition that the slot has to be empty (0) first.
- On the same (second) pedal/button, set up a mapping to copy the loop recorder to the second slot of the sample deck, but set modifier conditions that the first slot has to be playing (2) and the second slot has to be empty. Repeat this logic for slot three and four.
This setup will send the contents of the loop recorder to the next empty sample deck when you hit that second pedal/button, but only then – so you can build up a loop until you want to start something separate. Neat, huh? Because Traktor always mutes the sample slot initially, and there’s no way to turn that behaviour off, we also need to do just a little more work to turn this into a workable solution:
- Mark four buttons/pedals for mute/unmute duties on the slots.
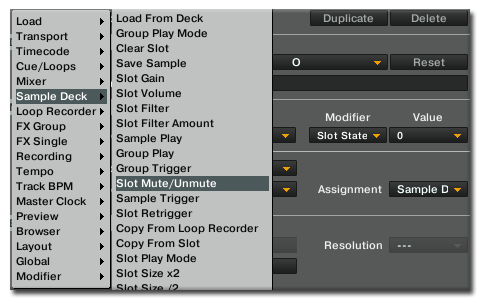
- For each button, map ‘slot mute/unmute’ set to toggle to it.
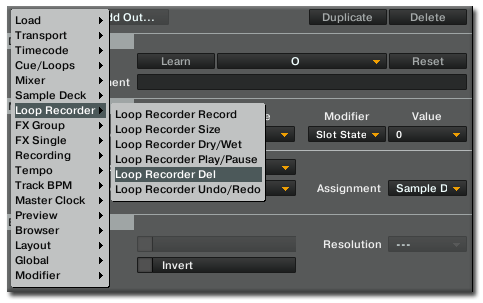
- Also for each button, map ‘loop recorder delete’ to it.
- For extra safety, use a modifier on your loop record button so that when it is pressed it is set to 1. Set a modifier condition on each loop recorder delete command so that the modifier has to be 0 to ensure the loop can’t be deleted mid-record.
Now, each time you want to start a fresh loop layer you simply press your new layer pedal/button to send what you have in the loop recorder to a sample slot. The loop will continue to play in the loop recorder until you activate the sample slot, at which point the sample slot takes over and the loop recorder is cleared, ready for you to carry on (if you were to take a look at my string theory piece you might get an idea for a single button press that does all these steps for you…). You can then use these buttons to mute and unmute your layers. Oh, one more thing: you might want to hook up a mapping to clear slots, so that you can reuse them.
If you’re in one of those lazy moods you might be looking forward to a mapping ready for you to download and try out. Sorry ladies and gents, there’s not one; I thought about it but the vast amount of possibilities for different setups combined with the fact that this is really only a five minute job in the controller editor means that it would probably take longer to edit a mapping to your own MIDI preferences than it would to make one from scratch! One final thing – Merry Christmas and happy holidays to one and all!


