This week we’ve got some cool tips for all you Ableton Live users; if you’ve been wanting to get a little deeper below the surface and find out how you can really customise Live into the rig of your dreams then you really should know how you can manipulate the Launch Properties of the clips you use, including Follow Actions.
It’s not that difficult to get your head around how to get these tricks to work for you, but it’s probably easier if I just show you. I’ve recorded a video to help bring you up to speed:
To recap:
To get more interesting behaviour out of Live, we can change clips’ launch properties. In the video I show how we can use these techniques to get two different effects.
In the first example I take four drum loops that are each two bars long and put them all in the same track, which by default makes each cut the other off, inheriting the global launch quantisation when triggered.
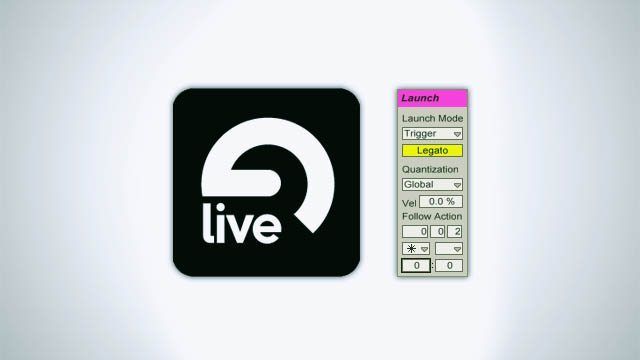
To change this I can do a couple of things, and it all starts by unlocking the Launch Properties viewer for clips, located at the bottom of the clip properties view hidden behind a small L in a circle. First off changing the clip launch mode to Legato will stop the clips launching from the beginning no matter what timing they’re triggered with, instead allowing them to pick up the timing of the previous clip. Because the clips all have the same timing (if layered on top of each other they would play together), enabling Legato for each clip will mean that when we switch between clips we’ll get an effect akin to chopping between channels with a crossfader – we can make this effect further pronounced by tightening the launch quantisation settings or even switching them off as I do in the video.
The clip switching itself can be automated with Follow Actions; upon launching the clip, something else can be set to happen a certain amount of time. There’s a bars/beats/16ths timing selector, and in the video example I decide to make Live switch between loops automatically on every 8th, so I set the last of the boxes – the 16th note selector – to 2 (2/16ths equals 1/8th). We can then select two actions that will happen this amount of time after the clip is triggered and the ratio chance of each happening; in the video I decide I want it equally likely that any of the four clips will play next so I select Any in one box, and because I always want that to happen, I leave the next action blank but set the ratio of ‘switching to any’ vs ‘staying put’ to 999:0. As long as the No Action (‘staying put’) action has zero chance of happening, it doesn’t matter what the other option is set to, of course. Now when played, there’s a 3:1 chance that the loop will switch to another loop – there’s a 1:3 chance it will stay on the same loop – so as you can see, there’s multiple ways to consider the logic of Follow Actions.
In the second example I set a one bar loop up to sequence itself in 8th notes in the clip sequencer. By duplicating the single bar into eight versions of itself (right click > Duplicate or Cmd/Ctrl+D) on the same track, we now have eight potentially different versions of the loop to trigger.
By changing the start point of each loop to stagger them an 8th further in time for each one going down, we make it so that triggering each version of the loop chops us to a different point in time. Because we’ve set the start point of the clips up manually, this time we’re going to leave Legato mode off.
In order to create a visual representation of the loop’s sequence, we’re going to set the Follow Actions of the clips to make them play the Next clip in the sequence an 8th (the amount of time, in this example, between each ‘chop’) after they’re triggered. Of course, for the final clip the sequence needs to return to the beginning, so for that clip we need to jump to the First in the track. We use the same logic as the first example for the Follow Actions: the first action is Next (or First) and the second is No Action, with odds of 1:0.
So, here are the main points:
- Launch properties work on audio and MIDI clips.
- The numbers at the bottom of the follow actions are the ratio likelihoods of them happening. If one’s zero, it doesn’t matter what you set the second to – it’ll happen 100% of the time (unless it’s also zero of course!). You could also think of this as the ‘odds’ of the action occurring.
- You can select multiple clips to save the tedious act of changing every clip individually.
- A big advantage to this is that if you have a controller with visual feedback for playing clips – like pads that light up – you’ll get a fantastic real-time step sequencer in front of your eyes.
- You can get really deep with the ratios of things happening, so experiment – but don’t get bogged down with automating everything to the point where there’s no point in you even being there!
Let us know how you get on!


