DJ TechTools
  • Blog
    • DJ Gear
      • DIY Projects
      • Gear Reviews
      • New Products
      • Controllerism
    • Techniques + Tips
      • Beginner DJ
      • Advanced DJ
      • Producer
      • Finger Drummer
    • News + Culture
      • Editorials + Opinions
      • Artist Interviews
      • Performances + Routines
      • How I Play
    • DJ Software Tutorials
      • Serato Tips
        • Traktor Tips
      • CDJ Tips
      • Ableton Live Tips
  • Store
    • Run by real DJs, not a corporation
    • DJ Controllers
      • Midi Fighter Twister
      • Midi Fighter Spectra
      • Midi Fighter 64
      • View All
    • Accessories
      • Chroma USB Drive for DJs
      • Chroma Caps
      • Chroma Cables Audio
      • Chroma Cables USB-A
      • Chroma Cables: USB-C
      • DJTT Gift Card
      • Midi Fighter T-Shirt
      • Keyboard Covers
      • Earplugs by V-Moda
    • Production Gear
    • Soundcards & Mixers
  • Community
    • Popular Forums
      • General Discussion
      • Buy & Sell
      • Reviews
      • Mixes
      • Music Production
      • Show Your Setup
      • Off Topic
    • Handy Links
      • New Posts
      • Private Messages
      • Register
      • Search
    • Midi Maps
      • Traktor
      • Ableton
      • Serato DJ
      • Midi Fighter 3D
      • Midi Fighter Twister
      • Midi Fighter Spectra
  • Midi Fighter
  • Chroma
No Result
View All Result
DJ TechTools

Turn A Song Into A Live Remix Performance In Ableton + Maschine

Mad Zach by Mad Zach
September 28, 2015
in Ableton Live Tips, Controllerism, How-To Video Tutorials, Maschine, Production Tips
Reading Time: 4 mins read
0
Turn A Song Into A Live Remix Performance In Ableton + Maschine
150
VIEWS
Post on FacebookTweet thisUpvote on Reddit

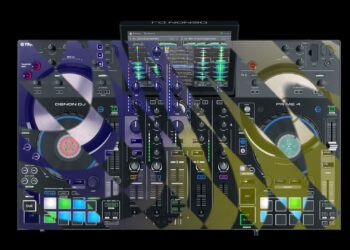
At the crossroads of DJing and production lies the evolving role of the live producer/performer. Not truly a DJ, but more than a producer, it begs the question – what does “playing live” mean in this day and age? It’s a personal decision – some will choose to DJ – itself an honorable and life-long quest –  while others will seek more performative live experiences. In today’s tutorial, Mad Zach shares one strategy for taking a finished song and using parts of it to create a performable kit in Ableton and Maschine.

Building A Live Remix From Stems

The goal of this approach is to use core elements from the song to create a kit to be played live. We’re not going to stress too much about trying to make it sound exactly like the produced song (that’s what the song is for). Instead, we’ll be inspecting the song for juicy sound design, snippets, instruments and drums. The main objective: make something which is fun to play and sounds cool. Think of it more as a live remix and you may unlock a whole new dimension to the song you’ve created once you put it to your fingers.

The song I work with in the video is one I’ve just finished for a Soundhunters remix contest curated by Jean Michel Jarre. If you enjoy the music in the video, grab the free download on Soundcloud:

You might also like to participate in the contest and get some free samples – the details are here on Soundhunters.

Step 1: Group/Bus Tracks By Type

The key to capturing a song’s “essence” into playable one shots for your live remix is resampling. This is the process of recording the output of your master bus into one audio file. It’s like exporting a bounce, but all within your DAW, and with quick control over what layers get included.

Resampling is so important because it can be paired with grouping and solo-ing to create samples which contain complex, dimensional bits from the song. There are several ways to resample layers from a song – I prefer to create a system of track groups, and use a spare audio track for resampling. To do this, sort all of your tracks into groups based on type of sound. For example, drums, bass, atmospheres, FX. Once grouped, you can easily solo the groups one at a time and record them – isolated – onto your resampling audio track.

Step 2: Setup Resampling Track

Screen Shot 2015-09-27 at Sep 27.08.48 PM

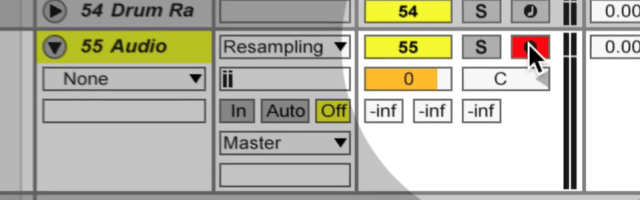
In order to start resampling, we have to first create a new audio track, select “resampling” for the input, and arm it. This will make it so that whatever layers we solo will be recorded onto the resampling track.

Step 3: Record The Cool Bits

As soon as the routing is set up in the DAW, you can start recording. I like to work with a mental checklist of types of sounds to record. Core drum sounds are a great place to start, as they allow me to try ideas in the context of a beat. I recommend experimenting with resampling your entire drum bus, FX included. To record a bus, just solo that group, arm your resampling track, pick a start point where you want the audio to capture, and hit record. If you want to normalize the samples before bringing them into the kit, you can “consolidate” them by hitting command-J before dragging them to a cell/pad.

When you’ve got some drums, its good to move quickly on to find something which you can “latch” onto in a more melodic or directional capacity. For this the atmosphere bus can be good, as I typically include the hook in this bus.

Step 4: Load Resampled Bits Into A Kit

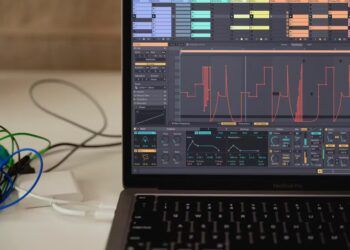
In the video, I use Maschine to build the kit, but it is just as easy to work with Ableton’s drum rack. The process is really straight forward. Just click and drag your resampled bits onto the pads and play with them to find the right placement. Adjust your start and end points to taste.

In order to play the cells, a MIDI controller is required, but you could work with as many or few cells as you like. With fewer pads, you may want to consider resampling even more layers together. For more information on finger drumming and some tips for where to put which types of sounds, check out this video I made a few years ago – or check out a full tutorial here:

Don’t feel like you have to hit every one shot, you can also use this technique to work with loops or a sequencer!

Some parameters you might want to explore when loading your resampled song bits onto the pads:

  • volume envelope
  • filter cutoff
  • FX: delay, reverb
  • side-chain compression
  • choke groups

Step 5: Play (and save) Your Kit!

Now that you’ve got all your sounds recorded and loaded, it’s up to you to start tickling those pads and making the magic happen. But if you’re only just starting to finger drum, don’t worry, simply design the kit to be easy to play. Try working with loops that you can retrigger and hold down, and more layers combined when you create your one shots. And if you’re not keen to finger drum, you can just as easily use the sequencer, set up some good macros, and take more of a techno approach.

By turning your track into a kit, you can use it live, or even recycle choice bits from it for later use. All in all this is a great technique for producers who want to try playing their songs like an instrument. It’s always surprising what comes out, often times you’ll find a whole new perspective on a song you thought was set in stone.

Download Mad Zach’s Maschine kit from this project here on Blend.io. Do you have a cool strategy for performing original material live? Tell us in the comments!

Tags: Abletonlive remixmad zachmaschineperformance
Share1Tweet1Share
Previous Post

What Will The Next Pioneer CDJ Look Like?

Next Post

Traktor 2.10 Out Now: Kontrol S5 Support, Dual Aux Inputs

Related Posts

A Prime 4+ and a Kontrol S3 intercut against eachother over a black background
Breaking News

InMusic just bought Native Instruments. So what now for Traktor?

May 8, 2026
Ableton launches Live 12 Suite rent-to-own plan – and it’s not a subscription
Ableton

Ableton launches Live 12 Suite rent-to-own plan – and it’s not a subscription

October 1, 2025
Control an entire studio with Midi Fighter Spectra (like Mad Zach)
Finger Drumming

Control an entire studio with Midi Fighter Spectra (like Mad Zach)

May 9, 2025
Load More
Next Post
Traktor 2.10 is out now

Traktor 2.10 Out Now: Kontrol S5 Support, Dual Aux Inputs

Want to reach DJTT's audience here?

Shoot an email to advertising@djtechtools.com

DJTT ads
DJTT newsletter
Midi Fighter
Chat with us
  • ABOUT DJTT
  • CONTACT
  • PRIVACY
  • MIDI FIGHTER HELP
  • ABOUT DJTT
  • JOBS
  • CONTACT US
  • ADVERTISE
  • PRIVACY POLICY
  • ACCESSIBILITY STATEMENT

© 2024 DJ Techtools all rights reserved by DJ TechTools on all content unless otherwise noted.

No Result
View All Result
  • Blog
    • DJ Gear
      • DIY Projects
      • Gear Reviews
      • New Products
      • Controllerism
    • Techniques + Tips
      • Beginner DJ
      • Advanced DJ
      • Producer
      • Finger Drummer
    • News + Culture
      • Editorials + Opinions
      • Artist Interviews
      • Performances + Routines
      • How I Play
    • DJ Software Tutorials
      • Serato Tips
      • CDJ Tips
      • Ableton Live Tips
  • Store
    • Run by real DJs, not a corporation
    • DJ Controllers
      • Midi Fighter Twister
      • Midi Fighter Spectra
      • Midi Fighter 64
      • View All
    • Accessories
      • Chroma USB Drive for DJs
      • Chroma Caps
      • Chroma Cables Audio
      • Chroma Cables USB-A
      • Chroma Cables: USB-C
      • DJTT Gift Card
      • Midi Fighter T-Shirt
      • Keyboard Covers
      • Earplugs by V-Moda
    • Production Gear
    • Soundcards & Mixers
  • Community
    • Popular Forums
      • General Discussion
      • Buy & Sell
      • Reviews
      • Mixes
      • Music Production
      • Show Your Setup
      • Off Topic
    • Handy Links
      • New Posts
      • Private Messages
      • Register
      • Search
    • Midi Maps
      • Traktor
      • Ableton
      • Serato DJ
      • Midi Fighter 3D
      • Midi Fighter Twister
      • Midi Fighter Spectra
  • Midi Fighter
  • Chroma

© 2024 DJ Techtools all rights reserved by DJ TechTools on all content unless otherwise noted.

This website uses cookies. By continuing to use this website you are giving consent to cookies being used. Visit our Privacy and Cookie Policy.