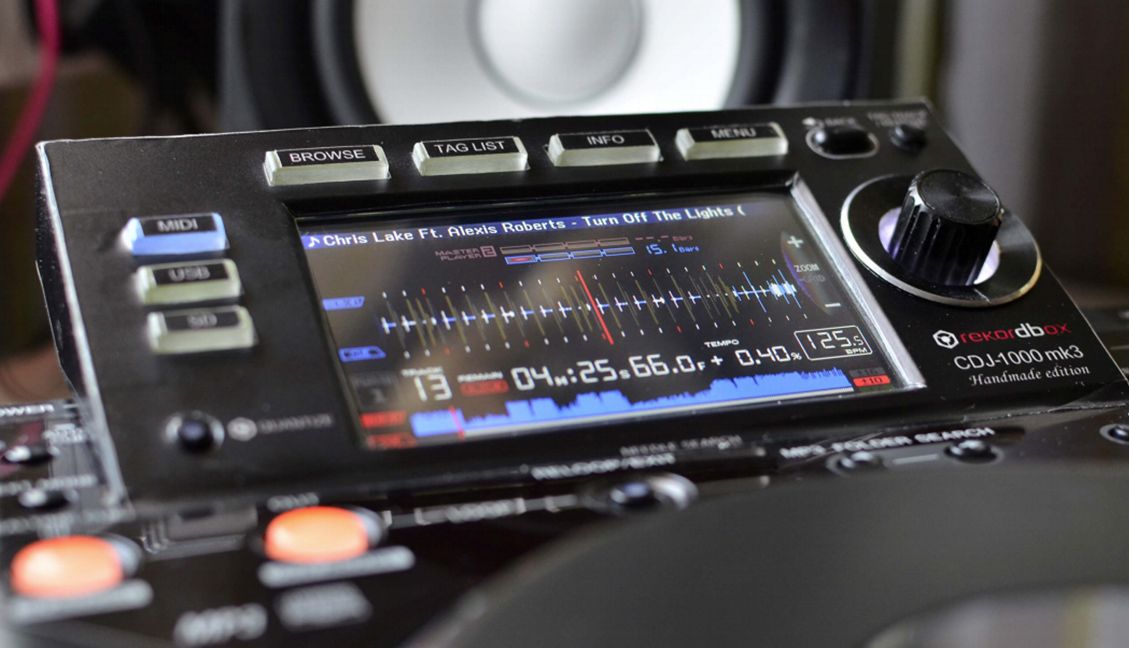
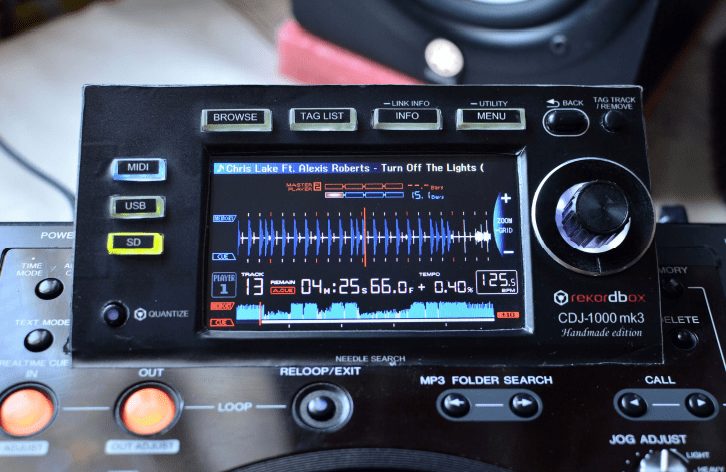
Tired of the excessive electronic waste that comes with DJ gear lust? Consider instead the idea of breathing new life into old pieces of digital DJ gear, giving them modern features and functionality. Today’s project by Andrei Anatska is one we first previewed last summer: taking a CDJ-1000MK3 and replacing the display and some of the boards inside to create NXS-style display and control – all for less than $100 a unit. Keep reading to learn more about this project and get the instructions!
CDJ-1000MK3 Handmade Edition
First, watch a demo of the finished mod:
This project has been in the making for a while. We first shared Andrei’s original concept for the mod last year on DJTT, which takes an old Pioneer DJ CDJ-1000mk3 and gives it a very modern upgrade that would feel familiar to almost any current digital DJ. The concept resonated with so many that he kept working on the project and at the end of April he released the firmware as well as an instruction manual for fellow DIYers to do it themselves.
We’ll talk more about the DIY process below, but if you want to just jump right in here’s the relevant links:
Features Of The Upgrade
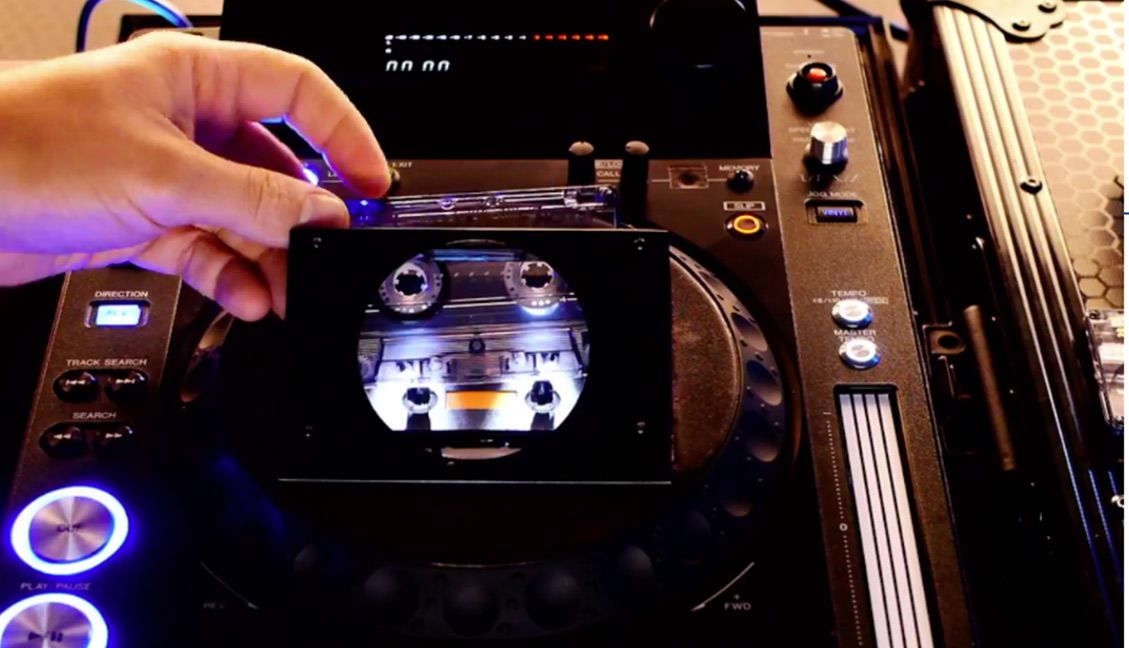
As a reminder – here’s what the user interface and screen of the CDJ-1000mk3 looked like when it was first introduced back in 2006:
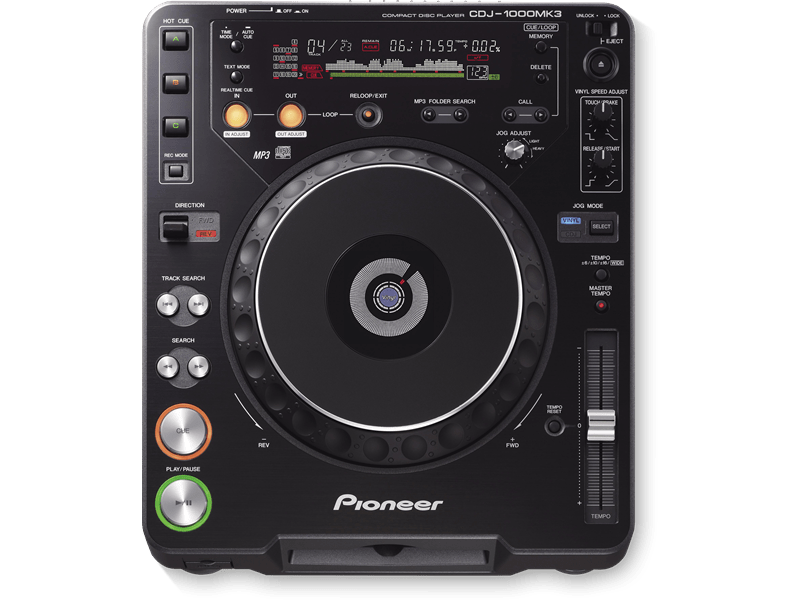
If anything, it feels like it should be called the CDJ-1000mk4 after this extensive modification.The upgrade is significant, bringing the following features and controls, effectively recreating the NXS CDJ experience:
- Playlist browsing and sorting
- Tag List to hold crates
- Detailed waveforms – both a static overview and a zoomable, scrolling waveform
- Beatgrids + phase meters
- WAV file support (right now, those are the only type of files supported – no MP3)
- Slip Mode (activated using the Master Tempo button)
- Touchscreen strip search to move around in the track
The work to do a custom firmware for a device like this is no small matter – you can follow along the many changes Andrei has implemented along the way on the Github project’s changelog.
A few things are not implemented in the basic mod now that are pointed out in the manual:
- Media: Micro SD Cards only supported right now, plans in place to add USB flash drive support
- Rekordbox support: Much of reading from a Rekordbox database is working, but right now all playlists on a Rekordbox drive get merged into one – more work planned on this
- No supported MIDI in/out or Pro DJ Link (linking together two devices to share audio library)
- Master Tempo: The board used has a weaker microcontroller than used on CDJ-2000s, so it can’t do certain realtime algorithms – and master tempo (key lock) is one of them.
The DIY Process
To do this process yourself, you’ll need about $100 in parts (all listed in the manual), the biggest expense of which is a touchscreen ST microcontroller board which runs $54.
If you want to buy a used but functional CDJ-1000mk3 to start this project from, recent prices on eBay seem to indicate you could get one for about $250 – or a pair of them for as low as $400.

To actually take on the process of modding a CDJ-1000mk3 in this project, you’ll want to have at least some experience with electronics and soldering. It’s not a super complicated process – but that’s only because Andrei has done an amazing job of documenting it in his guide.
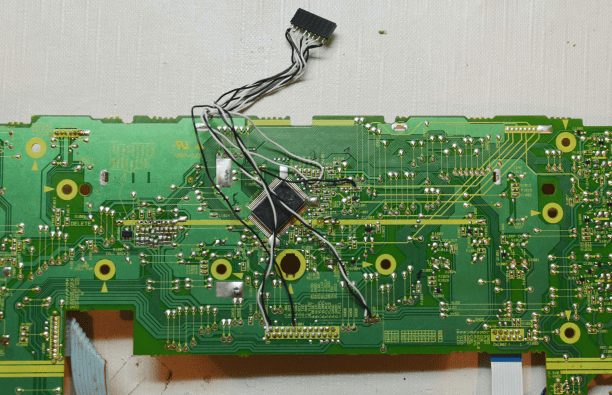
The final step in the process is probably the most challenging: making a PCB and case for the new display. You can have the PCB made using an online service or make it at home, but this might be the biggest obstacle for someone who is more novice in electronics. That said, Andrei has included files for manufacturing the PCB – so it shouldn’t be too difficult.
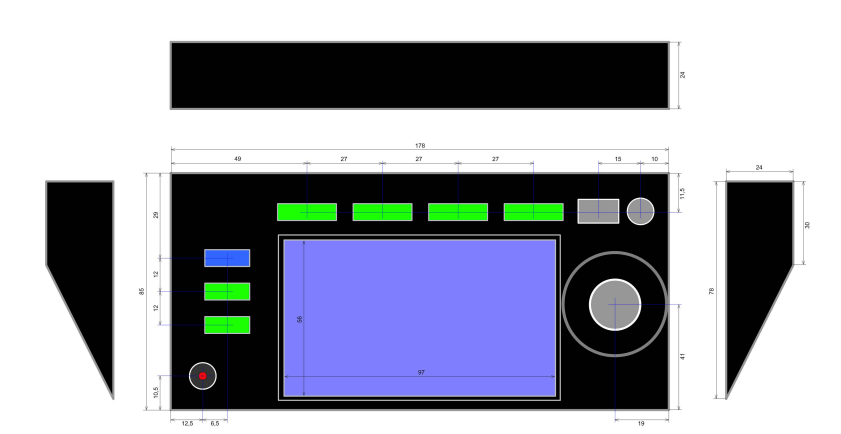
He’s also included specifications for the size and design of the display board’s case – which is cut out of black plastic. That’s where the “Handmade Edition” name comes from, right?
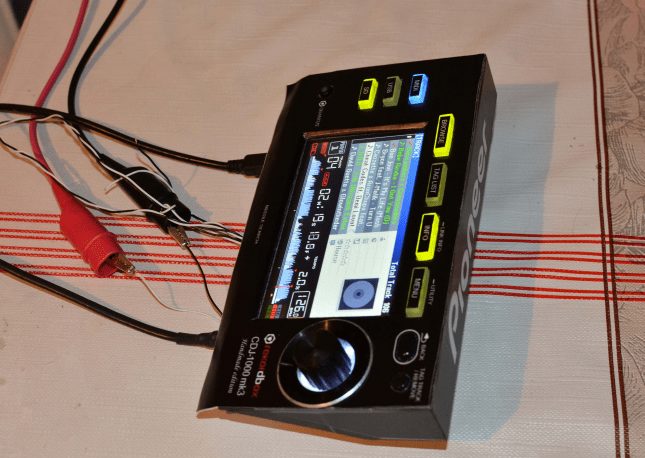
Need help, have questions or ideas? Share them in the comments below – we’ll ask Andrei to keep an eye on the comments section and reply 🙂


