Hard Disk Drive vs. Solid State Drive

What is the difference between and HDD and a Solid State Drive? Why are SSDs so much faster?
You’re probably familiar with USB memory sticks – SSDs can be thought of as an oversized and more sophisticated version of the humble USB memory stick. Like a memory stick, there are no moving parts to an SSD. Rather, information is stored in microchips. Conversely, a hard disk drive uses a mechanical arm with a read/write head to move around and read information from the right location on a storage platter. This difference is what makes SSD so much faster. As an analogy, what’s quicker? Having to walk across the room to retrieve a book to get information or simply magically having that book open in front of you when you need it? That’s how an HDD compares to an SSD; it simply requires more physical labor (mechanical movement) to get information. (Source: Storage Review)
An SSD can have a dramatic impact on the overall performance of your Mac. With an SSD you’ll experience faster boot up, faster app start up (no more bouncing icons), and overall smoother performance when running multiple apps. There are additional advantages to SSDs that goes beyond just speed:
- Durability – Non mechanical design means less risk of damage from shock
- Energy Efficient – 2W vs. 6W for an HDD, this can result in a small increase in battery life
- Cool and Quiet – No moving parts generate far less heat and near silent operation
Which Mac Is This For?

Before going any further it’s important to clarify what MacBook and MacBook Pro models this tutorial applies to. This tutorial applies to 2008 – 2012 MacBook/MacBook Pro models that are using a hard disk drive. These instructions do not apply to the MacBook Air or MacBook Pro with Retina Displays. These models by default ship with an SSD, which can be upgraded for more storage but DJs with these models are already benefitting from the performance benefits of an SSD. This tutorial definitely doesn’t apply to the new MacBook that’s not very DJ friendly.
What SSD Should I Buy?
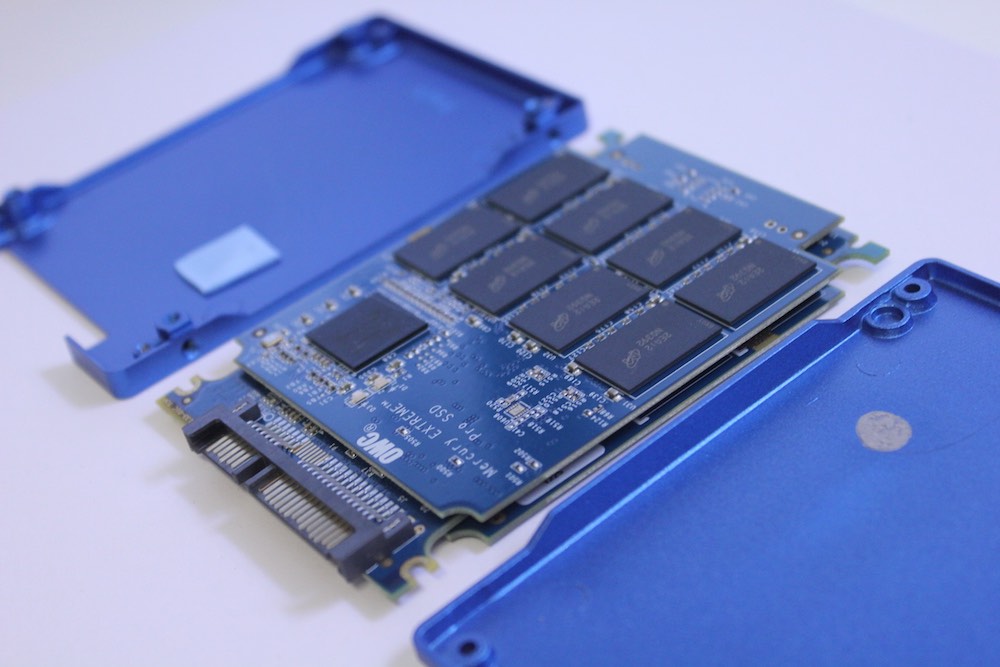
There are several SSDs available from manufacturers like Samsung, OCZ, Kingston, and OWC. I personally use a Samsung 850 EVO 250GB with my iMac and an OWC Electra 6G for my MacBook Pro. I highly recommend ordering from OWC because they offer bundles that include everything you need to do the hard drive swap: precision tools for opening your MacBook, an external drive enclosure, and the SSD itself. They also have detailed installation video’s for most Macs that make the process really easy to follow. Here are the 3 bundles for different drive sizes:
- OWC Mercury Electra 6G 240GB SSD + Tools + Drive Enclosure ($138)
- OWC Mercury Electra 6G 480GB SSD + Tools + Drive Enclosure ($239)
- OWC Mercury Electra 6G 1TB SSD + Tools + Drive Enclosure ($475)
- Data Doubler ($29)
Once you’ve purchased an SSD, it’s time to create a clone of your current hard drive. By cloning the hard drive it’s making a bootable duplicate of your existing drive. This makes the drive “plug and play” once it’s installed in the laptop with the same file structure, the same drive name, same apps and OS. This is the fastest way to get up and running with the new SSD. When making a clone, you’ll need an SSD that matches the size of your existing drive. 250 GB? You need a 250 GB HD. 500 GB? You guessed it.
If you don’t have the cash for a large SSD, another option is to move large files/folders, such as your iTunes collection, to an external drive. Then reuse your existing internal drive as an second internal storage drive with the OWC Data Doubler to store your movies/music/large collections etc. Note this requires removing the optical/disk drive of your MacBook Pro. You can also keep the old internal drive as a bootable backup for digital insurance.
Although you may be tempted to go with an even smaller drive for more cost savings I wouldn’t recommend buying an SSD with less than 250GB storage. This can result in needing to constantly delete or move files around to create space on a smaller SSD.
Formatting And Cloning Your Drive
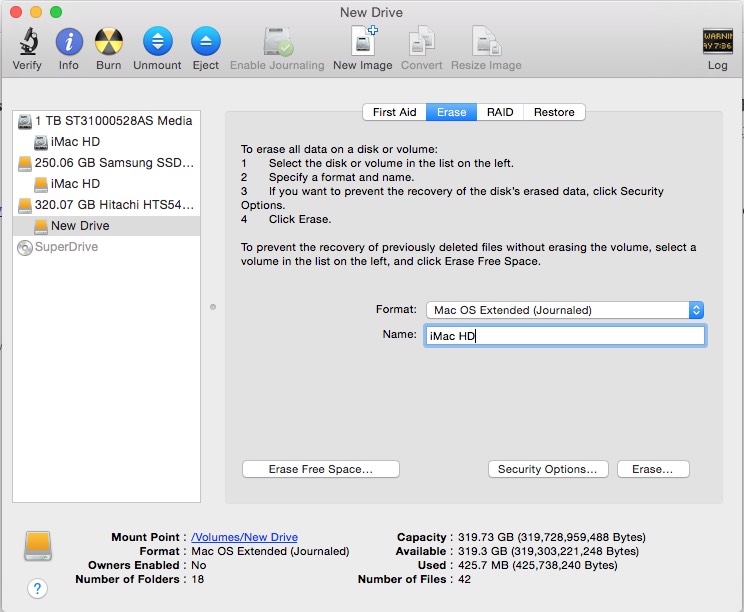
Before cloning the drive, we’ll need to format the new drive using Disk Utility (Applications —> Utilities —> Disk Utility). Highlight the new drive in the sidebar, they’re usually labelled by the brand and model (i.e. OWC Electra 6G). Then click the “Erase” tab, for format choose “Mac OS Extended (Journaled)”, and for the name match it to your existing drive so your file paths will be the same on the new drive. Click “Erase” and it will format and rename the drive. Now you’re ready to clone the drive.
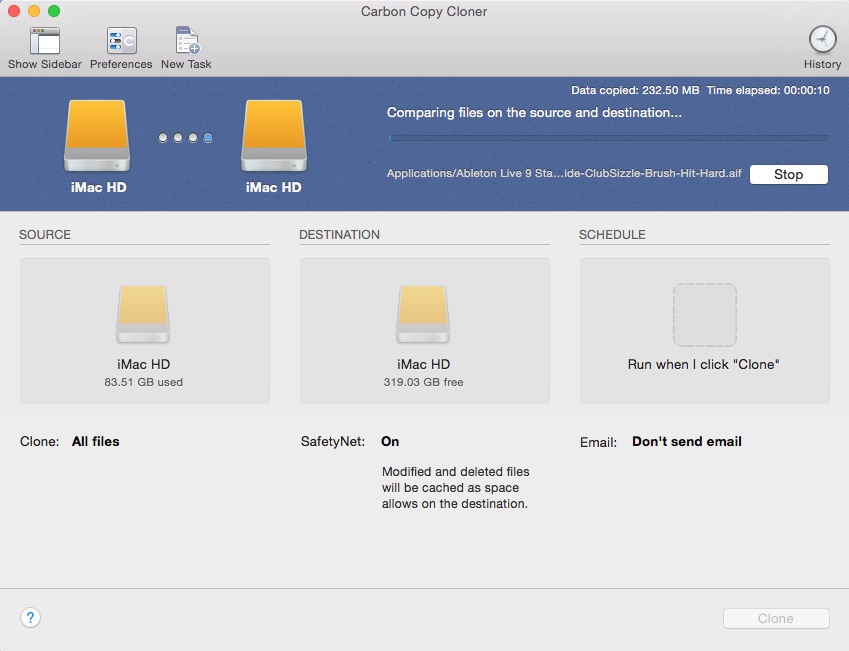
The app that we’ll be using to create the clone is called “Carbon Copy Cloner” (click here to download). The free 30 day trial allows you to create a full bootable backup so this is all you need to get started, no need to purchase the full license. The app is super easy to use:
- Connect your external enclosure with the SSD
- Open Carbon Copy Cloner
- Choose a source (your internal hard drive)
- Choose a destination (your SSD in the external enclosure)
- Click Clone!
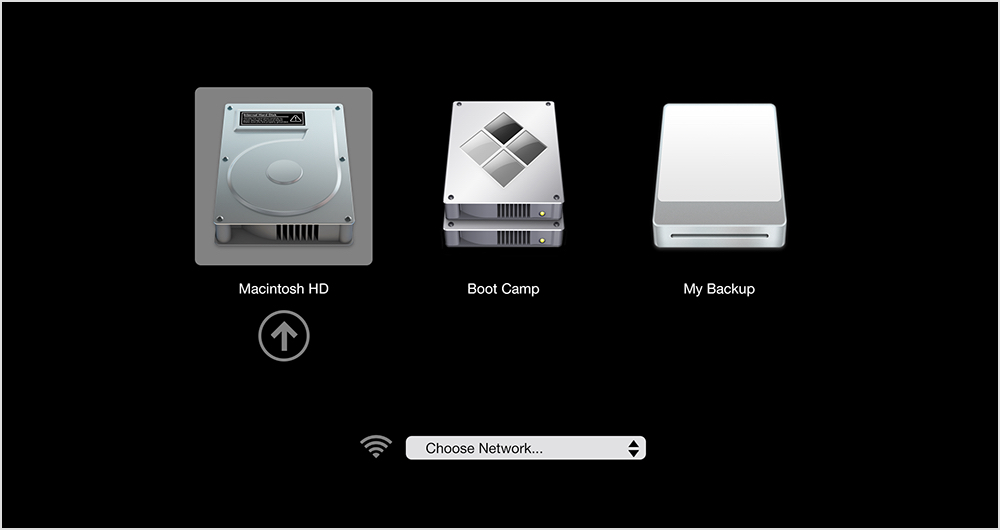
After the cloning process is complete, it’s time to test the drive to ensure that everything is working properly. You can do this without installing the SSD. Shut down your Mac and start it up again. After pressing the power up button, hold down the “option/alt” button on your keyboard. After a few seconds the startup manager will display the volumes (drives) that you can boot into. Choose your new drive (the drive icon should be yellow with a USB logo). Your Mac will startup using the new drive and since it’s a clone everything should appear exactly as it did on your old drive.
Installing the SSD In Your Mac
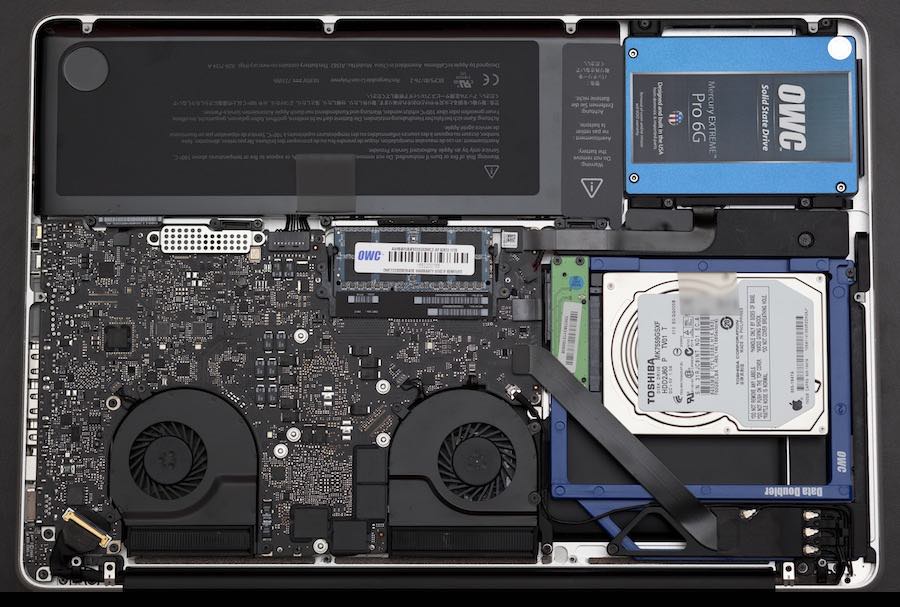
Once you’ve verified that the clone is working properly it’s time to install it into your Mac. Don’t worry, the process is actually pretty easy, even if you don’t consider yourself a “tech person”. OWC has detailed installation video’s for the MacBook/MacBook Pro that cover installing a new hard drive, replacing a battery, and installing their Data Doubler. Lots of Macs look alike so you’ll want to use the Mac’s Model ID to find the right installation video.
Here is an example of the hard drive replacement/installation process on the 2011/2012 MacBook Pro:
Bonus: Super Speed and Storage With A Data Doubler
If you’re going through the process of installing a new hard drive why not go all out and maximize the speed and storage of your Mac? Again the cost is relatively cheap compared to the price of a new MacBook Pro. This requires removing the optical/disk drive of your Mac, but with the availability of Netflix it’ll be hard to miss.
Super Speed and Super Storage
- OWC Mercury Electra 6G 480GB SSD + Tools + Drive Enclosure ($239)
- Seagate 2.0TB Momentus 5400RPM HDD ($117)
- Data Doubler ($29)
- Total Storage = 2.48TB
- Total = $385
Super Speed and Max Storage
- OWC Mercury Electra 6G 1TB SSD + Tools + Drive Enclosure ($475)
- Seagate 2.0TB Momentus 5400RPM HDD ($117)
- Data Doubler ($29)
- Total Storage = 3TB
- Total = $621
The cool thing about this upgrade is that it’s unique to older MacBook/Pro models. In newer MacBook Air and MacBook Pro Retina Displays there’s no optical drive and simply not enough space for a second drive, so the maximum storage you can get is 1TB. So if you’ve got an older MacBook Pro take advantage of that extra space!
Are you running an SSD? What make/model?
Let us know in the comments below!